


 本文展示了如何使用 Netty 框架创建一个简单的服务端和客户端。服务端通过 ChannelInboundHandlerAdapter 处理接收到的客户端消息并回显,而客户端则发送一条消息并等待响应。服务端启动后监听指定端口,客户端连接到该端口进行通信。
一、简单的服务端与客户端
- 服务端
package com.zhu.netty.server;

import io.netty.buffer.ByteBuf;
import io.netty.buffer.Unpooled;
import io.netty.channel.ChannelFutureListener;
import io.netty.channel.ChannelHandlerContext;
import io.netty.channel.ChannelInboundHandlerAdapter;
import io.netty.util.CharsetUtil;

/**
 * @author gglove
 * @date 2022/6/13 21:07
 * @description:服务端处理器
 * @since 1.8
 */
public class EchoServerHandler extends ChannelInboundHandlerAdapter {
    @Override
    public void channelRead(ChannelHandlerContext ctx, Object msg) throws Exception {
        ByteBuf in = (ByteBuf) msg;
        System.out.println("Server received client msg: " + in.toString(CharsetUtil.UTF_8));
        ctx.write(in);
    }

    @Override
    public void channelReadComplete(ChannelHandlerContext ctx) throws Exception {
        ctx.writeAndFlush(Unpooled.EMPTY_BUFFER).addListener(ChannelFutureListener.CLOSE);
    }

    @Override
    public void exceptionCaught(ChannelHandlerContext ctx, Throwable cause) throws Exception {
        cause.printStackTrace();
        ctx.close();
    }
}

package com.zhu.netty.server;

import io.netty.bootstrap.ServerBootstrap;
import io.netty.channel.ChannelFuture;
import io.netty.channel.ChannelInitializer;
import io.netty.channel.EventLoopGroup;
import io.netty.channel.nio.NioEventLoopGroup;
import io.netty.channel.socket.SocketChannel;
import io.netty.channel.socket.nio.NioServerSocketChannel;

import java.net.InetSocketAddress;

/**
 * @author gglove
 * @date 2022/6/14 20:24
 * @description: 服务端引导类
 * @since 1.8
 */
public class EchoServer {
    private int port;

    public EchoServer(int port) {
        this.port = port;
    }

    public static void main(String[] args) throws Exception {
        int port = 8099;
        new EchoServer(port).start();
    }

    public void start() throws Exception{
        final EchoServerHandler serverHandler = new EchoServerHandler();
        EventLoopGroup group = new NioEventLoopGroup(); //线程池
        try{
            ServerBootstrap b = new ServerBootstrap();
            b.group(group)
                    .channel(NioServerSocketChannel.class) //选择管道
                    .localAddress(new InetSocketAddress(port)) //绑定端口
                    .childHandler(new ChannelInitializer<SocketChannel>() { //添加处理器
                        @Override
                        protected void initChannel(SocketChannel ch) throws Exception {
                            ch.pipeline().addLast(serverHandler);
                        }
                    });
            ChannelFuture f = b.bind().sync();
            f.channel().closeFuture().sync();
        }finally {
            group.shutdownGracefully().sync();
        }

    }
}
- 客户端
package com.zhu.netty.client;

import io.netty.buffer.ByteBuf;
import io.netty.buffer.Unpooled;
import io.netty.channel.ChannelHandler;
import io.netty.channel.ChannelHandlerContext;
import io.netty.channel.SimpleChannelInboundHandler;
import io.netty.util.CharsetUtil;

/**
 * @author gglove
 * @date 2022/6/14 20:34
 * @description:客户端处理器
 * @since 1.8
 */
@ChannelHandler.Sharable
public class EchoClientHandler extends SimpleChannelInboundHandler<ByteBuf> {
    @Override
    public void channelActive(ChannelHandlerContext ctx) throws Exception {
        ctx.writeAndFlush(Unpooled.copiedBuffer("I am client!", CharsetUtil.UTF_8));
    }

    @Override
    protected void channelRead0(ChannelHandlerContext channelHandlerContext, ByteBuf in) throws Exception {
        System.out.println("Client received :"  + in.toString(CharsetUtil.UTF_8));
    }

    @Override
    public void exceptionCaught(ChannelHandlerContext ctx, Throwable cause) throws Exception {
        cause.printStackTrace();
        ctx.close();
    }
}
package com.zhu.netty.client;

import io.netty.bootstrap.Bootstrap;
import io.netty.channel.ChannelFuture;
import io.netty.channel.ChannelInitializer;
import io.netty.channel.EventLoopGroup;
import io.netty.channel.nio.NioEventLoopGroup;
import io.netty.channel.socket.SocketChannel;
import io.netty.channel.socket.nio.NioSocketChannel;

import java.net.InetSocketAddress;

/**
 * @author gglove
 * @date 2022/6/14 20:39
 * @description:客户端引导
 * @since 1.8
 */
public class EchoClient {
    private String host;

    private int port;

    public EchoClient(String host, int port) {
        this.host = host;
        this.port = port;
    }

    public void start() throws Exception{
        EventLoopGroup group = new NioEventLoopGroup();
        try{
            Bootstrap b = new Bootstrap();
            b.group(group)
           .channel(NioSocketChannel.class).remoteAddress(new InetSocketAddress(host, port)).handler(new ChannelInitializer<SocketChannel>() {
                @Override
                protected void initChannel(SocketChannel socketChannel) throws Exception {
                    socketChannel.pipeline().addLast(new EchoClientHandler());
                }
            });
            ChannelFuture sync = b.connect().sync();
            sync.channel().closeFuture().sync();
        }finally {
            group.shutdownGracefully().sync();
        }
    }

    public static void main(String[] args) throws Exception {
        String host = "127.0.0.1";
        Integer port = 8099;
        new EchoClient(host, port).start();
    }
}
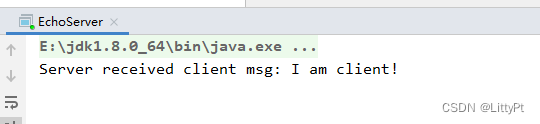
二、执行效果
服务端
客户端


 460
460

 被折叠的 条评论
为什么被折叠?
被折叠的 条评论
为什么被折叠?
 到【灌水乐园】发言


