


 本文介绍了一个基于前端Vue3和后端SpringBoot实现的短信登录功能。前端负责展示用户界面并处理用户交互,包括发送验证码及登录操作;后端则通过Redis进行验证码的存储与验证,并利用阿里云SDK实现短信发送。
目录

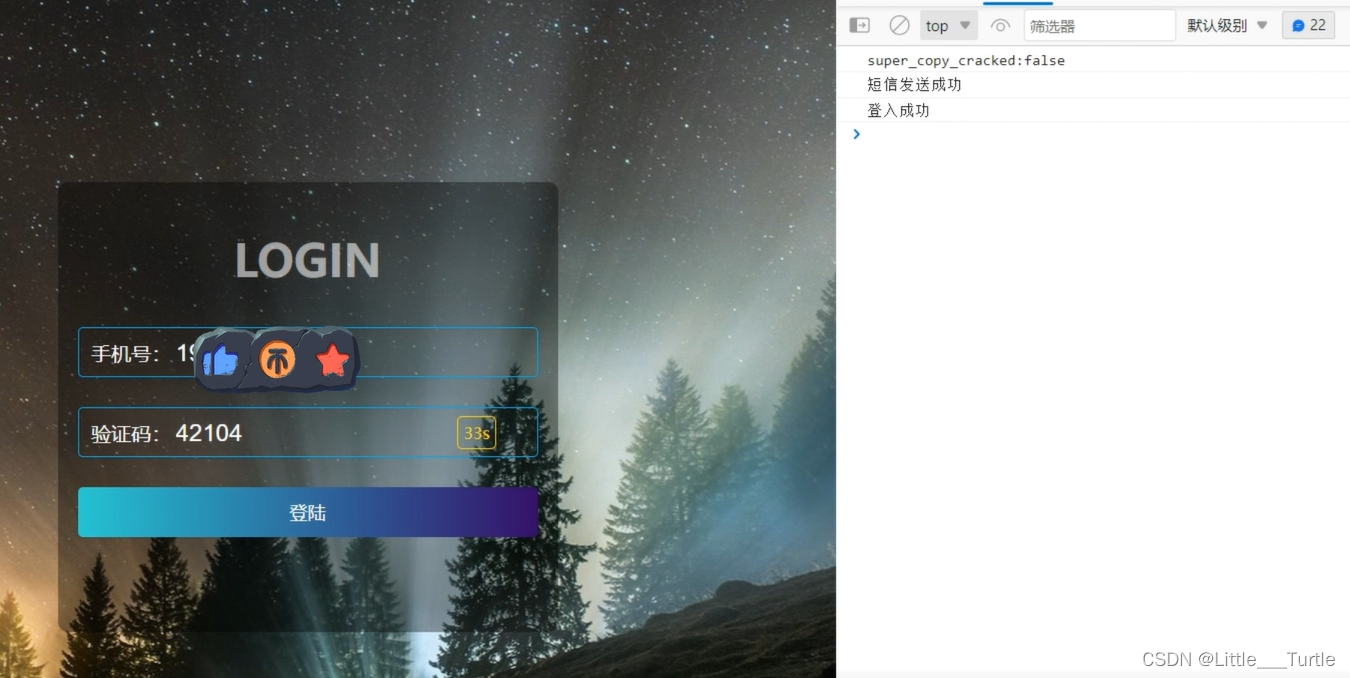
🚒登入功能展示🚒


🛺项目代码介绍🛺
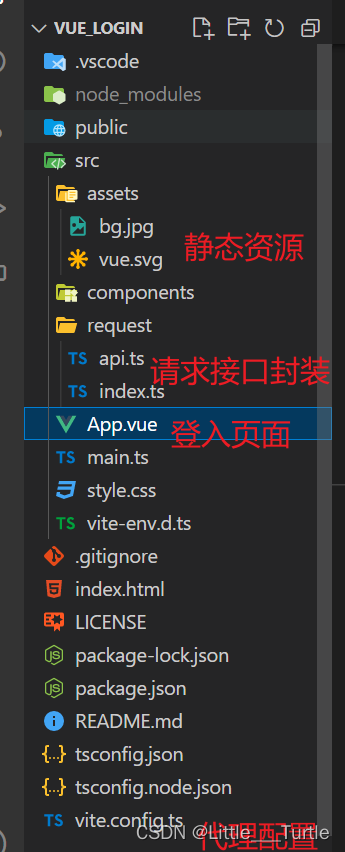
🚗前端目录🚗
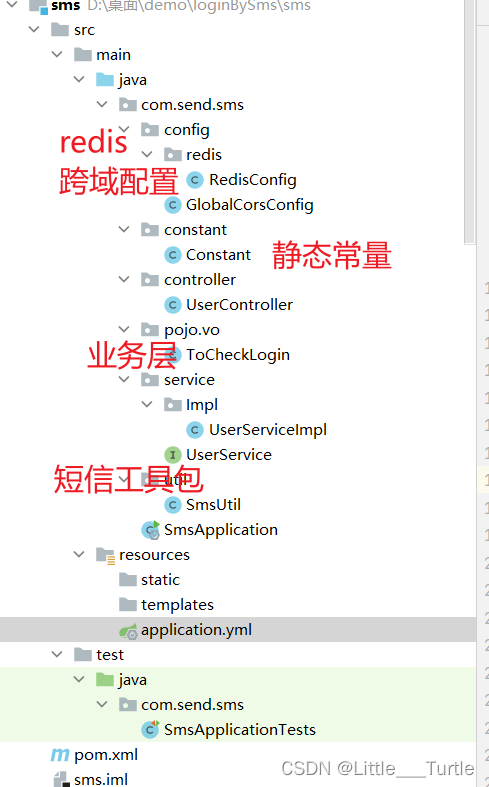
🚓后端目录🚓
🚔部分核心代码演示🚔
🚘前端:登入页面🚘
<script setup lang="ts">
import { reactive } from 'vue';
import { toSendMessage ,toCheckLogin} from './request/api';

//数据定义
const data=reactive({
  //提示框信息
  content:"发送验证码",
  //倒计时秒数
  totalTime:60,
  //输入电话号码
  phoneNumber:"",
  //输入验证码
  code:"",
})
//请求发送验证码
const toCountdown=()=>{
  //发送验证码接口
  toSendMessage(data.phoneNumber).then((res)=>{
    console.log(res.data);
  })
  //点击倒计时
  let clock =  window.setInterval(() => {
                data.content = data.totalTime + 's';
                data.totalTime --;
                if( data.totalTime < 0){
                    data.totalTime = 60;
                    data.content = "发送验证码";
                    window.clearInterval(clock);
                }
            }, 1000);
}
//用户登入
const toLogin=()=>{
  toCheckLogin(data.phoneNumber,data.code).then(res=>{
    console.log(res.data);
  })
}
</script>

<template>
  <div class="login-bg">
    <div class="content">
      <div class="title">
        <h2>LOGIN</h2>
      </div>
      <div class="form-box">
        <div class="login-center">
          <span class="t-name">手机号:</span
          ><input
            type="text"
            name=""
            id="tel_num"
            class="inp phone-inp"
            placeholder="请输入您的手机号"
            v-model="data.phoneNumber"
          />
        </div>
        <div class="login-center">
          <span class="t-name">验证码:</span
          ><input
            type="text"
            name=""
            id="code_num"
            class="inp code-inp"
            v-model="data.code"
            placeholder="请输入您的验证码"
          />
          <div class="get-code ">
            <!-- code-stop 点击事件的禁止 只有totalTime等于60才可点击 -->
            <span class="code-btn" :class="{ 'code-stop' : data.totalTime!=60}" @click="toCountdown">{{data.content}}</span>
          </div>
        </div>
        <div class="login-button" @click="toLogin">登陆</div>
      </div>
    </div>
  </div>
</template>

<style lang="scss" scoped>
.content {
  position: absolute;
  width: 500px;
  height: 450px;
  background-color: #00000060;
  border-radius: 10px;
  top: 50%;
  left: 50%;
  margin-left: -240px;
  margin-top: -240px;
  padding: 10px 20px;
  box-sizing: border-box;
  text-align: center;
}
.title h2 {
  font-size: 45px;
  line-height: 60px;
  color: #ffffff90;
  font-weight: bold;
  text-align: center;
}
.login-center {
  height: 50px;
  border-radius: 5px;
  border: 1px solid #00aced;
  margin-bottom: 30px;
  line-height: 50px;
  padding: 0 10px;
  box-sizing: border-box;
  color: #fff;
  input {
    color: #fff;
  }
}
.login-center .t-name {
  font-size: 20px;
  float: left;
  height: 100%;
  width: 85px;
}
.login-center .inp {
  font-size: 24px;
  float: left;
  border: none;
  background: transparent;
  height: 100%;
  outline: none;
}
.login-center .inp.code-inp {
  width: 220px;
}
.login-center .get-code {
  float: right;
  width: 100px;
  height: 100%;
}
.login-center .get-code .code-btn {
  color: gold;
  font-size: 16px;
  width: 100%;
  border: 1px solid gold;
  border-radius: 5px;
  padding: 5px;
  box-sizing: border-box;
  cursor: pointer;
}
.code-stop{
  //禁止点击
   pointer-events: none;
}
.login-button {
  background-image: linear-gradient(to right, #30cfd0, #330867);
  height: 50px;
  border-radius: 5px;
  font-size: 18px;
  color: #fff;
  text-align: center;
  line-height: 50px;
  cursor: pointer;
}
</style>
🚖后端 🚖
/**
 * @Description 用户接口实现
 * @Author 小乌龟
 * @Date 2022/9/14 9:50
 */
@Service
public class UserServiceImpl implements UserService {
    @Resource
    private RedisTemplate<String,String> redisTemplate;

    @Override
    public String toSendMessage(String phoneNumber) {
        //扩展 可以验证该电话号码是否注册
        //1.判定验证码是否过期
        String code = redisTemplate.opsForValue().get(phoneNumber);
        if (!StringUtils.isEmpty(code)){
            return phoneNumber+":"+"验证码未过期";
        }
        //2.已过期/无验证码 生成验证码
        //随机生成字符串 做验证码
        int toCode = (int) (Math.random() * (50000 - 40000) + 40000);
        code=Integer.toString(toCode);
        String toSendMes = SmsUtil.toSendMes(phoneNumber, code);
        if (Constant.OK.equals(toSendMes)){
            //redis 中存放 5分钟过期
            redisTemplate.opsForValue().set(phoneNumber,code,Constant.NUM_FIVE, TimeUnit.MINUTES);
            //3.发送短信
            return "短信发送成功";
        }
      return "短信发送异常";
    }

    @Override
    public String checkLogin(String phoneNumber, String code) {
        //1.redis 验证码校验
        String redisCode = redisTemplate.opsForValue().get(phoneNumber);
        if (code.equals(redisCode)){
            return "登入成功";
        }
        return "登入失败";
    }
}
🏀项目jar包🏀
<dependencies>
        <dependency>
            <groupId>org.springframework.boot</groupId>
            <artifactId>spring-boot-starter-web</artifactId>
        </dependency>
        <!--        阿里短信包-->
        <dependency>
            <groupId>com.aliyun</groupId>
            <artifactId>aliyun-java-sdk-core</artifactId>
            <version>4.6.0</version>
        </dependency>
        <dependency>
            <groupId>com.aliyun</groupId>
            <artifactId>aliyun-java-sdk-dysmsapi</artifactId>
            <version>1.1.0</version>
        </dependency>
        <!--        json-->
        <dependency>
            <groupId>com.alibaba</groupId>
            <artifactId>fastjson</artifactId>
            <version>1.2.76</version>
        </dependency>
        <!--        redis-->
        <dependency>
            <groupId>org.springframework.boot</groupId>
            <artifactId>spring-boot-starter-data-redis</artifactId>
        </dependency>
        <dependency>
            <groupId>org.projectlombok</groupId>
            <artifactId>lombok</artifactId>
            <optional>true</optional>
        </dependency>
        <dependency>
            <groupId>org.springframework.boot</groupId>
            <artifactId>spring-boot-starter-test</artifactId>
            <scope>test</scope>
        </dependency>
    </dependencies>
🏐redis配置🏐
/**
 * @author 小乌龟 redis配置
 */
@Configuration
public class RedisConfig extends CachingConfigurerSupport {

    //操纵缓存的模板
    @Bean
    @SuppressWarnings("all")
    @ConditionalOnMissingBean(name = "redisTemplate")
    public RedisTemplate<String, String> redisTemplate(RedisConnectionFactory factory) {
        RedisTemplate<String, String> template = new RedisTemplate<String, String>();
        template.setConnectionFactory(factory);
        // Json序列化配置
        Jackson2JsonRedisSerializer jackson2JsonRedisSerializer = new Jackson2JsonRedisSerializer(Object.class);
        ObjectMapper om = new ObjectMapper();
        //日期格式化
        om.setDateFormat(new SimpleDateFormat("yyyy-MM-dd HH:mm:ss"));
        // 日期序列化处理
        om.disable(SerializationFeature.WRITE_DATES_AS_TIMESTAMPS);
        om.registerModule(new Jdk8Module())
                .registerModule(new JavaTimeModule())
                .registerModule(new ParameterNamesModule());
        om.setVisibility(PropertyAccessor.ALL, JsonAutoDetect.Visibility.ANY);
        om.activateDefaultTyping(LaissezFaireSubTypeValidator.instance, ObjectMapper.DefaultTyping.NON_FINAL, JsonTypeInfo.As.WRAPPER_ARRAY);
        jackson2JsonRedisSerializer.setObjectMapper(om);
        // String 的序列化
        StringRedisSerializer stringRedisSerializer = new StringRedisSerializer();
        // key采用String的序列化方式
        template.setKeySerializer(stringRedisSerializer);
        // hash的key也采用String的序列化方式
        template.setHashKeySerializer(stringRedisSerializer);
        // value序列化方式采用jackson
        template.setValueSerializer(jackson2JsonRedisSerializer);
        // hash的value序列化方式采用jackson
        template.setHashValueSerializer(jackson2JsonRedisSerializer);
        //将默认的序列化方式改成StringRedisSerializer
        template.setDefaultSerializer(stringRedisSerializer);
        template.afterPropertiesSet();
        return template;
    }

}
🧰项目功能介绍🧰
🥰短信登入功能实现🥰
🍳前端 vue3+axios🍳
🥨 后端 springboot+redis🥨
🥐项目精简 不引入过多框架🥐
🌯登入功能实现🌯
🥙具体功能演示🥙
🍵B站视频🍵
🐎源码的分享🐎
🦌视频简介中🦌
🦬前后端gitee🦬
🫖感谢大家的三连支持🫖


 被折叠的 条评论
为什么被折叠?
被折叠的 条评论
为什么被折叠?
 到【灌水乐园】发言


