


 本文详细介绍了如何使用IntelliJ IDEA创建一个Servlet服务项目,从新建项目到配置文件结构,再到配置Tomcat,编写Servlet,最后通过web.xml配置Servlet,一步步教你完成简单Servlet项目的搭建。
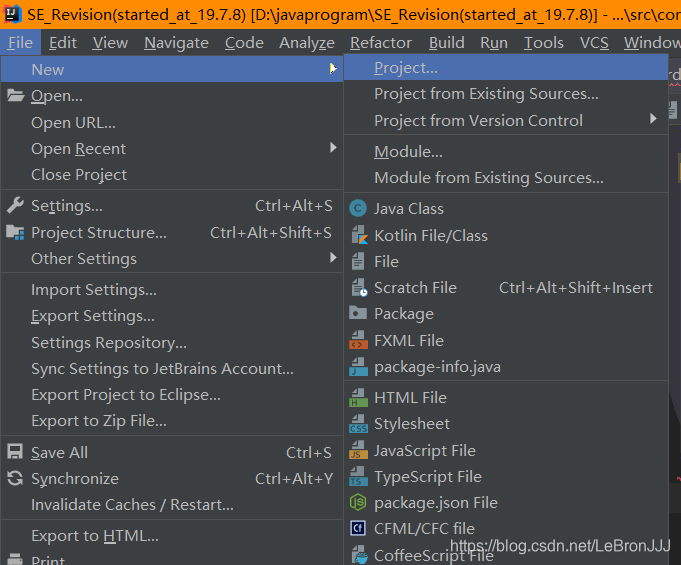
第一步:
首先你要有IntelliJ Idea 安装了jdk,以及安装了 TomCat。
第二步:
File -> new ->Project
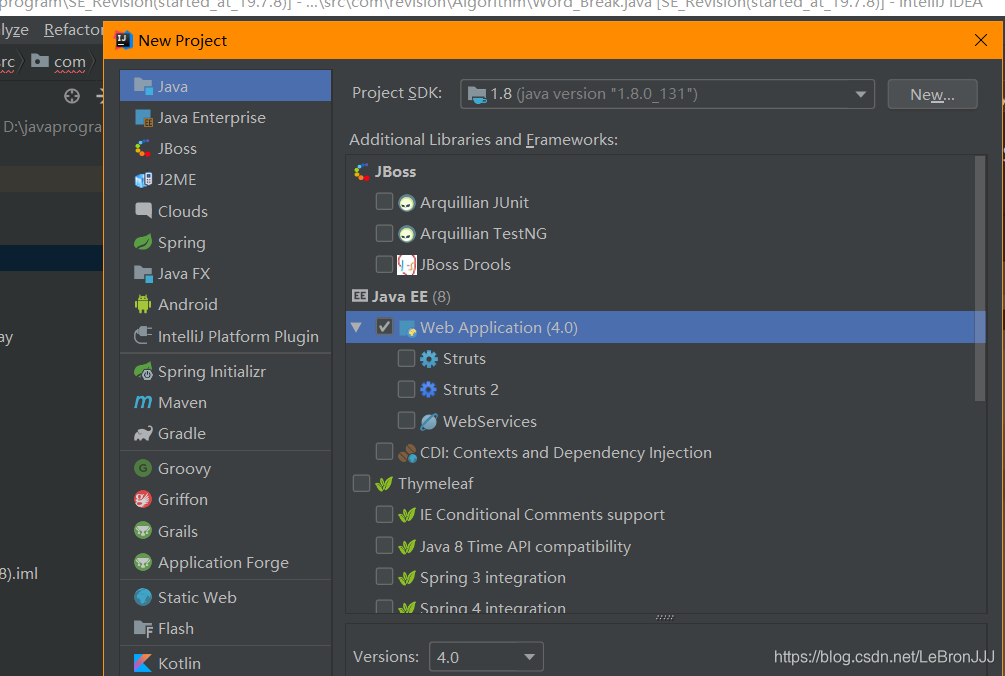
然后创建选择java EE 的 Web Application
定义项目名,还有项目所在的文件夹
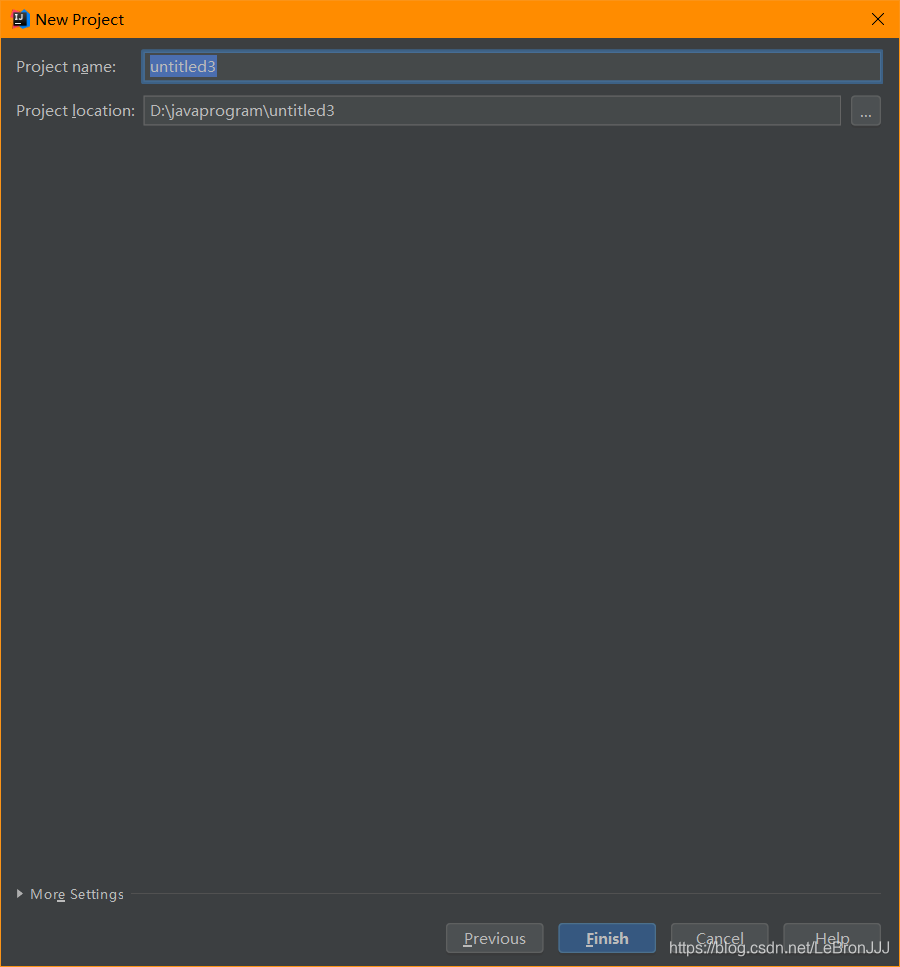
然后就创建好了最初的模型。
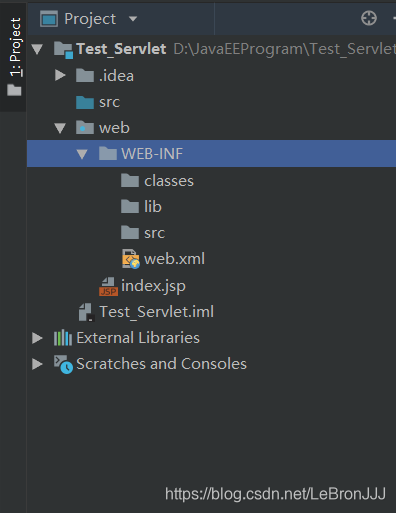
如下图
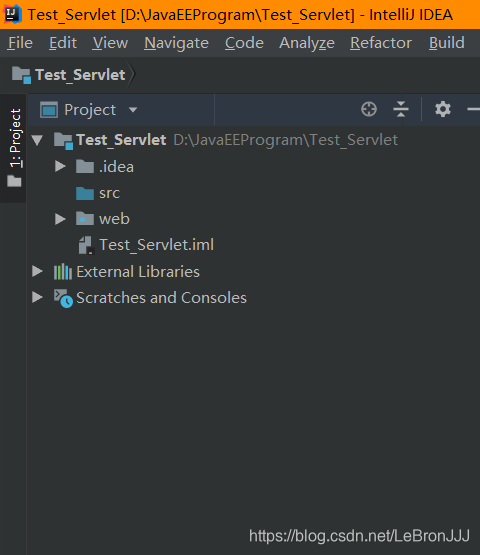
第三步:
配置文件结构:
在web ->WEB-INF 文件夹中创建 classes lib src文件夹
src用于存放源Servlet的java文件,classes用来存放编译后输出的class文件,lib用于存放第三方jar包
src右键设为source
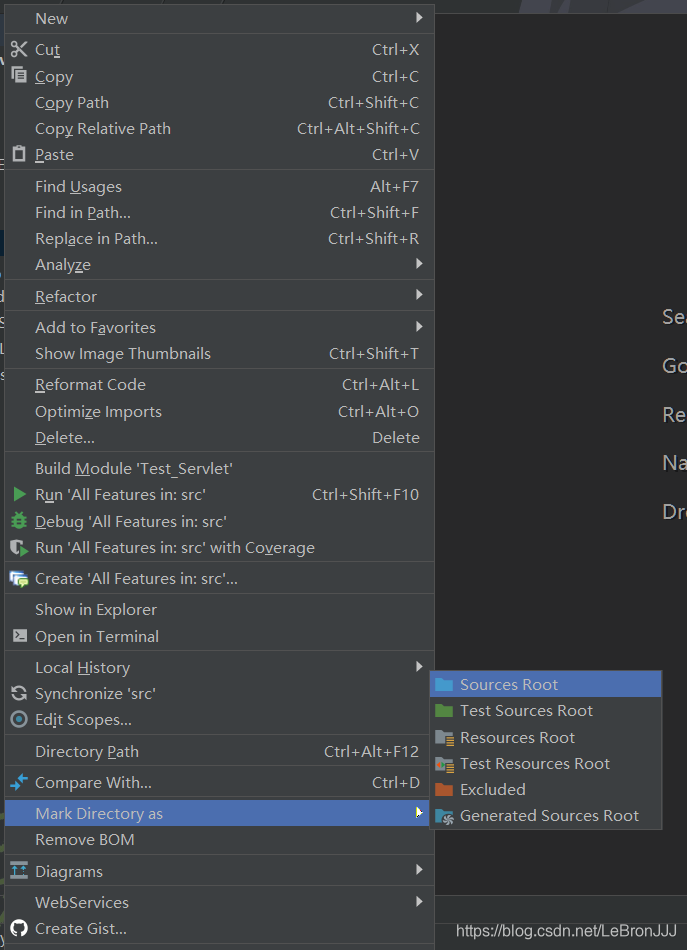
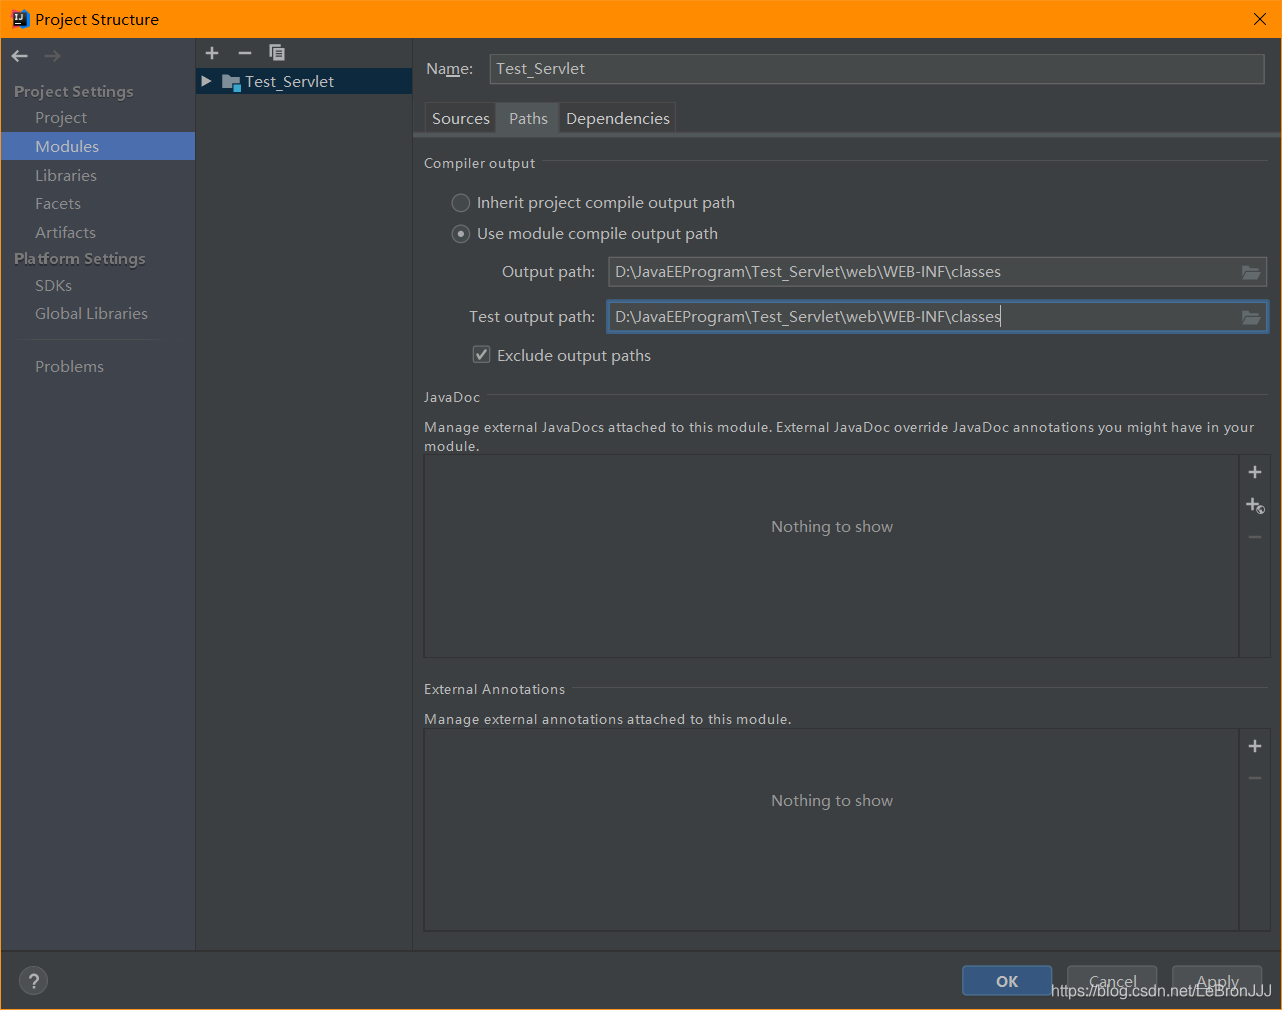
点击左边文件栏的项目名,Test_Servlet 按下 F4 进入项目结构 设置界面
将Output path和Test output path都选择刚刚创建的classes文件夹
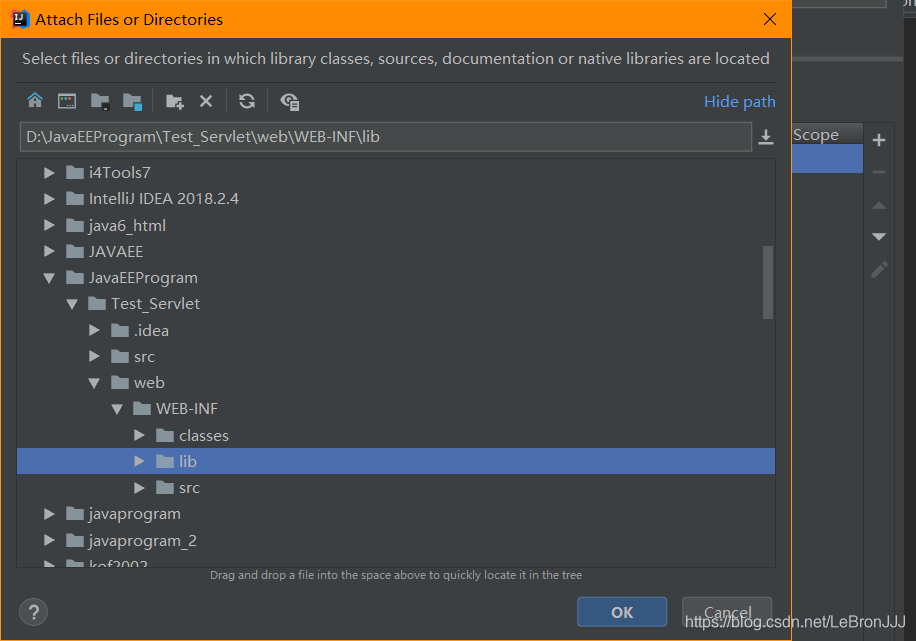
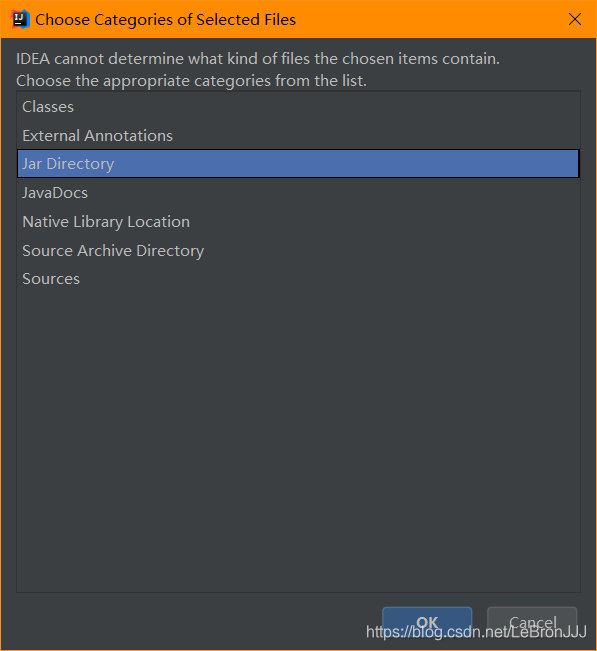
接着选择Dependencies -> 将Module SDK选择为1.8 -> 点击右边的“+”号 -> 选择 “Jars or Directories” ->
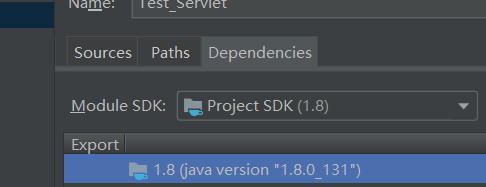
选择刚刚创建的lib文件夹-> 选择“jar directory”
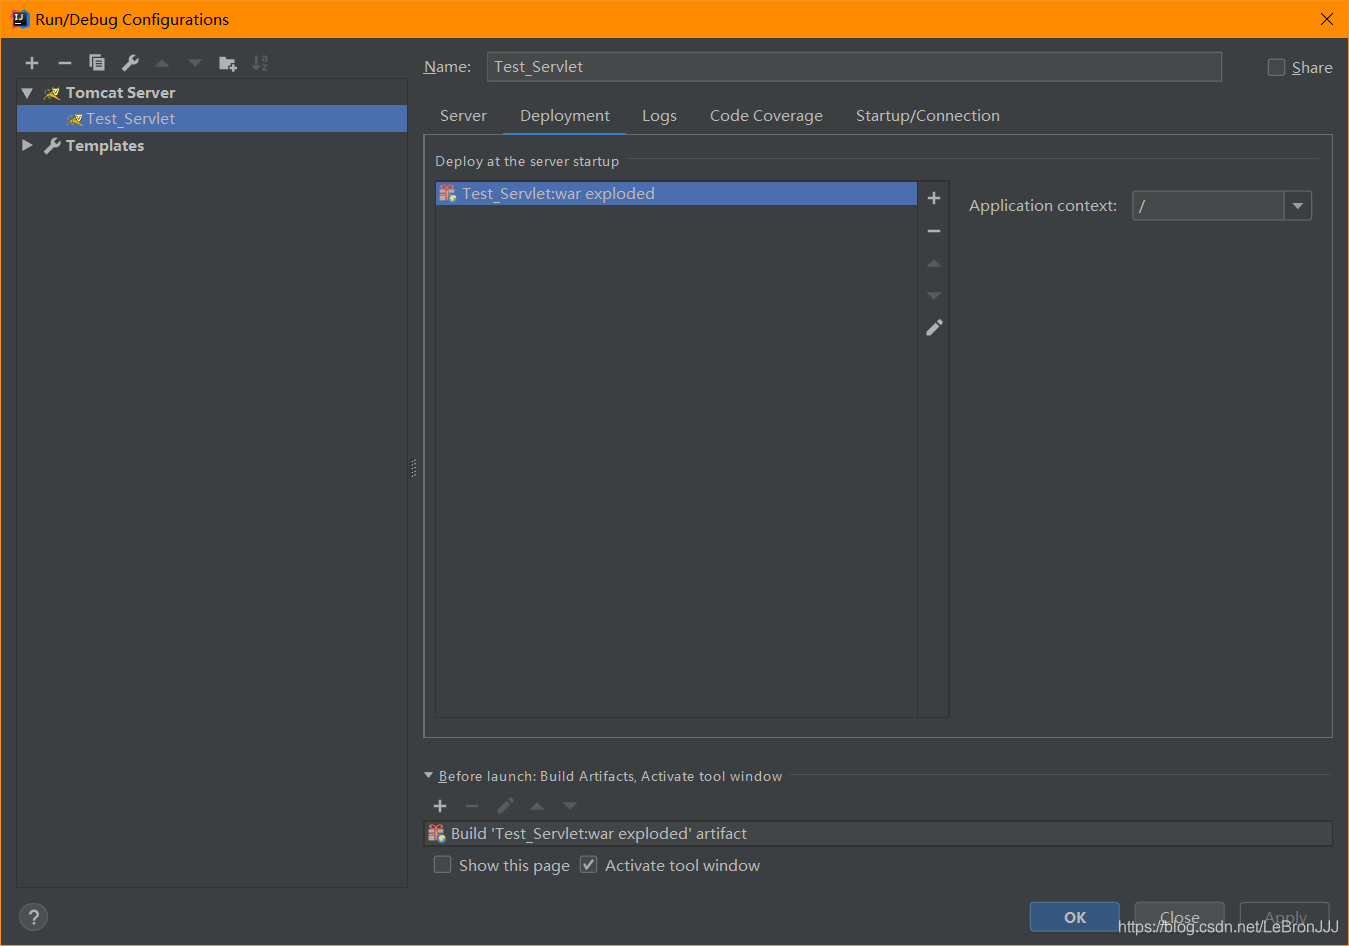
第四步:
配置TomCat:
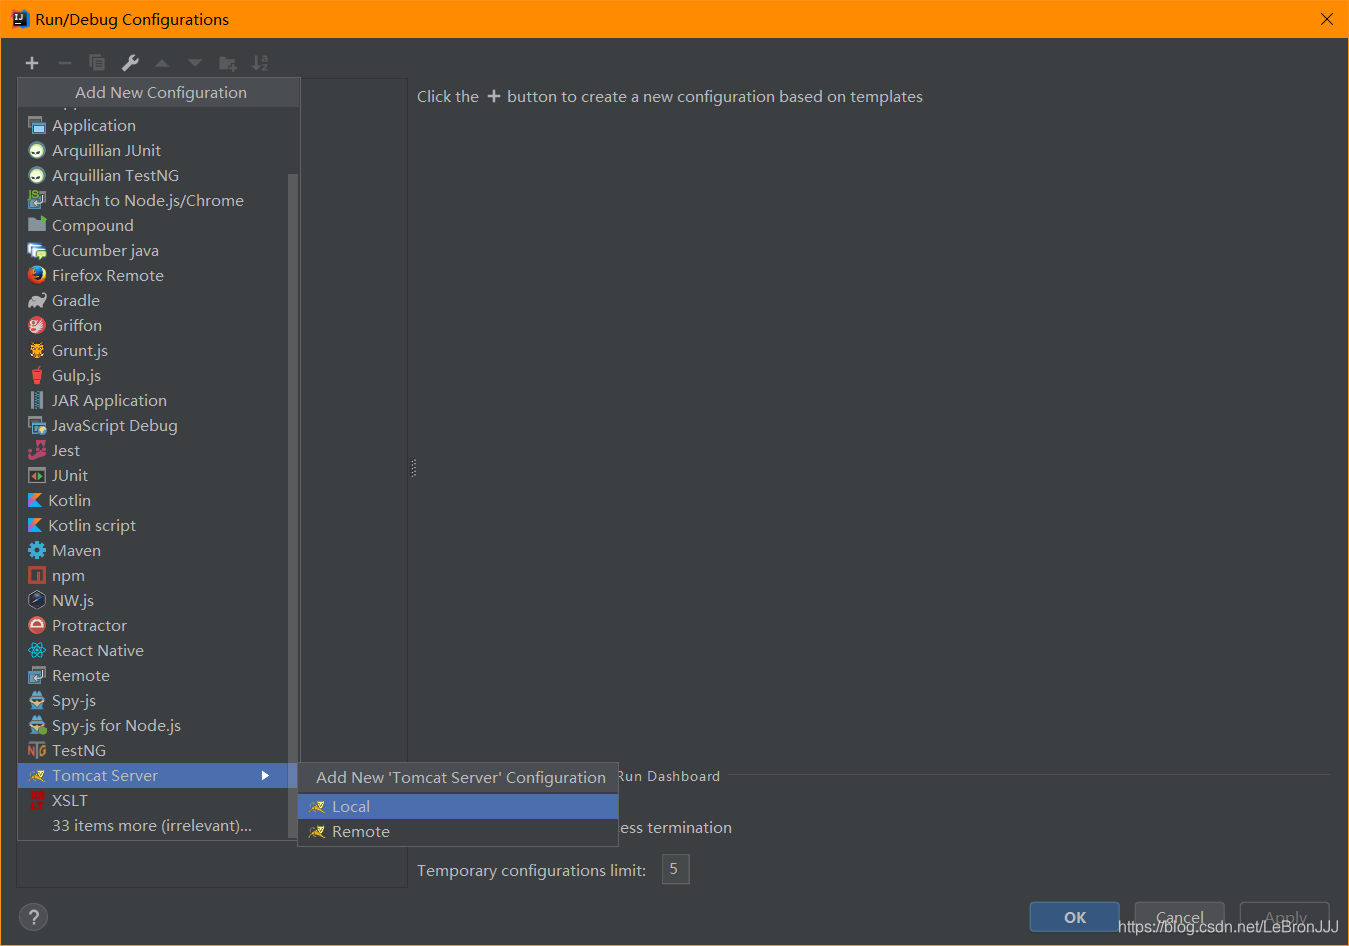
Run -> Edit Configuration -> 点击左上角“+”号 -> “Tomcat Server” -> “Local”
在"Name"处输入新的服务名,点击"Application server"后面的"Configure…",弹出Tomcat Server窗口,选择本地安装的Tomcat目录,点击 Apply -> OK
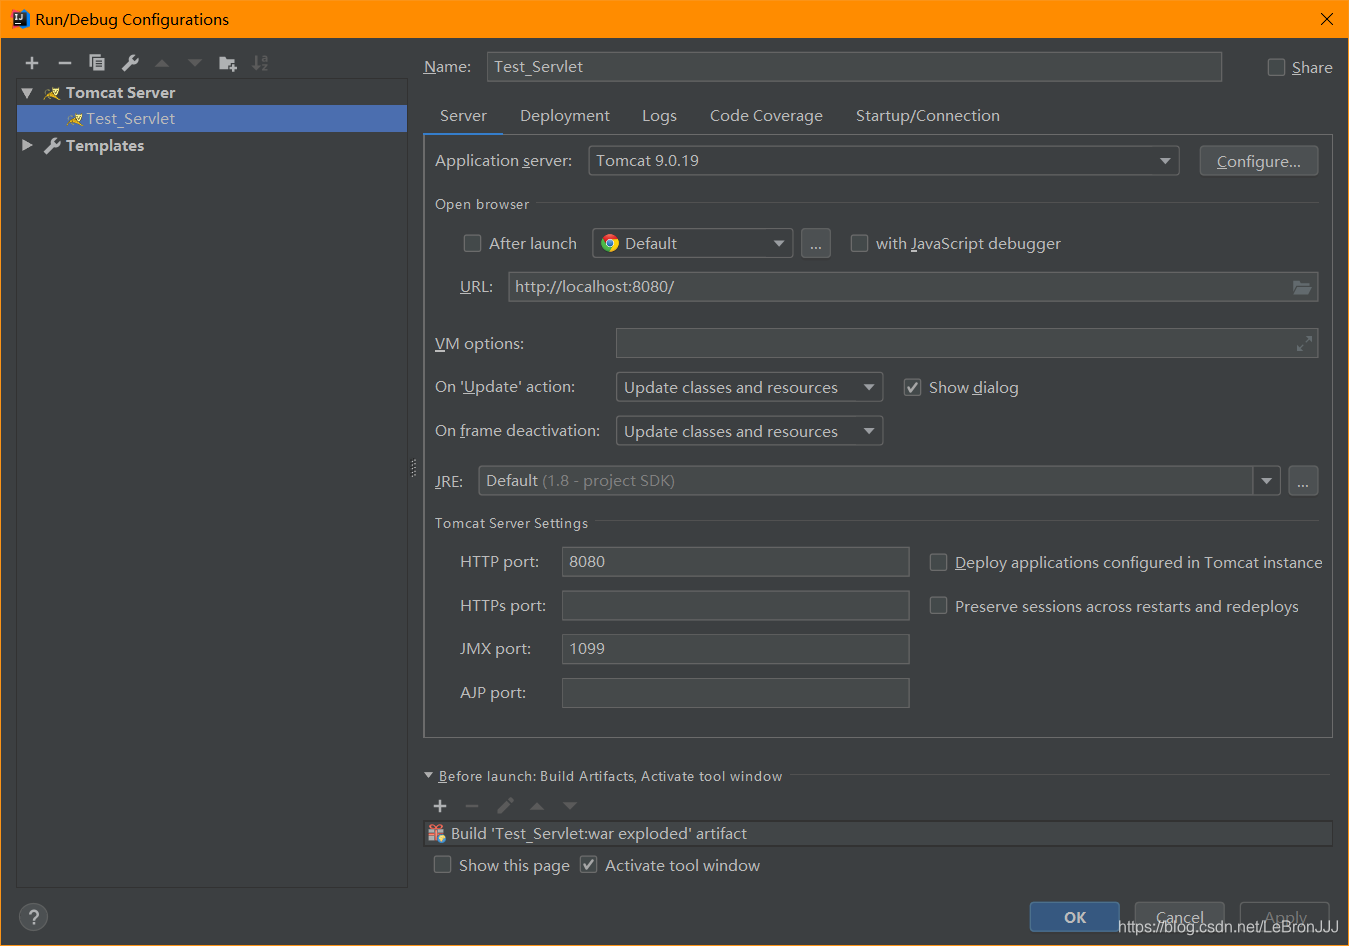
设置"HTTP port"和"JMX port"(默认值即可),点击 Apply -> OK
Deployment(部署)这里默认已经有了就不用管了
第五步:
编写页面
先写index.jsp
上面一些表头都是idea自动生成的 这里用 html语言去写就行
<%--
  Created by IntelliJ IDEA.
  User: Administrator
  Date: 2019/7/29
  Time: 0:29
  To change this template use File | Settings | File Templates.
--%>
<%@ page contentType="text/html;charset=UTF-8" language="java" %>
<html>
  <head>
    <title>$Title$</title>
  </head>
  <body>
  This is a Servlet Test!!!
  </body>
</html>
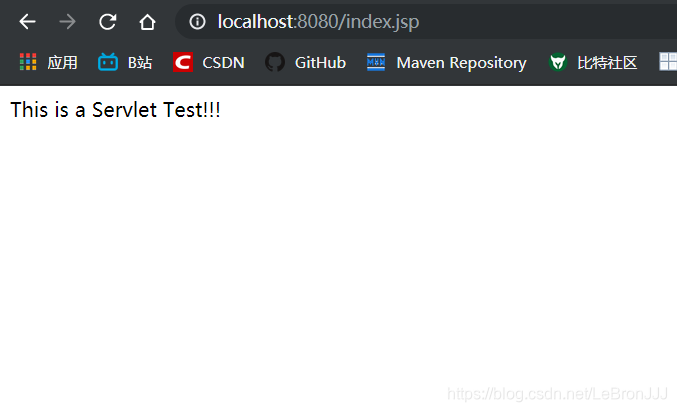
接下来运行tomcat,在浏览器上输入 localhost:8080/index.jsp
就能看到:
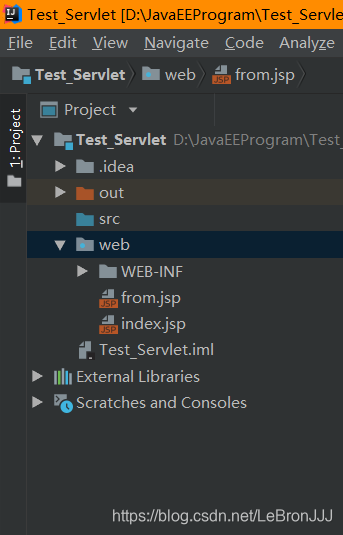
在web目录下新建文件 form.jsp
编写 form.jsp
<%--
  Created by IntelliJ IDEA.
  User: Administrator
  Date: 2019/7/29
  Time: 0:50
  To change this template use File | Settings | File Templates.
--%>
<%@ page contentType="text/html;charset=UTF-8" language="java" %>
<html>
<head>
    <title>提交到Servlet</title>
</head>
<body>
<form enctype="application/x-www-form-urlencoded;charset=UTF-8"
      id="form1" action="aa" method="post">
用户名</br>
<INPUT type="text"  name="name">
<INPUT type="submit"value="提交">
</form>
</body>
</html>
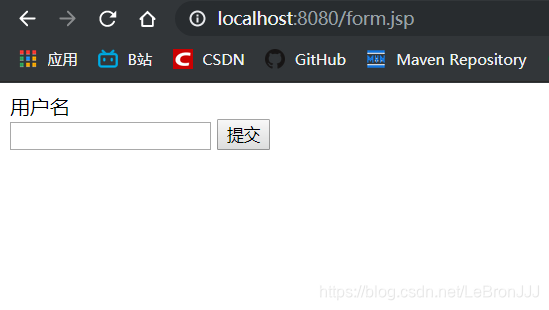
然后在浏览器中 输入 localhost:8080/form.jsp
显示页面:
ok 两个页面都好了 我们现在来写 Servlet
第六步:
编写Servlet:
我们在 WEB-INF 的 文件夹中的 src中创建java文件,名为FirstServlet。
然后编写:
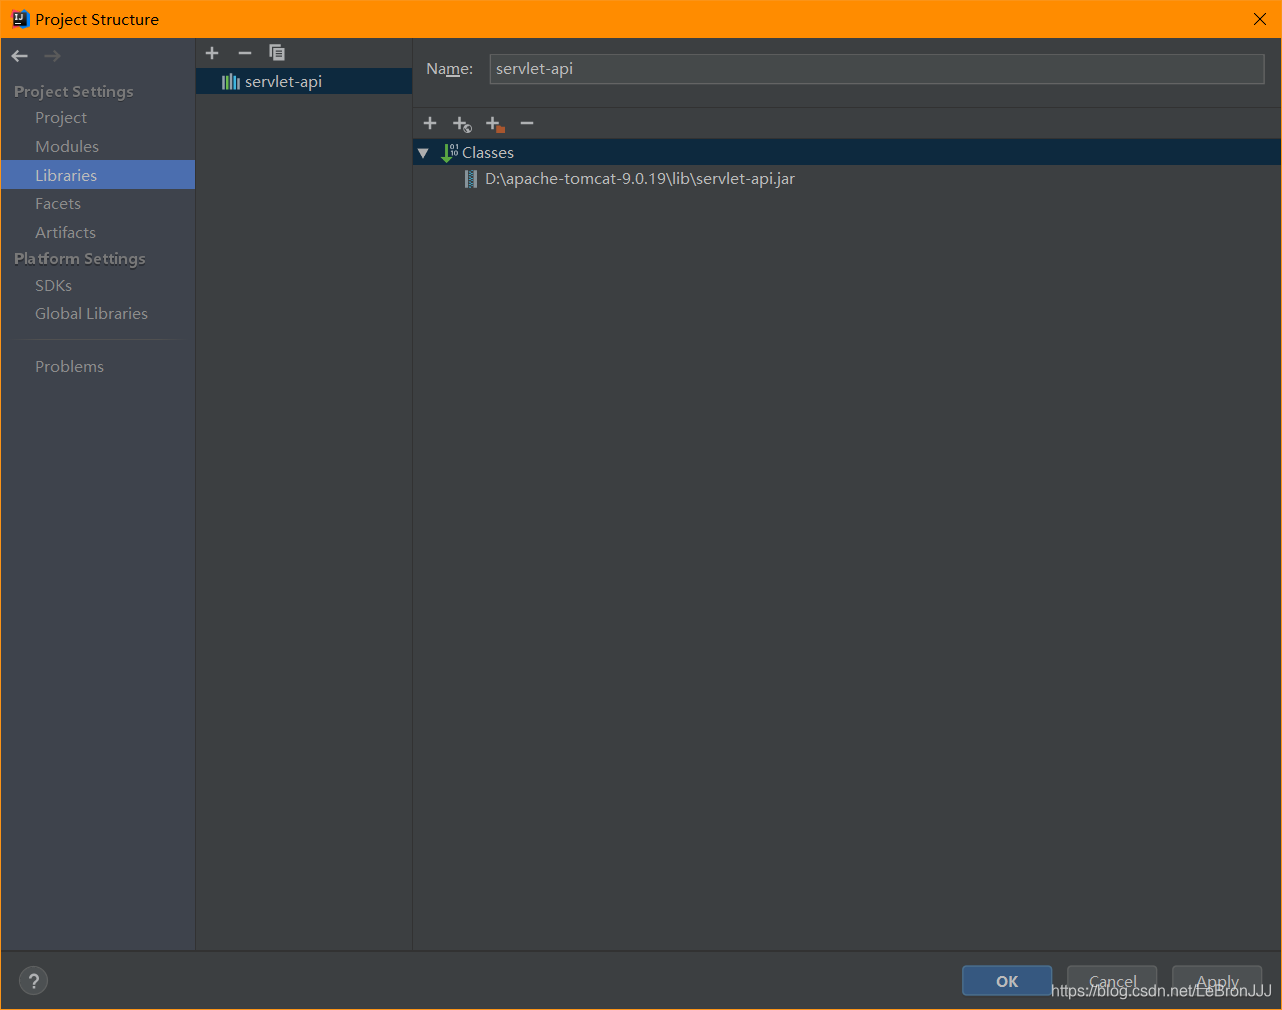
你可能会发现这里的HttpServlet 是没有这个类的,那是因为我们忘记了倒tomcat里的servlet 的api包,所以要先导包。
方法是:点击左侧文件类表 项目名 然后按下F4 进入 项目结构,进入如图界面进行“+”操作 找到你安装Tomcat的目录 里面的 api文件夹中 寻找 servlet-api.jar包 然后导入
然后我们继续编写  servlet

import javax.servlet.ServletException;
import javax.servlet.http.HttpServlet;
import javax.servlet.http.HttpServletRequest;
import javax.servlet.http.HttpServletResponse;
import java.io.IOException;
import java.io.PrintStream;

public class FirstServlet extends HttpServlet {
    @Override
    protected void doGet(HttpServletRequest request, HttpServletResponse response) throws ServletException, IOException {
        this.doPost(request,response);
    }

    public void doPost(HttpServletRequest request,
                       HttpServletResponse response) throws IOException {
        response.setCharacterEncoding("UTF-8");
        response.setContentType("text/html;charset=utf-8");
        System.out.println(request.getCharacterEncoding());
        String name = request.getParameter("name");

        PrintStream out = new PrintStream(response.getOutputStream());

        out.append("<html>");
        out.append("<head>");
        out.append("<title>Servlet Test</title>");
        out.append("<body>");
        out.append("你的名字是" + name);
        out.append("</body>");
        out.append("</head>");
        out.append("</html>");

    }
}
编译 servlet文件后 我们看到 classes 文件夹中多了FirstServlet.class文件
第七步:
配置Servlet
我们使用 web.xml进行配置 :
代码如下:
<?xml version="1.0" encoding="UTF-8"?>
<web-app xmlns="http://xmlns.jcp.org/xml/ns/javaee"
         xmlns:xsi="http://www.w3.org/2001/XMLSchema-instance"
         xsi:schemaLocation="http://xmlns.jcp.org/xml/ns/javaee http://xmlns.jcp.org/xml/ns/javaee/web-app_4_0.xsd"
         version="4.0">

    <servlet>
        <!-- 配置Servlet的名字-->
        <servlet-name>firstServlet</servlet-name>

        <!-- 指定Servlet的实现类-->
        <servlet-class>FirstServlet</servlet-class>
    </servlet>
    <!--指定Servlet的 url-->
    <servlet-mapping>
        <!--指定Servlet的名字-->
        <servlet-name>firstServlet</servlet-name>
        <!--指定Servlet的映射地址-->
        <url-pattern>/aa</url-pattern>
    </servlet-mapping>
</web-app>
浏览器输入localhost:8080/form.jsp 填入参数后跳转到Servlet,显示成功
OK到目前为止你已经完成了一个简单的Servlet项目了?????


 4065
4065

 被折叠的 条评论
为什么被折叠?
被折叠的 条评论
为什么被折叠?
 到【灌水乐园】发言


