


由于自己平时工作学习的时候需要在各个平台之间传一些文本,但是又不想登录微信或者QQ这类软件,麻烦不说,有的时候其他人的电脑或平板上还没登陆,传给他们百度网盘链接或者其他的长文本就很麻烦,还有隐私问题,于是使用GPTCV大法,写了一个网页端的局域网聊天室,并打包成了docker镜像,使用方法放到最后。
这篇文章主要是想记录自己打包docker镜像并上传dockerhub的历程做个笔记。
首先,目录层级如下:
internal_chat/
├── app.py # Flask 主程序
├── Dockerfile # Docker 构建文件
├── requirements.txt # Python 依赖包
├── chat_log.json # 聊天记录文件(自动生成或初始化为空列表)
├── templates/
│ └── index.html # 网页聊天界面 HTML 模板
├── static/
│ ├──style.css # 可选:自定义样式
└──
直接上代码:
app.py
from flask import Flask, render_template, request, jsonify
from datetime import datetime, timedelta
import json
import os

app = Flask(__name__)
LOG_FILE = 'chat_log.json'
messages = []

def load_messages():
    global messages
    if os.path.exists(LOG_FILE):
        with open(LOG_FILE, 'r', encoding='utf-8') as f:
            try:
                messages = json.load(f)
            except json.JSONDecodeError:
                messages = []

def save_messages():
    with open(LOG_FILE, 'w', encoding='utf-8') as f:
        json.dump(messages, f, ensure_ascii=False, indent=2)

def clean_old_messages():
    global messages
    now = datetime.now()
    messages[:] = [
        msg for msg in messages
        if now - datetime.strptime(msg['timestamp'], '%Y-%m-%d %H:%M:%S') < timedelta(days=1)
    ]
    save_messages()

@app.route('/')
def index():
    return render_template('index.html')

@app.route('/send', methods=['POST'])
def send_message():
    data = request.get_json()
    username = data.get('username', '匿名')
    message = data.get('message', '')
    now = datetime.now()
    timestamp = now.strftime('%Y-%m-%d %H:%M:%S')
    messages.append({
        'username': username,
        'message': message,
        'timestamp': timestamp
    })
    clean_old_messages()
    save_messages()
    return jsonify(success=True)

@app.route('/messages')
def get_messages():
    clean_old_messages()
    for msg in messages:
        msg['time'] = datetime.strptime(msg['timestamp'], '%Y-%m-%d %H:%M:%S').strftime('%H:%M:%S')
    return jsonify(messages=messages)

if __name__ == '__main__':
    load_messages()
    clean_old_messages()
    app.run(host='0.0.0.0', port=15920, debug=True)
index.html
<!DOCTYPE html>
<html lang="zh">
<head>
    <meta charset="UTF-8">
    <title>局域网聊天</title>
    <meta name="viewport" content="width=device-width, initial-scale=1">
    <link rel="stylesheet" href="/static/style.css">
</head>
<body>
    <div class="container">
        <h2>局域网聊天室</h2>
        <div id="usernameDisplay"></div>
        <div id="chatbox"></div>
        <div class="input-area">
            <input type="text" id="msg" placeholder="输入消息..." autofocus>
            <button onclick="sendMessage()">发送</button>
        </div>
    </div>

    <script>
        // 生成随机用户名(5位)
        function generateUsername() {
            return Math.random().toString(36).substr(2, 5).toUpperCase();
        }

        const username = generateUsername();
        document.getElementById('usernameDisplay').textContent = `用户名:${username}`;

        function fetchMessages() {
            fetch('/messages')
                .then(res => res.json())
                .then(data => {
                    const chatbox = document.getElementById('chatbox');
                    chatbox.innerHTML = '';
                    data.messages.forEach(msg => {
                        const item = document.createElement('div');
                        item.className = 'message';
                        item.innerHTML = `<span class="time">[${msg.time}]</span> <strong>${msg.username}</strong>: ${msg.message}`;
                        chatbox.appendChild(item);
                    });
                    chatbox.scrollTop = chatbox.scrollHeight;
                });
        }

        function sendMessage() {
            const msgInput = document.getElementById('msg');
            const msg = msgInput.value.trim();
            if (!msg) return;
            fetch('/send', {
                method: 'POST',
                headers: {'Content-Type': 'application/json'},
                body: JSON.stringify({ username: username, message: msg })
            }).then(() => {
                msgInput.value = '';
                fetchMessages();
            });
        }

        // 回车发送消息
        document.getElementById('msg').addEventListener('keydown', function (e) {
            if (e.key === 'Enter') {
                sendMessage();
            }
        });

        setInterval(fetchMessages, 1000);
        window.onload = fetchMessages;
    </script>
</body>
</html>
style.css
body {
    font-family: -apple-system, BlinkMacSystemFont, sans-serif;
    margin: 0;
    padding: 0;
    background: #f2f2f2;
}

.container {
    max-width: 600px;
    margin: auto;
    padding: 20px;
}

h2 {
    text-align: center;
    color: #333;
}

#usernameDisplay {
    text-align: center;
    margin-bottom: 10px;
    font-weight: bold;
}

#chatbox {
    background: #fff;
    height: 400px;
    overflow-y: auto;
    border: 1px solid #ccc;
    padding: 10px;
    border-radius: 5px;
}

.message {
    margin: 5px 0;
    line-height: 1.4;
}

.message .time {
    color: #888;
    margin-right: 5px;
}

.input-area {
    display: flex;
    margin-top: 10px;
}

#msg {
    flex: 1;
    padding: 10px;
    border: 1px solid #ccc;
    border-radius: 5px 0 0 5px;
    font-size: 16px;
}

button {
    padding: 10px 15px;
    border: none;
    background: #007bff;
    color: white;
    font-size: 16px;
    cursor: pointer;
    border-radius: 0 5px 5px 0;
}

button:hover {
    background: #0056b3;
}

@media (max-width: 600px) {
    #chatbox {
        height: 300px;
    }
    button {
        font-size: 14px;
    }
    #msg {
        font-size: 14px;
    }
}
运行测试:
访问IP:15920

OK,运行正常,下一步我们打包成docker镜像
Linux执行命令:
docker login
[root@localhost internal_chat]# docker login
USING WEB-BASED LOGIN
To sign in with credentials on the command line, use 'docker login -u <username>'
Your one-time device confirmation code is: DKTP-BLDV
Press ENTER to open your browser or submit your device code here: https://login.docker.com/activate
Waiting for authentication in the browser¡
访问网址:https://login.docker.com/activate
然后输入设备ID:DKTP-BLDV(在提示里面)
按照网页提示注册登录
登录后终端回显:
WARNING! Your password will be stored unencrypted in /root/.docker/config.json.
Configure a credential helper to remove this warning. See
https://docs.docker.com/engine/reference/commandline/login/#credential-stores

Login Succeeded
接下来Linux在项目目录下执行命令:
touch requirements.txt
里面只写一个模块
Flask==3.1.1
创建一个Dockerfile
touch Dockerfile
写入以下内容:
# Builder 阶段:安装依赖并安装python包
FROM python:3.11-alpine AS builder

WORKDIR /app

RUN apk add --no-cache gcc musl-dev libffi-dev

COPY requirements.txt .

RUN pip install --prefix=/install --no-cache-dir -r requirements.txt

COPY . .

# 运行阶段:只复制已安装的包和代码
FROM python:3.11-alpine

WORKDIR /app

# 复制 builder 阶段安装好的包
COPY --from=builder /install /usr/local

# 复制应用代码
COPY --from=builder /app /app

CMD ["python", "app.py"]
OK,执行打包命令:
docker build -t lan-chat .
注意最后有个 .
[root@localhost internal_chat]# docker build -t lan-chat .
[+] Building 20.0s (13/13) FINISHED                                                 docker:default
 => [internal] load build definition from Dockerfile                                          0.0s
 => => transferring dockerfile: 540B                                                          0.0s
 => [internal] load metadata for docker.io/library/python:3.11-alpine                         1.3s
 => [internal] load .dockerignore                                                             0.0s
 => => transferring context: 2B                                                               0.0s
 => [internal] load build context                                                             0.0s
 => => transferring context: 2.46kB                                                           0.0s
 => [builder 1/6] FROM docker.io/library/python:3.11-alpine@sha256:8068890a42d68ece5b62455ef  0.0s
 => CACHED [builder 2/6] WORKDIR /app                                                         0.0s
 => CACHED [builder 3/6] RUN apk add --no-cache gcc musl-dev libffi-dev                       0.0s
 => CACHED [builder 4/6] COPY requirements.txt .                                              0.0s
 => [builder 5/6] RUN pip install --prefix=/install --no-cache-dir -r requirements.txt       17.3s
 => [builder 6/6] COPY . .                                                                    0.2s
 => [stage-1 3/4] COPY --from=builder /install /usr/local                                     0.2s
 => [stage-1 4/4] COPY --from=builder /app /app                                               0.1s
 => exporting to image                                                                        0.4s
 => => exporting layers                                                                       0.4s
 => => writing image sha256:7e1b8c7d6611d4d6b58cc739b91941dacfa2302689a136d74eaf31e0b3edd5fe  0.0s
 => => naming to docker.io/library/lan-chat                                               0.0s
这里我选择python:3.11-alpine是为了压缩镜像体积
打包后我们查看一下:
[root@localhost internal_chat]# docker images
REPOSITORY                    TAG                  IMAGE ID       CREATED          SIZE
lan-chat                      latest               7e1b8c7d6611   32 seconds ago   64.4MB
好的,接下来我们打个tag
[root@localhost internal_chat]# docker tag lan-chat-app sspeaf/lan-chat:latest
然后push到dockerhub
[root@localhost internal_chat]# docker push sspeaf/lan-chat:latest
The push refers to repository [docker.io/sspeaf/lan-chat]
40f4d3da82c7: Pushed
96b5e0494498: Pushed
9a6a1c7594c7: Pushed
ed1fa62b5e54: Mounted from library/python
15b8ed2bc3f1: Mounted from library/python
e980fad4908b: Mounted from library/python
fd2758d7a50e: Mounted from library/python
latest: digest: sha256:f536145b2b92468e6133e4b8b0964367d006501354a3368ba07461e2f5a3347d size: 1785
OK,我们执行下面的命令run一下试试:
docker run -d -p 15920:15920 --name lan-chat --restart unless-stopped -v /etc/localtime:/etc/localtime:ro -v /etc/timezone:/etc/timezone:ro sspeaf/lan-chat:latest
记得防火墙放开15920/tcp端口
浏览器访问下:
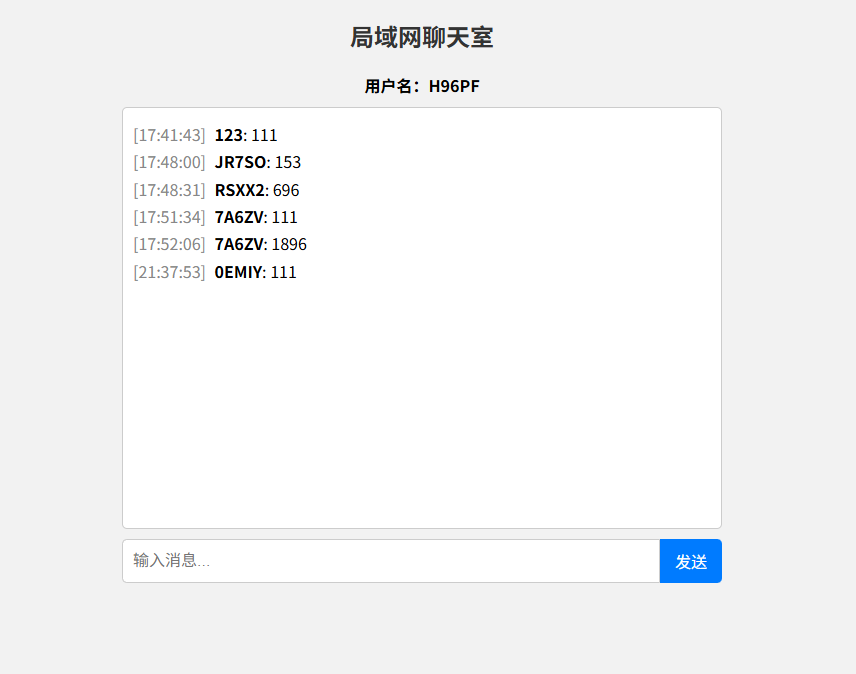
接下来在各个平台的浏览器内收藏IP:15920,然后添加到桌面就可以啦!
希望这个项目能帮到你


 2181
2181

 被折叠的 条评论
为什么被折叠?
被折叠的 条评论
为什么被折叠?
 到【灌水乐园】发言


