


一、GitLab
GitLab 是一个基于 Git 的 代码托管平台,提供从 代码托管、CI/CD、代码审查、Issue 跟踪、Wiki、DevOps 工具链一体化 的平台。
二、GitLab 的安装(以 CentOS 7 为例)
1. 安装
手动添加 GitLab CE 的 repo 文件
cat >/etc/yum.repos.d/gitlab-ce.repo <<EOF
[gitlab-ce]
name=Gitlab CE Repository (mirrored by TUNA)
baseurl=https://mirrors.tuna.tsinghua.edu.cn/gitlab-ce/yum/el7/
gpgcheck=0
enabled=1
EOF


sudo yum clean all
sudo yum makecache
sudo yum install -y gitlab-ce
2. 使用离线 RPM 安装(建议可选)
从清华源下载 GitLab 安装包:https://mirrors.tuna.tsinghua.edu.cn/gitlab-ce/yum/el7/

#执行安装
 yum install -y gitlab-ce-xxxxx.rpm
3. 启动 GitLab 服务
#使用gitlab.rb文件生成子配置文件
gitlab-ctl reconfigure

#应该要个5分钟

###启动 GitLab 的所有组件(Nginx、PostgreSQL、Redis、Gitaly 等)

应用默认配置(来自 /etc/gitlab/gitlab.rb)

自动生成 SSL、密钥等初始设置
访问ip
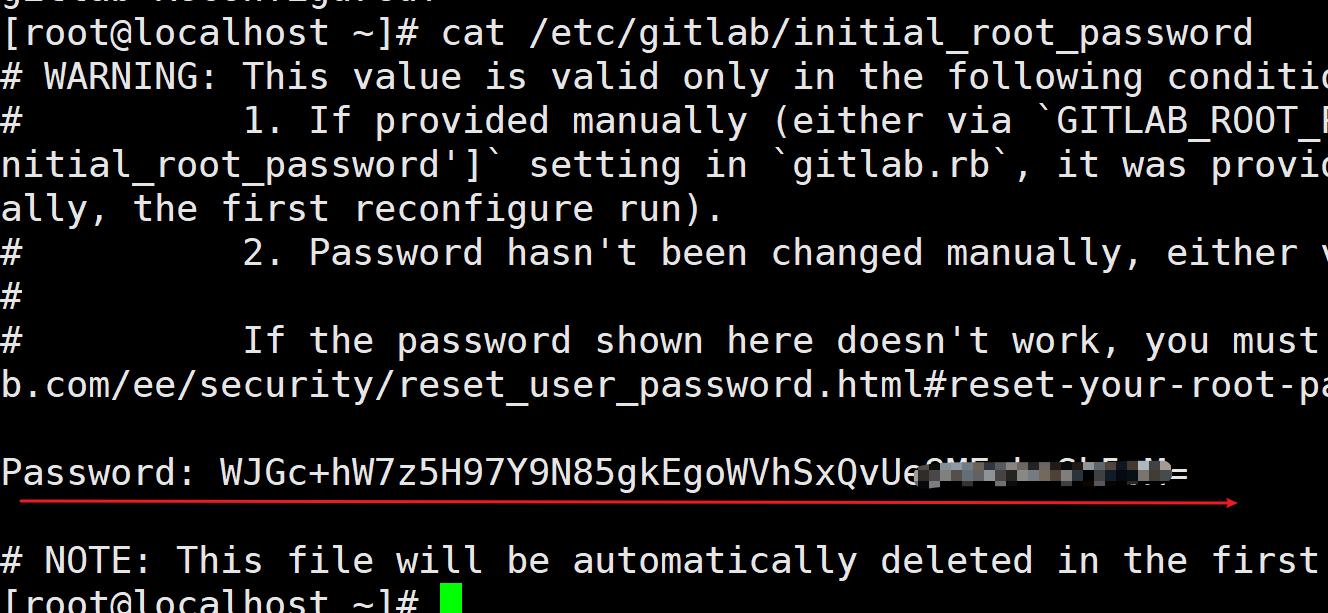
账号:root
密码:cat /etc/gitlab/initial_root_password
常用管理命令
gitlab-ctl status        # 查看状态
gitlab-ctl restart       # 重启所有组件
gitlab-ctl stop/start    # 停止或启动 GitLab
gitlab-ctl tail          # 查看日志

三、应用配置
sudo vim /etc/gitlab/gitlab.rb
# 修改 external_url 为你的实际 IP 或域名

sudo gitlab-ctl reconfigure
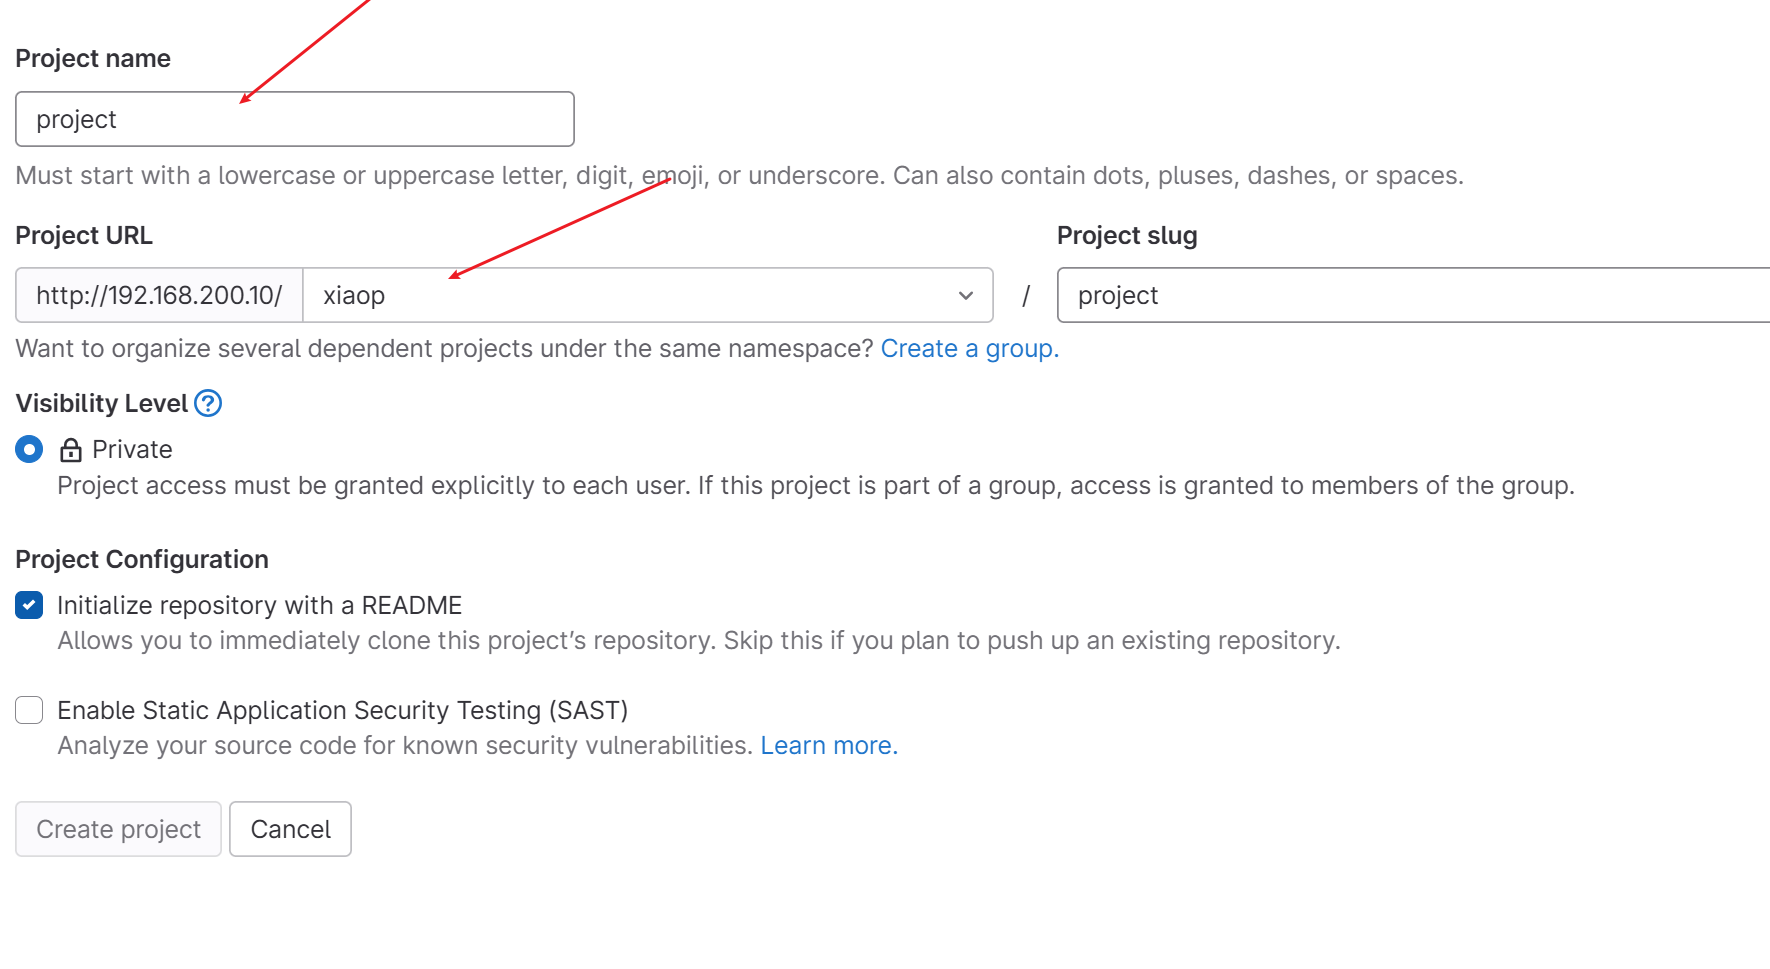
四、创建第一个 Git 项目
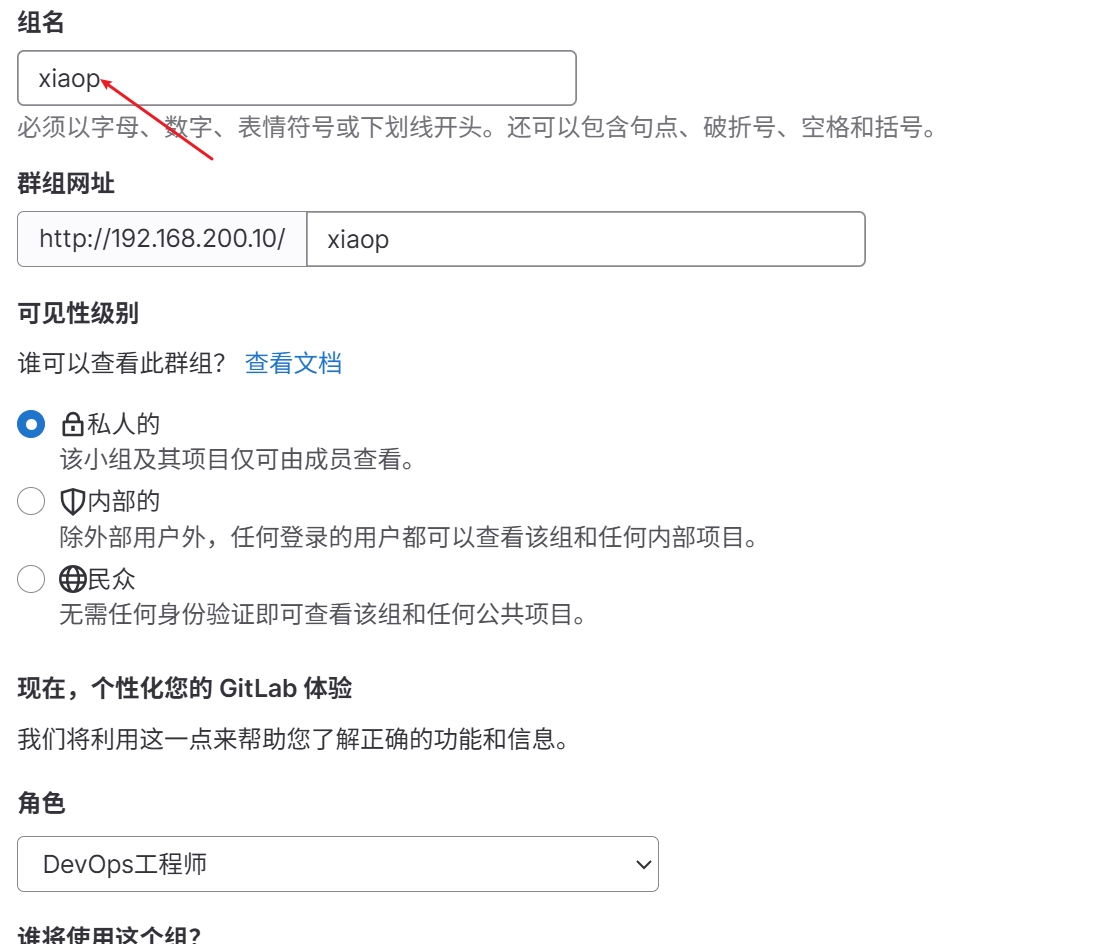
创建组
五、将你的代码推送到 GitLab
##假设你已经有本地项目
cd /your/project

git init
git remote add origin http://<IP>/root/my-first-project.git
git add .
git commit -m "Initial commit"
git push -u origin master
如果提示输入用户名/密码,输入 GitLab 网页的登录用户名(root)和密码即可
六、常用管理命令
gitlab-ctl status         # 查看 GitLab 所有组件状态
gitlab-ctl restart        # 重启所有服务
gitlab-ctl reconfigure    # 应用配置更改
gitlab-ctl tail           # 查看所有日志
gitlab-rake gitlab:check  # 检查服务运行状态
七、后续可选配置
功能 说明 设置 HTTPS 配置 gitlab.rb使用 SSL 证书添加域名访问 设置 external_url 'https://gitlab.example.com'并配置 DNS配置邮箱通知 在 gitlab.rb中配置 SMTP 邮件服务安装 GitLab Runner 用于 CI/CD 自动化部署 定时备份 使用 gitlab-rake gitlab:backup:create定期备份数据
##有待补充


 362
362

 被折叠的 条评论
为什么被折叠?
被折叠的 条评论
为什么被折叠?
 到【灌水乐园】发言


