


 本文深入探讨Spring框架的控制反转(IoC)和依赖注入(DI)原理,讲解singleton和prototype作用域,setter和构造器注入方式,以及bean的初始化和销毁过程。通过示例代码演示如何在Spring中配置bean,实现低耦合和高灵活性。
【补充】
这是早就写了的文章,如今有新的理解,想补充完成。
1.scope
2.IOC
3.DI
4.setter注入和构造器注入
5.init和destory
【打头说明】
IOC说的是控制反转,意思就是让spring来创建对象,竟然让spring来创建对象,总得告诉spring谁需要它来创建。
- Spring中提供的其他IoC标签
1,版型标签:就是代表不同的样子;四种标签也能起到和component相同的作用
1,@Controller:用于控制器(Action/如果在SpringMVC中,@Controller有特殊意义);
2,@Service:用于服务对象;
3,@Repository:用于DAO;
4,@Component:用于其他组件;
注意,不同版型标签达到的目的都是一样的,都是让spring去扫描这些类;
这些标签对于Spring没有区别,是写给程序猿看的;
DI是依赖注入,那么怎么注入?用下面的标签
DI相关的注解:
1,在Spring中,有两个注解可以用来做DI:@Autowired, @Resource
----------------------------------------------------原来写的------------------------------------------------------------
spring官网的文档说明https://docs.spring.io/spring/docs/5.0.4.RELEASE/spring-framework-reference/core.html#beans-introduction
Spring IOC : 又称控制反转,控制什么,反转什么呢。
人话解释:大部分的业务实现都需要2个对象或者2个对象以上合作完成,那么在用到另一个对象的时候,传统就需要new Object();如下代码
classA
{
    AInterface a;

    A(){}

    AMethod()//一个方法
    {
        a = new AInterfaceImp();
    }
}
这样一来,耦合关系就产生了;
因此,控制反转说的是,把创建对象的权利交给spring,这就是所谓的控制反转。(待会用代码说明)
Spring DI :又叫依赖注入,是一个工程。官方给出2种注入方式,一种是构造函数注入,一种是setter注入。
方式一:setter注入
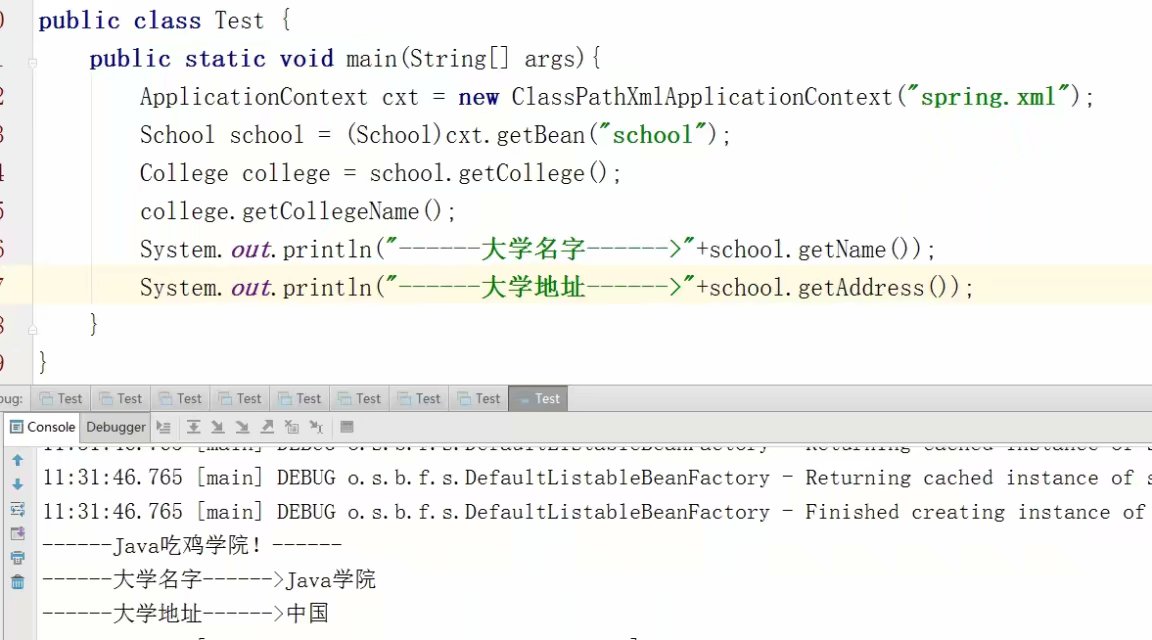
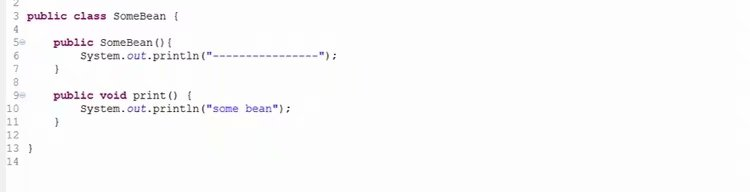
public class College {
        public void getCollegeName(){
            System.out.println("------Java吃鸡学院!------");
         }
 }

public class School {
       String name;
       String address;
       College college;
       public String getName() { return name;}
       public void setName(String name) { this.name = name; }
       public String getAddress() { return address; }
       public void setAddress(String address) { this.address = address; }
       public College getCollege() { return college; }
       public void setCollege(College college) { this.college = college; }
}
//spring.xml里面配置 这样就把代码之间的耦合放在了xml里面
<bean class="com.ecp.flproject.test.College" id="college"></bean>
<bean class="com.ecp.flproject.test.School" id="school">
       <property name="college" ref="college"/>
       <property name="name" value="Java学院"/>
       <property name="address" value="中国"/>
</bean>
测试代码(对象的创建必须经过构造函数)
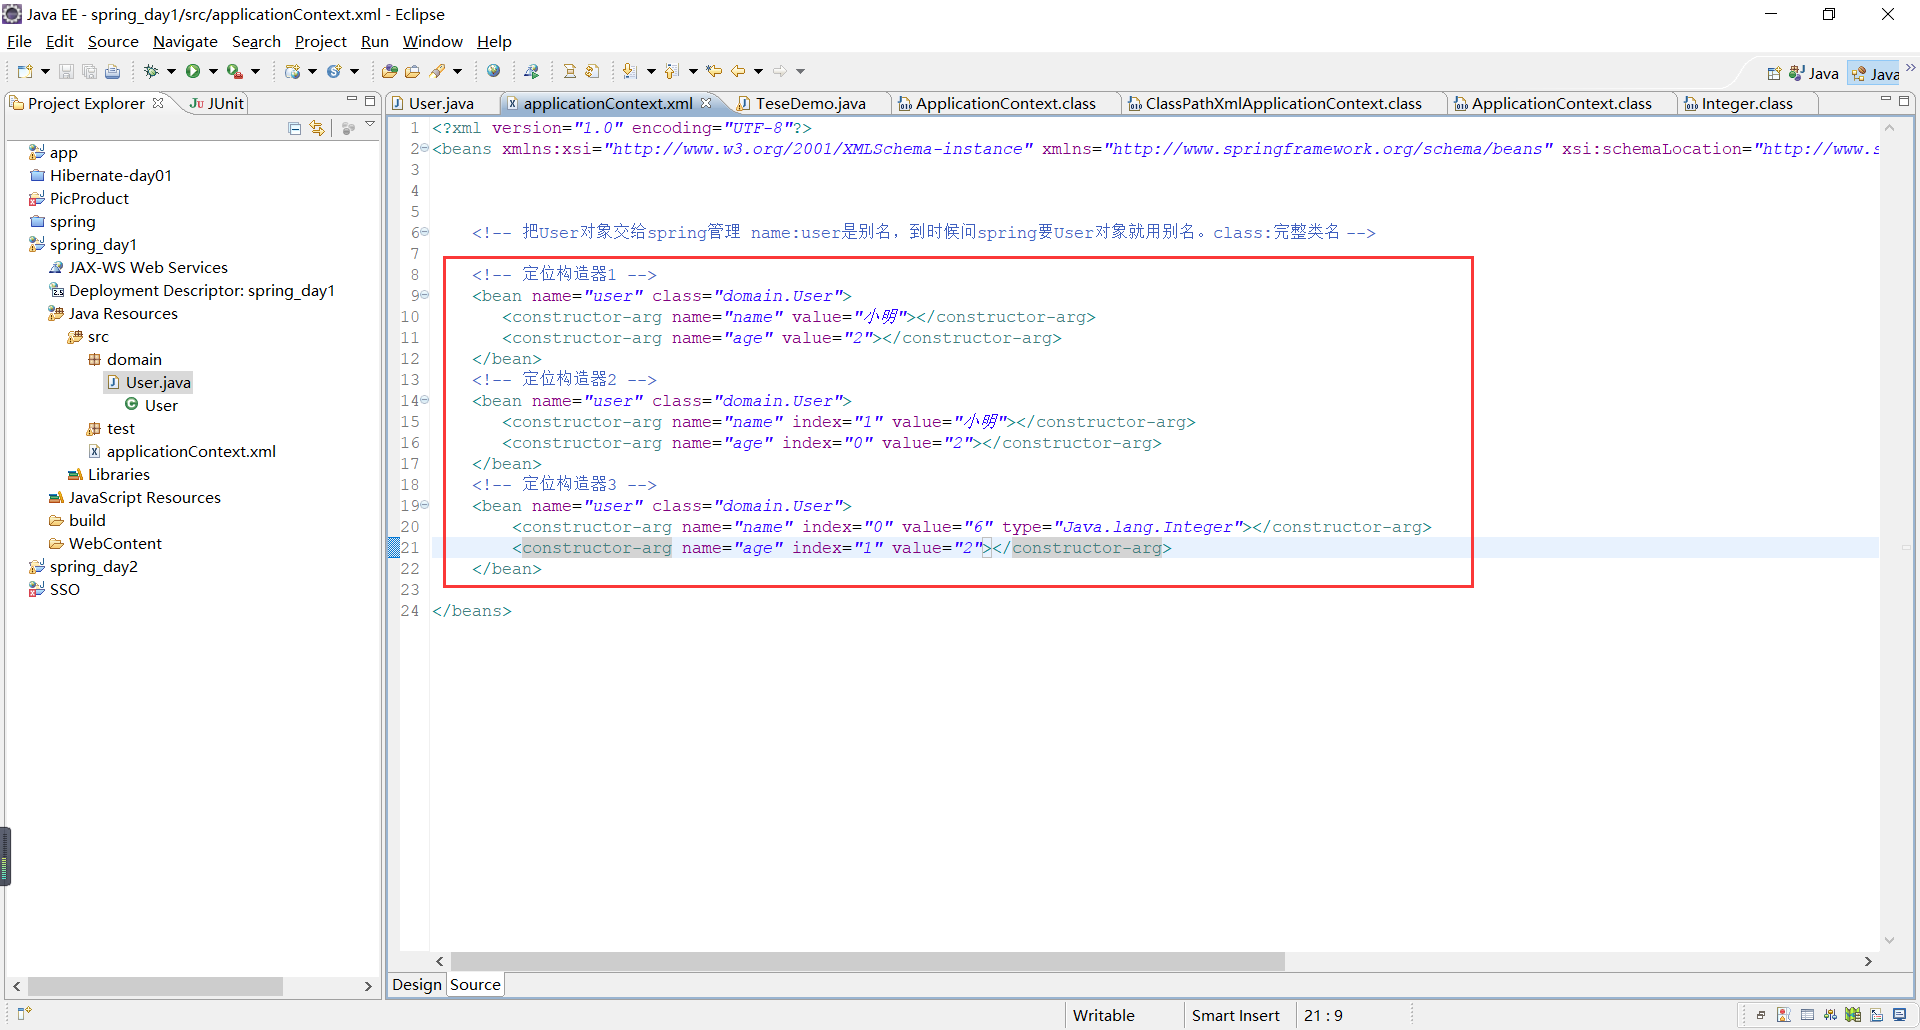
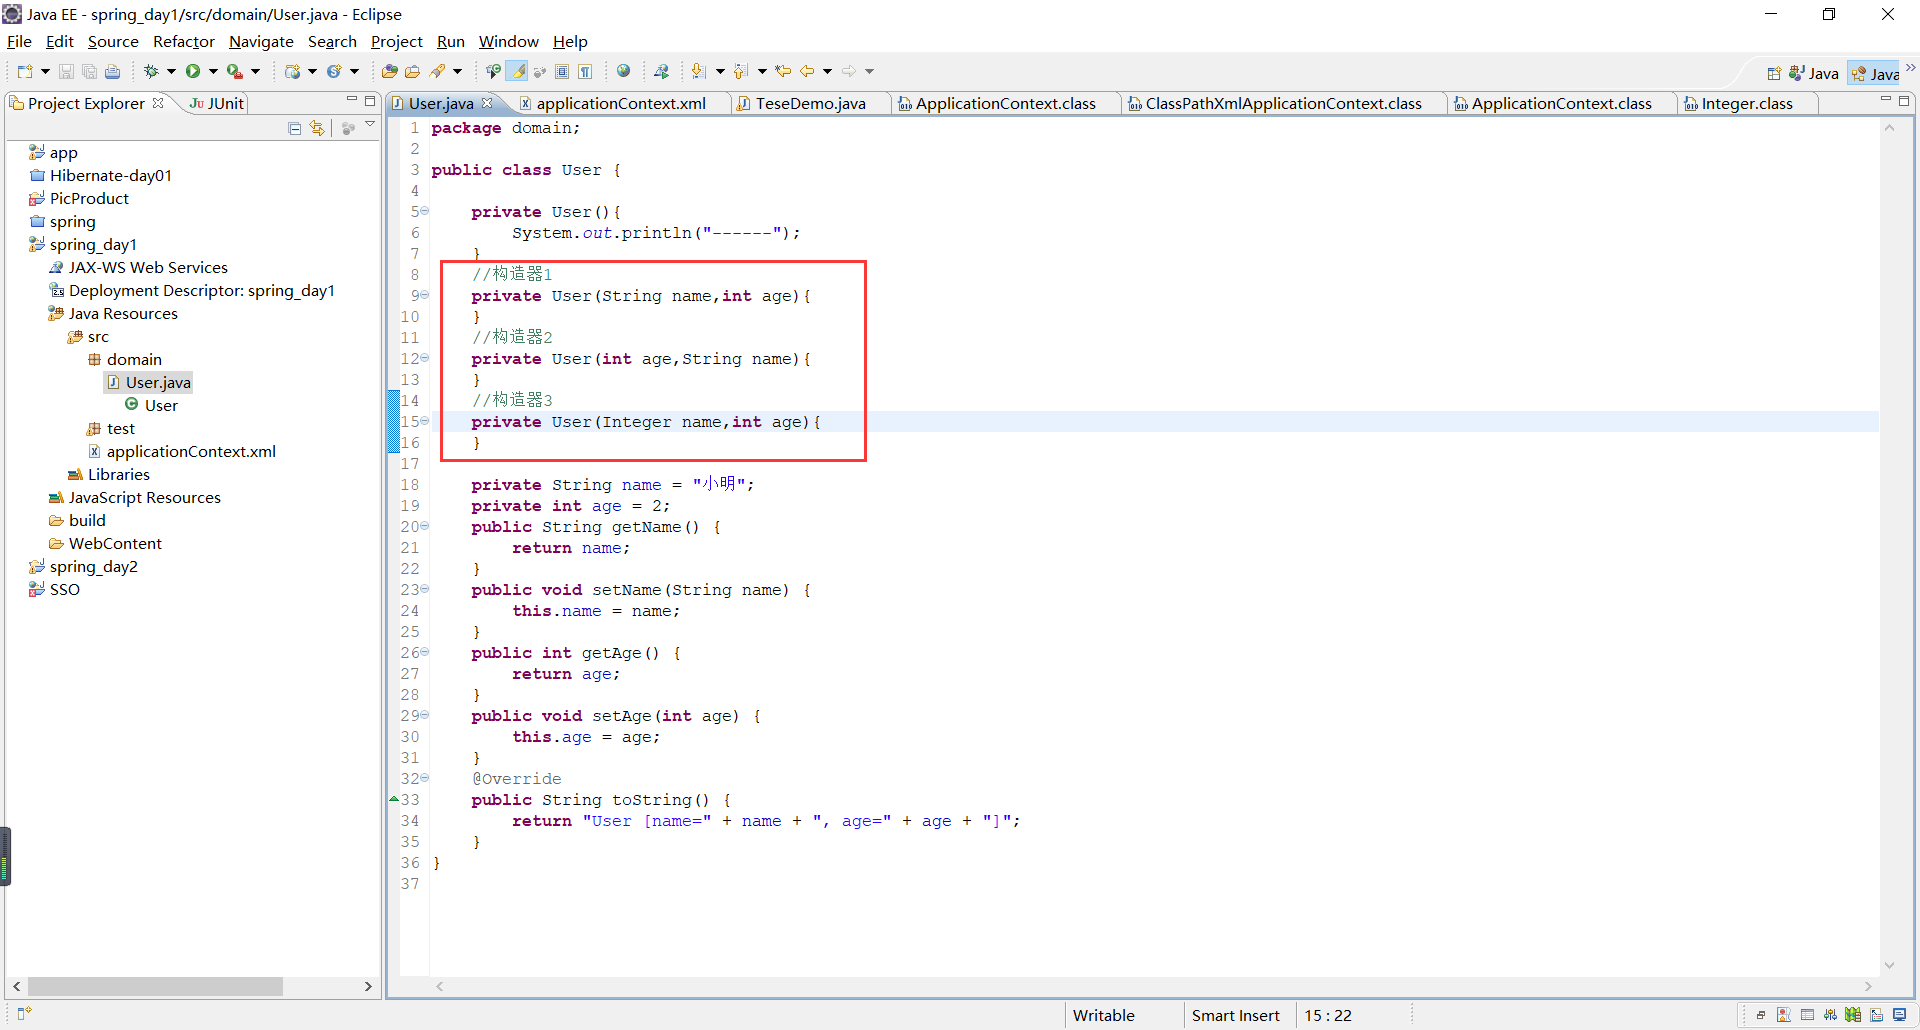
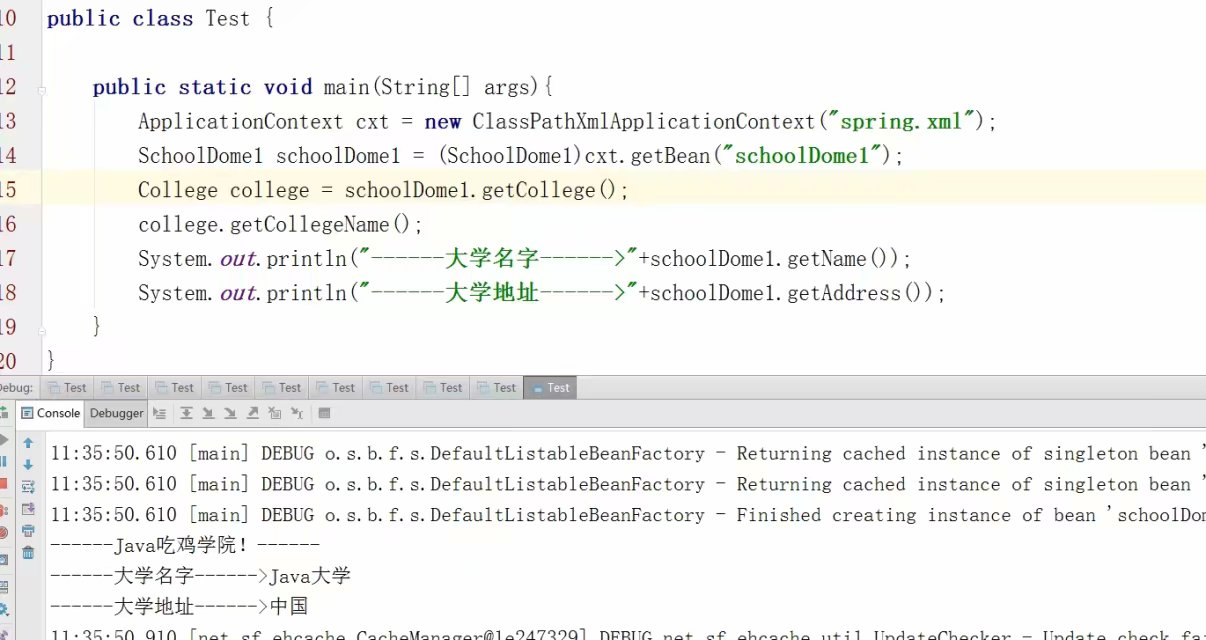
方式二:构造器注入
由于构造器的参数可能顺序不一样,或者类型不一样,这种情况下如何注入?
可以通过index,type,name进行指定。
public class SchoolDome1 {
       String name;
       String address;
       College college;

       public SchoolDome1(String name,String address,College college){
             this.name = name;
             this.address = address;
             this.college = college;
       }

       public String getName() { return name; }
       public void setName(String name) { this.name = name; }
       public String getAddress() { return address; }
       public void setAddress(String address) { this.address = address; }
       public College getCollege() { return college; }
       public void setCollege(College college) { this.college = college; }
}

<bean class="com.ecp.flproject.test.College" id="college"></bean>
<bean class="com.ecp.flproject.test.SchoolDome1" id="schoolDome1">
      <constructor-arg index="0" value="Java大学"></constructor-arg>
       <constructor-arg index="1" value="中国"></constructor-arg>
       <constructor-arg index="2" ref="college"></constructor-arg>
</bean>
测试代码
1.我看源代码ApplicationContext 是继承了 BeanFactory。
2.ConfigurableApplicationContext 继承了 ApplicationContext。
3.官方说该接口org.springframework.context.ApplicationContext表示Spring IoC容器,并负责实例化,配置和组装上述bean。
4.官方还说ApplicationContext包含了所有功能BeanFactory。
补充说明:
【scope】
1.singleton 单例的,只会在容器中创建一次。(默认的)
2.prototype 多例的,每次去获取的时候,都是新的对象。
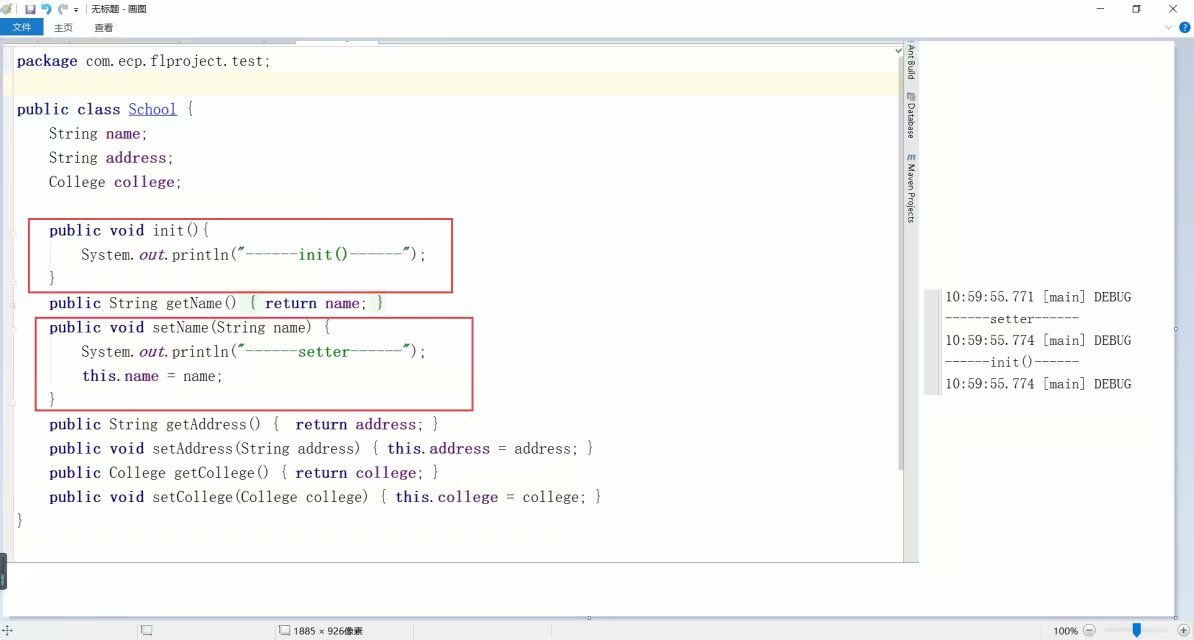
【init和destory】
bean上有2个属性
init-method = “init”,对象创建之后马上执行这个初始化方法。
destory-method = “destory”,容器关闭后执行销毁方法。
可以在注入之后,再执行一些方法,但前提是,要提前在类里写好这个方法;

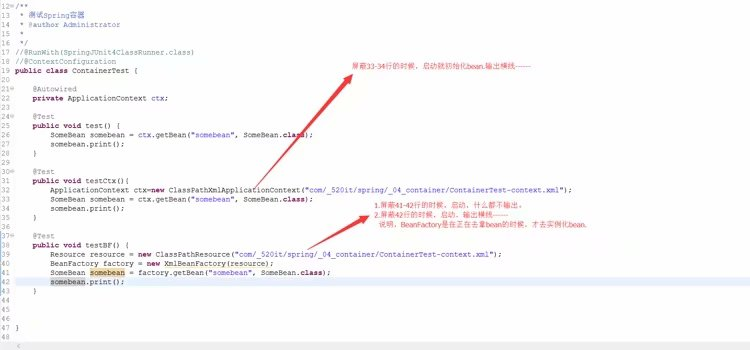
Spring中在不同容器下,bean的初始化时机;
1,BeanFactory是在真正去拿bean的时候,才会去创建bean的实例(延迟实例化);
2,ApplicationContext是在容器启动的时候就已经创建好了bean的实例(迫切实例化);
延迟实例化的优势:应用启动的时候占用的资源很小;适合资源紧张的应用;
迫切实例化的优势:应用在启动的时候已经实例化所有的对象,就可以在启动的时候发现对象的错误或者为这些对象做更多的事情(比如AOP);
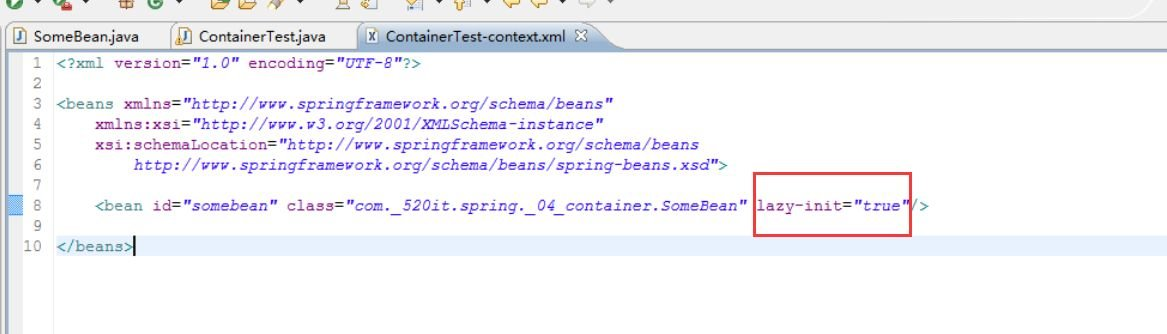
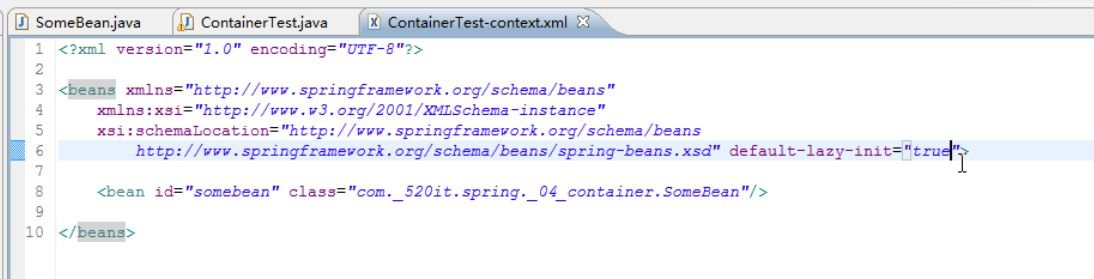
也可以在bean上面添加lazy-init=true来让ApplicationContext也延迟实例化对象;还可以在beans上面配置default-lazy-init=true让整个beans中所有的bean全部延迟实例化;


 1651
1651

 被折叠的 条评论
为什么被折叠?
被折叠的 条评论
为什么被折叠?
 到【灌水乐园】发言


