 Dubbo服务提供者搭建


 本文详细介绍如何在已有的项目基础上,使用Zookeeper和Dubbo创建一个新的服务提供者模块fbs-service,包括添加依赖、配置Tomcat插件、编写服务实现类、配置Spring和Dubbo等关键步骤。
前提
-
zookeeper以及dubbo已经安装并启动
-
项目是在原来的基础上创建的
创建一个新的模块fbs-service,步骤如下:
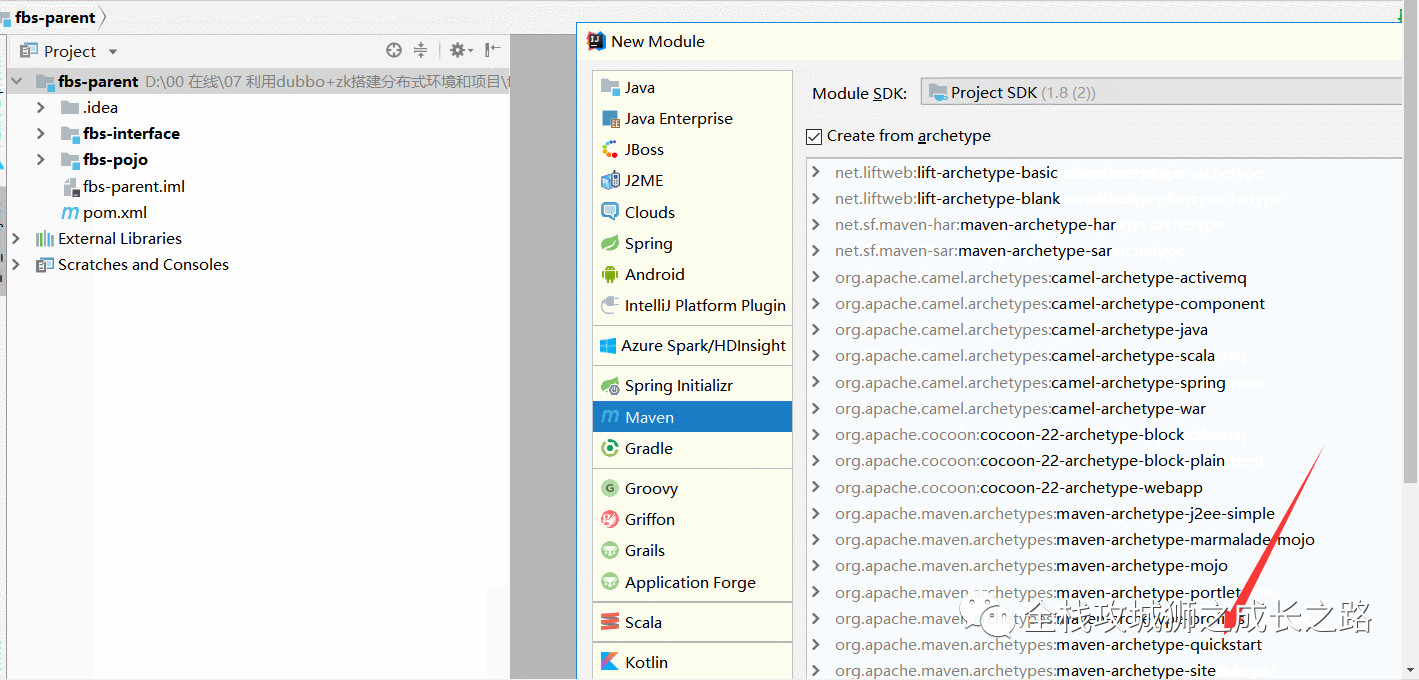
创建fbs-service模块
在pom.xml中添加依赖:
<dependency><groupId>net.wanho.fenbushi</groupId><artifactId>fbs-interface</artifactId><version>1.0-SNAPSHOT</version><scope>compile</scope></dependency>
修改pom.xml中的build标签如下:
<build><finalName>fbs-service</finalName><plugins><plugin><groupId>org.apache.tomcat.maven</groupId><artifactId>tomcat7-maven-plugin</artifactId><configuration><path>/</path><port>8081</port></configuration></plugin></plugins></build>
在该模块的的src/main下面加入java文件夹,设置为Sources Root,在该文件夹下创建com.elvis.service.impl包,在包下面加入UserServiceImpl.java类。
package com.elvis.service.impl;import com.elvis.pojo.User;import com.elvis.service.UserService;import java.util.ArrayList;import java.util.List;@Servicepublic class UserServiceImpl implements UserService {@Overridepublic List<User> queryUsers() {List<User> list = new ArrayList<>();//这里面查询数据库并不是我们关注的主要矛盾list.add(new User(1,"ali"));list.add(new User(2,"zhangli"));list.add(new User(3,"xiaoli"));return list;}}
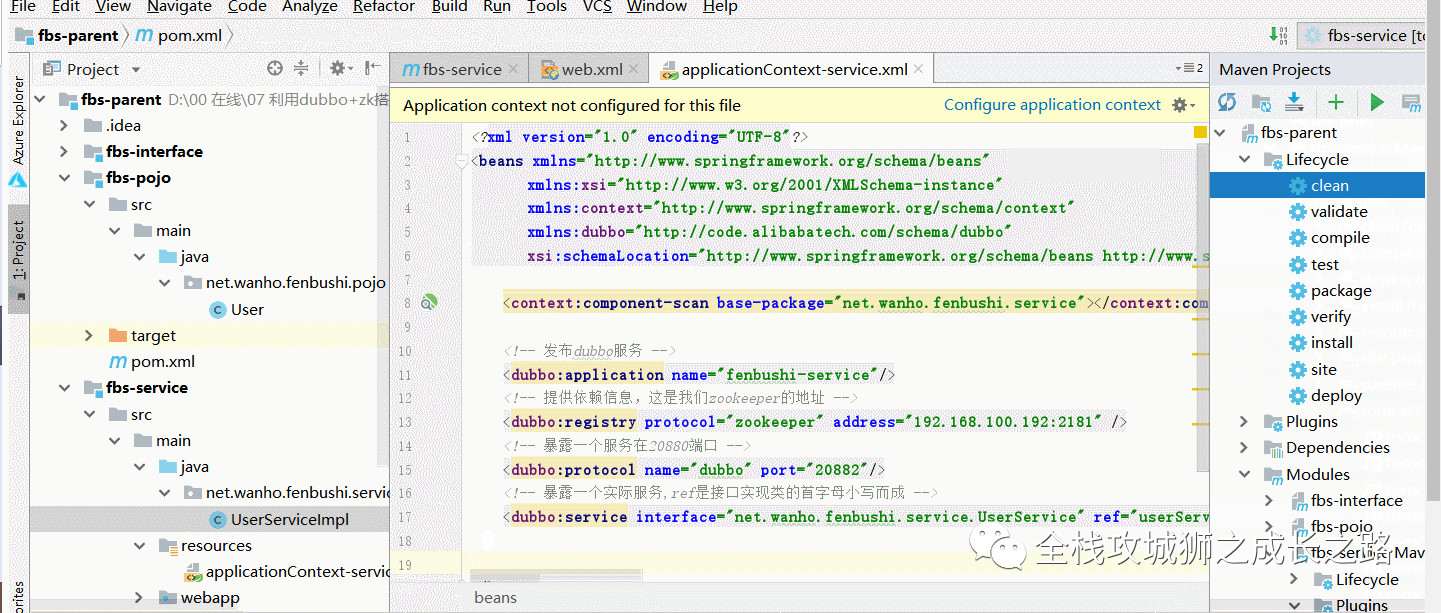
在该模块的的src/main下面加入resources文件夹,设置为Resources Root,在该文件夹下创建applicationContext-service.xml。
<?xml version="1.0" encoding="UTF-8"?><beans xmlns="http://www.springframework.org/schema/beans"xmlns:xsi="http://www.w3.org/2001/XMLSchema-instance"xmlns:context="http://www.springframework.org/schema/context"xmlns:dubbo="http://code.alibabatech.com/schema/dubbo"xsi:schemaLocation="http://www.springframework.org/schema/beans http://www.springframework.org/schema/beans/spring-beans.xsd http://www.springframework.org/schema/context http://www.springframework.org/schema/context/spring-context.xsd http://code.alibabatech.com/schema/dubbo http://code.alibabatech.com/schema/dubbo/dubbo.xsd"><context:component-scan base-package="net.wanho.fenbushi.service"></context:component-scan><!-- 发布dubbo服务 --><dubbo:application name="fenbushi-service"/><!-- 提供依赖信息,这是我们zookeeper的地址 --><dubbo:registry protocol="zookeeper" address="192.168.100.192:2181" /><!-- 暴露一个服务在20880端口 --><dubbo:protocol name="dubbo" port="20882"/><!-- 暴露一个实际服务,ref是接口实现类的首字母小写而成 --><dubbo:service interface="net.wanho.fenbushi.service.UserService" ref="userServiceImpl" timeout="30000"/></beans>
修改src/main/webapp/WEB-INF/web.xml,配置父容器即可
<!DOCTYPE web-app PUBLIC"-//Sun Microsystems, Inc.//DTD Web Application 2.3//EN""http://java.sun.com/dtd/web-app_2_3.dtd" ><web-app><display-name>Archetype Created Web Application</display-name><context-param><param-name>contextConfigLocation</param-name><param-value>classpath:applicationContext-service.xml</param-value></context-param><listener><listener-class>org.springframework.web.context.ContextLoaderListener</listener-class></listener></web-app>
项目结构如下:
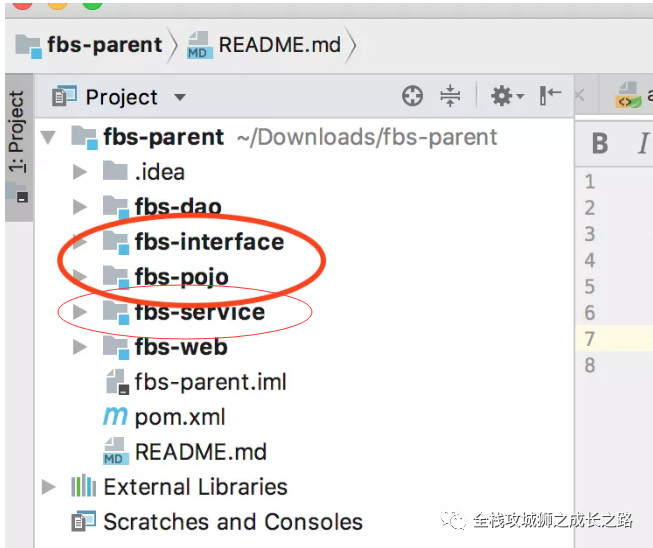
项目结构
8、启动以及测试
以tomcat插件方式启动
打开浏览器,输入http://192.168.4.201:8080/dubbo,按如下步骤操作:
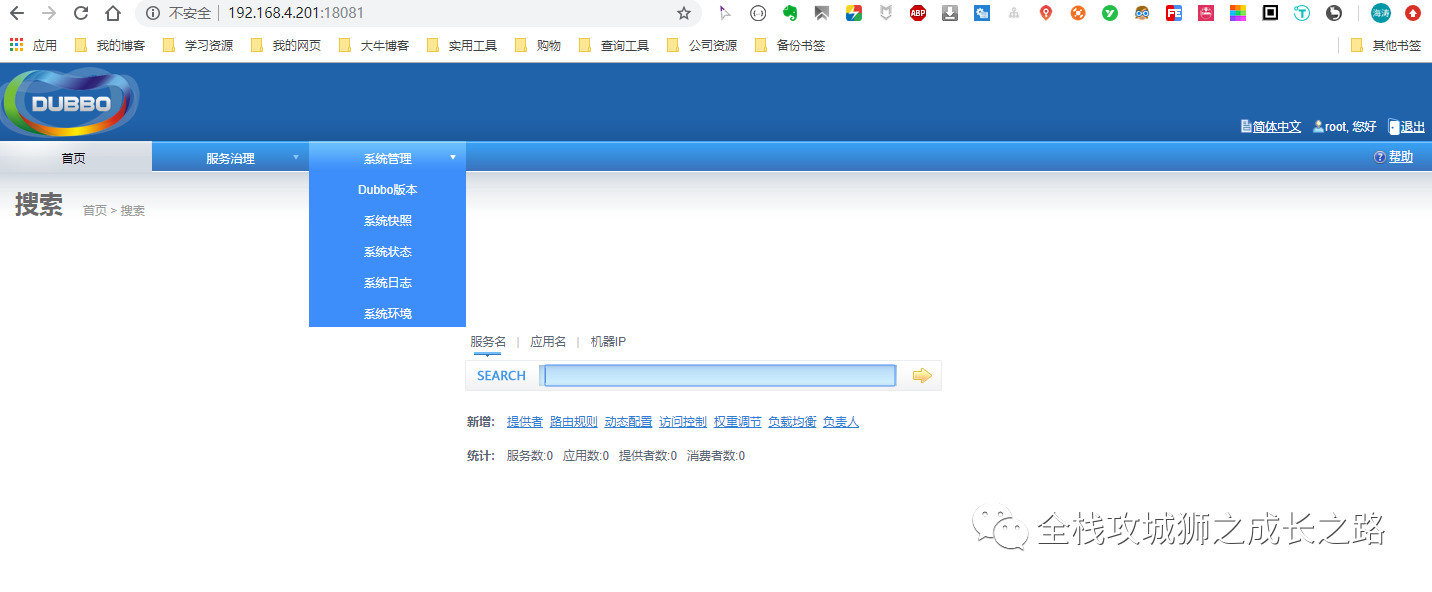
测试
我们看到,服务的生产者已经有了,缺少消费者,下面我们就创建web层,即服务消费者。


 1119
1119

 被折叠的 条评论
为什么被折叠?
被折叠的 条评论
为什么被折叠?
 到【灌水乐园】发言


