


 本文详细介绍了Spring Cloud Ribbon的工作原理及使用方法,包括其作为客户端负载均衡工具的特点、配置过程、核心组件IRule的实现与自定义策略。此外,还探讨了如何在Spring Boot项目中启用负载均衡。
Spring Cloud Ribbon是基于Netflix Ribbon实现的一套客户端负载均衡的工具。
官网地址:https://github.com/Netflix/ribbon/wiki/Getting-Started
简单地说,Ribbon是Netflix发布的开源项目,主要功能是提供客户端的软件负载均衡算法,将Netflix的中间层服务连接在一起。Ribbon客户端组件提供了一系列完善的配置项如连接超时,重试等。简单地说,就是在配置文件中列出Load Balancer(简称LB)后面所有的机器,Ribbon会自动的帮助你基于某种规则(如简单轮询、随机连接等)去连接这些机器。我们也很容易使用Ribbon实现自定义的负载均衡算法。
LB,即负载均衡(Load Balance),在微服务或分布式集群中经常用的一种应用。负载均衡简单的说就是将用户的请求平摊的分配到多个服务上,从而达到系统的HA(高可用)。常见的负载均衡软件有Nginx,LVS,硬件F5等。
LB分为集中式LB和进程内LB
-
集中式LB:即在服务的消费方和提供方之间使用独立的LB设施(可以是硬件如F5,也可以是软件如Nginx),由该设施负责把访问请求通过某种策略转发至服务的提供方。
-
进程内LB:将LB逻辑集成到消费方,消费方从服务注册中心获知有哪些地址可用,然后自己再从这些地址中选择出一个合适的服务器。Ribbon就属于进程内LB,它只是一个类库,集成于消费方进程,消费方通过它来获取到服务提供方的地址。
参考文档地址与源码:https://github.com/Netflix/ribbon/wiki
Ribbon工作步骤
①先选择EurekaServer,它优先选择在同一个区域内负载较少的Server;
② 根据用户指定的策略,从Server取到的服务注册列表中选择一个地址。
Ribbon提供了多种策略,如轮询、随机和根据响应时间加权。
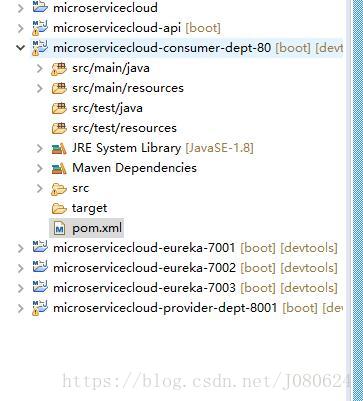
【1】消费者项目配置与修改
基础项目地址:GitHub项目地址。
① pom文件
<dependencies>
		<dependency><!-- 自己定义的api -->
			<groupId>com.web.springcloud</groupId>
			<artifactId>microservicecloud-api</artifactId>
			<version>${project.version}</version>
		</dependency>
		<!-- Cloud-Ribbon相关 -->
		<dependency>
			<groupId>org.springframework.cloud</groupId>
			<artifactId>spring-cloud-starter-eureka</artifactId>
		</dependency>
		<dependency>
			<groupId>org.springframework.cloud</groupId>
			<artifactId>spring-cloud-starter-ribbon</artifactId>
		</dependency>
		<dependency>
			<groupId>org.springframework.cloud</groupId>
			<artifactId>spring-cloud-starter-config</artifactId>
		</dependency>
			<!-- Spring Boot相关 -->
		<dependency>
			<groupId>org.springframework.boot</groupId>
			<artifactId>spring-boot-starter-web</artifactId>
		</dependency>
		<!-- 修改后立即生效,热部署相关 -->
		<dependency>
			<groupId>org.springframework</groupId>
			<artifactId>springloaded</artifactId>
		</dependency>
		<dependency>
			<groupId>org.springframework.boot</groupId>
			<artifactId>spring-boot-devtools</artifactId>
		</dependency>
	</dependencies>
② application.yml
server:
  port: 80

spring:
  application:
    name: microservicecloud-consumer

eureka:
  instance:
    prefer-ip-address: true # 注册服务的时候使用服务的ip地址
  client:
    register-with-eureka: false # 不向服务注册中心注册自己
    service-url:
      defaultZone: http://eureka7001.com:7001/eureka/,http://eureka7002.com:7002/eureka/,http://eureka7003.com:7003/eureka/
#      defaultZone: http://localhost:7001/eureka/
③自定义配置类注册RestTemplate开启负载均衡
@Configuration
public class ConfigBean {

	@LoadBalanced//开启负载均衡机制
    @Bean
    public RestTemplate restTemplate(){
        return new RestTemplate(); // 用来进行HTTP通信
    }

}
④ 主启动类添加@EnableEurekaClient
@SpringBootApplication
@EnableEurekaClient
public class DeptConsumer80_App
{
	public static void main(String[] args)
	{
		SpringApplication.run(DeptConsumer80_App.class, args);
	}
}
⑤ 修改客户端访问类
@RestController
public class DeptController_Consumer
{

//	private static final String REST_URL_PREFIX = "http://localhost:8001";
	private static final String REST_URL_PREFIX = "http://MICROSERVICECLOUD-DEPT";
	//这里使用服务名,也就是服务提供者应用名大写
	@Autowired
	private RestTemplate restTemplate;
	//...
}
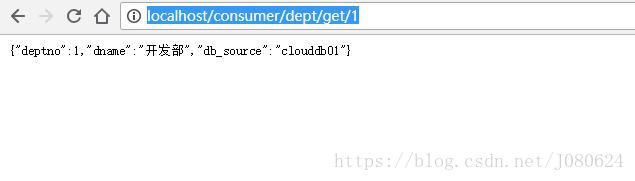
⑥ 测试
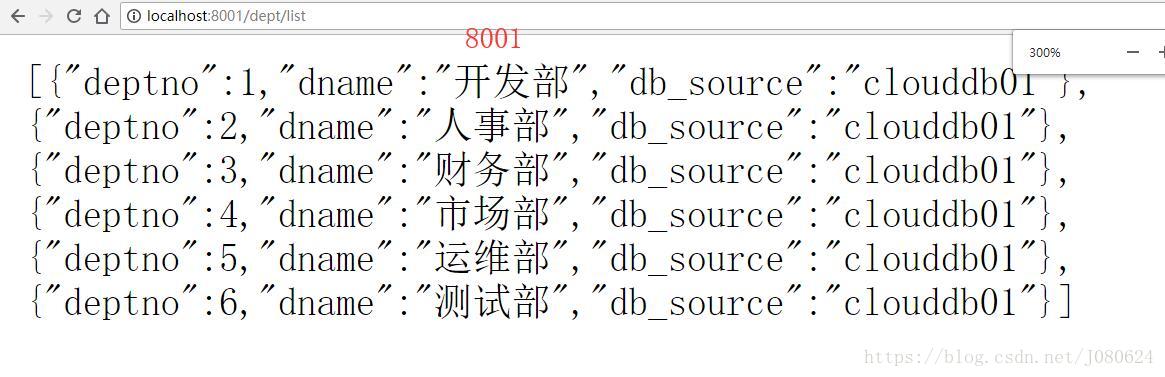
分别依次启动服务注册中心7001,7002和7003,服务提供者8001和服务消费者80,浏览器访问:http://localhost/consumer/dept/get/1,界面如下:
【2】构建并启动多个服务提供者
① 参考microservicecloud-provider-dept-8001,分别新建8002 8003
② 新建8002 8003数据库,各自微服务分别连各自数据库

③ 修改8002、8003各自yml
参考8001的yml,主要修改的地方有端口,数据库连接url和自定义服务实例名(instance-id),但是一定不要修改应用名–spring.application.name!!!
8002 yml修改如下:
server:
  port: 8002

mybatis:
  config-location: classpath:mybatis/mybatis.cfg.xml        # mybatis配置文件所在路径
  type-aliases-package: com.web.springcloud.entities    # 所有Entity别名类所在包
  mapper-locations:
  - classpath:mybatis/mapper/**/*.xml                       # mapper映射文件

spring:
   application:
    name: microservicecloud-dept # 这里不能修改
   datasource:
    type: com.alibaba.druid.pool.DruidDataSource            # 当前数据源操作类型
    driver-class-name: com.mysql.jdbc.Driver              # mysql驱动包
#    driver-class-name: org.gjt.mm.mysql.Driver              # mysql驱动包
    url: jdbc:mysql://localhost:3306/clouddb02              # 数据库名称
    username: root
    password: 123456
    initialSize: 5
    minIdle: 5
    maxActive: 20
    maxWait: 60000
    timeBetweenEvictionRunsMillis: 60000
    minEvictableIdleTimeMillis: 300000
    validationQuery: SELECT 1 FROM DUAL
    testWhileIdle: true
    testOnBorrow: true
    testOnReturn: false
    poolPreparedStatements: true
    #配置监控统计拦截的filters,去掉后监控界面sql无法统计,'wall'用于防火墙
    filters: stat,wall,log4j
    maxPoolPreparedStatementPerConnectionSize: 20
    useGlobalDataSourceStat: true
    connectionProperties: druid.stat.mergeSql=true;druid.stat.slowSqlMillis=500
#    dbcp2:
#      min-idle: 5                                           # 数据库连接池的最小维持连接数
#      initial-size: 5                                       # 初始化连接数
#      max-total: 5                                          # 最大连接数
#      max-wait-millis: 200                                  # 等待连接获取的最大超时时间

eureka:
  client: #客户端注册进eureka服务列表内
    service-url:
      defaultZone: http://eureka7001.com:7001/eureka/,http://eureka7002.com:7002/eureka/,http://eureka7003.com:7003/eureka/
#      defaultZone: http://localhost:7001/eureka/
  instance:
    instance-id: microservicecloud-dept8002 # 自定义服务实例Id
    prefer-ip-address: true     #访问路径可以显示IP地址

# http://192.168.2.100:8002/info优化显示
info:
  app.name: web-microservicecloud
  company.name: www.web.com
  build.artifactId: $project.artifactId$
  build.version: $project.version$

④ 分别启动服务中心7001 7002 7003和服务提供者8001 8002 8003
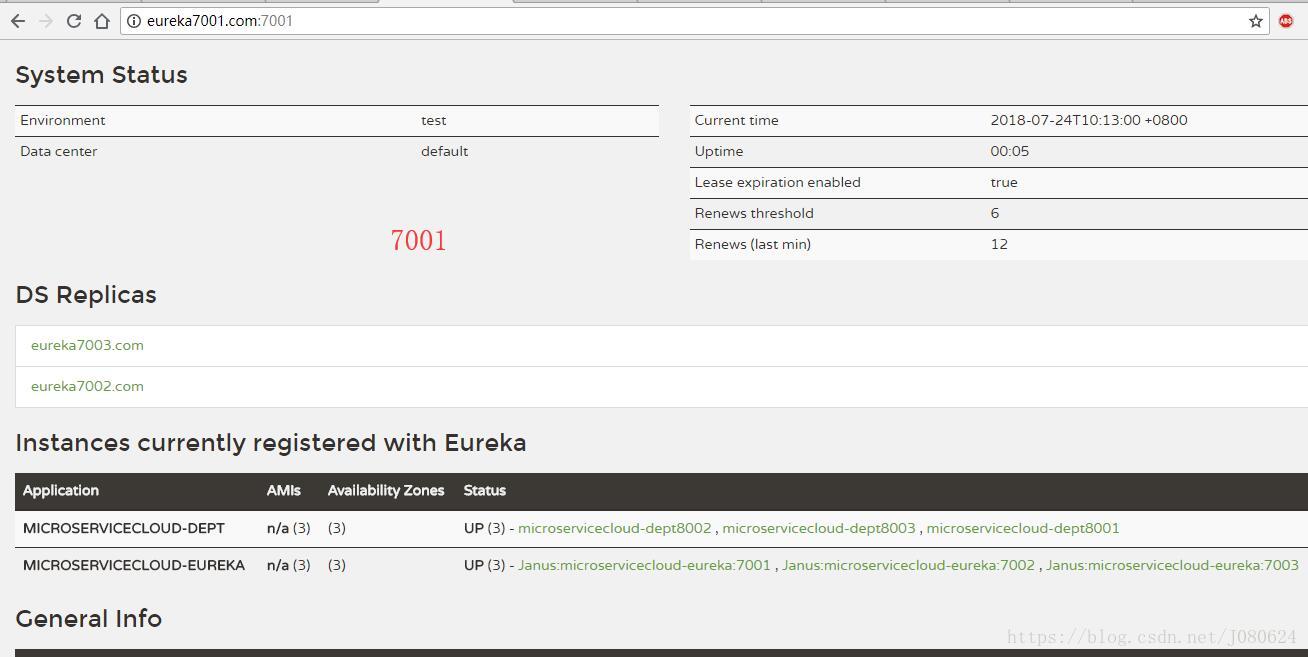
⑤ 启动服务消费者进行多次测试(此时RestTemplate已经添加了@LoadBalanced注解)
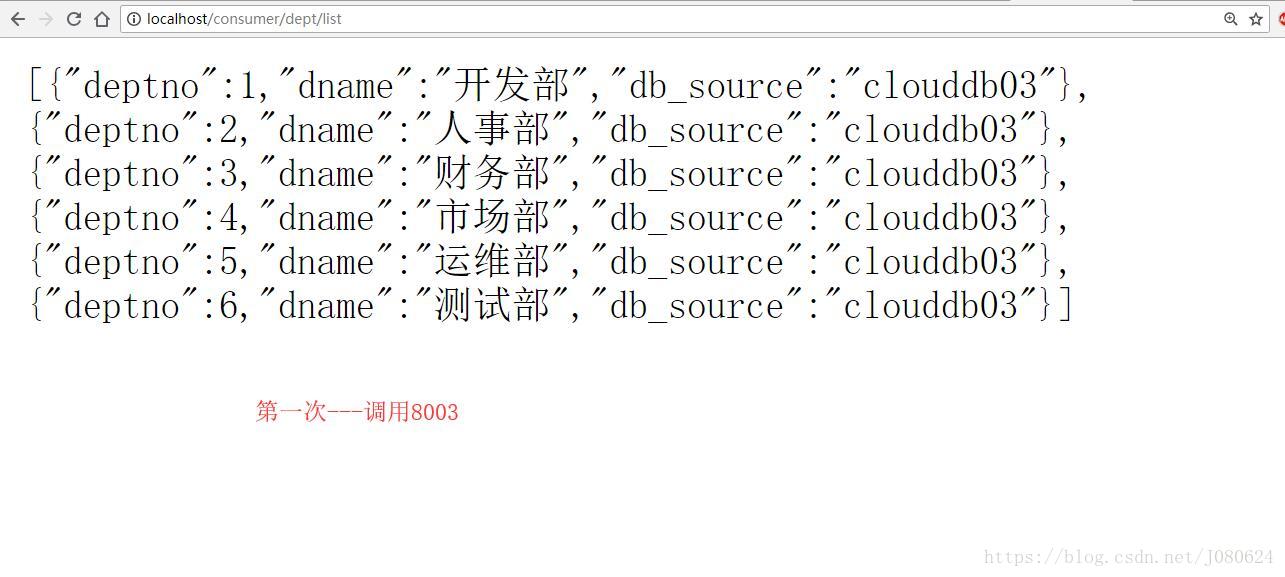
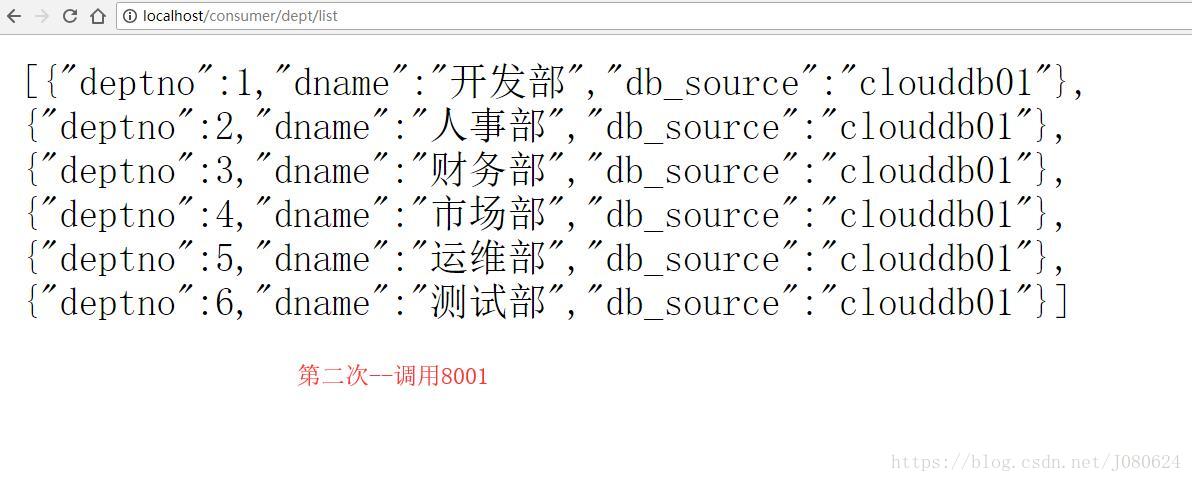
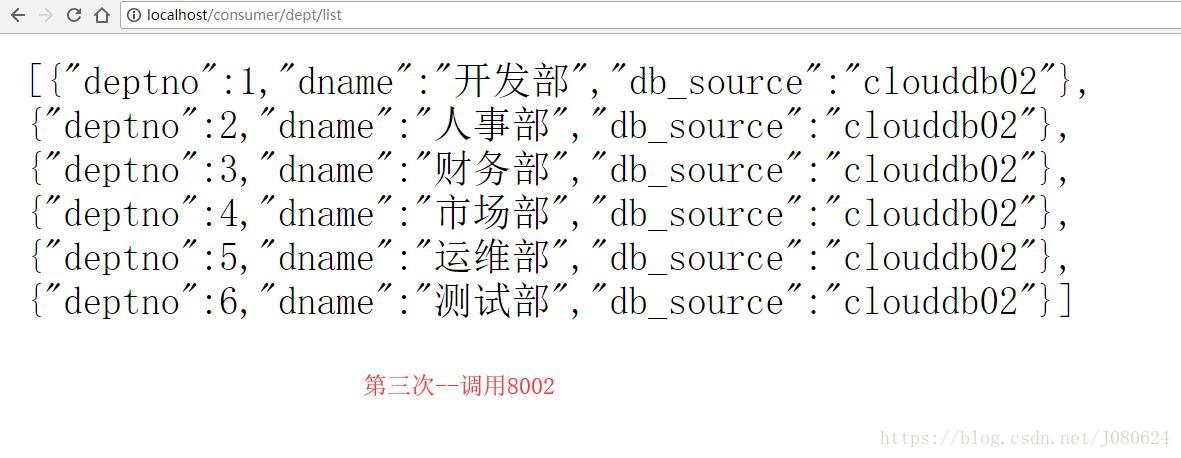
默认负载均衡算法为轮询算法!!!
总结:Ribbon其实就是一个软负载均衡的客户端组件,它可以和其他所需请求的客户端结合使用,和Eureka结合只是其中一个实例。
【3】Ribbon核心组件IRule
IRule:根据特定算法从服务列表中选取一个要访问的服务。
public interface IRule{

// 从server列表选择一个server
    public Server choose(Object key);

    public void setLoadBalancer(ILoadBalancer lb);

    public ILoadBalancer getLoadBalancer();
}
其实现类如下:
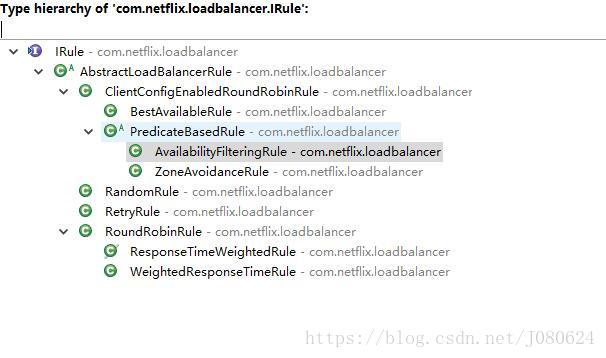
① RoundRobinRule
最基础的轮询算法–默认使用的算法。
② RandomRule
见名知意,随机选取。
③ AvailabilityFilteringRule
会先过滤掉由于多次访问故障而处于断路器跳闸状态的服务,还有并发的连接数量超过阈值的服务。然后对剩余的服务列表按照轮询策略进行访问。
④ WeightedResponseTimeRule
根据平均响应时间计算所有服务的权重,响应时间越快服务权重越大被选中的概率越高。刚启动时如果统计信息不足,会使用 RoundRobinRule策略。等统计信息足够,会切换到WeightedResponseTimeRule。
⑤ RetryRule
先按照 RoundRobinRule策略获取服务,如果获取服务失败则在指定时间内会进行重试获取可用的服务。
⑥ BestAvailableRule
会先过滤掉由于多次访问故障而处于断路器跳闸状态的服务,然后选取一个并发量最小的服务。
⑦ ZoneAvoidanceRule
复合判断Server所在区域的性能和Server的可用性来选择服务器。
【4】为什么IRule默认使用RoundRobinRule?
RoundRobinRule负载均衡算法:rest接口第几次请求数 % 服务器集群总数量 = 实际调用服务器位置下标 ,每次服务重启动后rest接口计数从1开始。
① 首先从RestTemplate添加注解@LoadBalanced 可知,负载均衡离不开LoadBalancerClient
/**
 * Annotation to mark a RestTemplate bean to be configured to use a LoadBalancerClient
 * @author Spencer Gibb
 */
@Target({ ElementType.FIELD, ElementType.PARAMETER, ElementType.METHOD })
@Retention(RetentionPolicy.RUNTIME)
@Documented
@Inherited
@Qualifier
public @interface LoadBalanced {
}
该接口LoadBalancerClient只有一个实现类:RibbonLoadBalancerClient
② RibbonLoadBalancerClient
package org.springframework.cloud.netflix.ribbon;

import java.io.IOException;
import java.net.URI;
import java.util.Collections;
import java.util.Map;
import org.springframework.cloud.client.DefaultServiceInstance;
import org.springframework.cloud.client.ServiceInstance;
import org.springframework.cloud.client.loadbalancer.LoadBalancerClient;
import org.springframework.cloud.client.loadbalancer.LoadBalancerRequest;
import org.springframework.util.Assert;
import org.springframework.util.ReflectionUtils;
import com.netflix.client.config.IClientConfig;
import com.netflix.loadbalancer.ILoadBalancer;
import com.netflix.loadbalancer.Server;

/**
 * @author Spencer Gibb
 * @author Dave Syer
 * @author Ryan Baxter
 */
public class RibbonLoadBalancerClient implements LoadBalancerClient {

	private SpringClientFactory clientFactory;

	public RibbonLoadBalancerClient(SpringClientFactory clientFactory) {
		this.clientFactory = clientFactory;
	}

	@Override
	public URI reconstructURI(ServiceInstance instance, URI original) {
		Assert.notNull(instance, "instance can not be null");
		String serviceId = instance.getServiceId();
		RibbonLoadBalancerContext context = this.clientFactory
				.getLoadBalancerContext(serviceId);
		Server server = new Server(instance.getHost(), instance.getPort());
		IClientConfig clientConfig = clientFactory.getClientConfig(serviceId);
		ServerIntrospector serverIntrospector = serverIntrospector(serviceId);
		URI uri = RibbonUtils.updateToHttpsIfNeeded(original, clientConfig,
				serverIntrospector, server);
		return context.reconstructURIWithServer(server, uri);
	}

	@Override
	public ServiceInstance choose(String serviceId) {
		Server server = getServer(serviceId);
		if (server == null) {
			return null;
		}
		return new RibbonServer(serviceId, server, isSecure(server, serviceId),
				serverIntrospector(serviceId).getMetadata(server));
	}

	@Override
	public <T> T execute(String serviceId, LoadBalancerRequest<T> request) throws IOException {
		ILoadBalancer loadBalancer = getLoadBalancer(serviceId);
		Server server = getServer(loadBalancer);
		if (server == null) {
			throw new IllegalStateException("No instances available for " + serviceId);
		}
		RibbonServer ribbonServer = new RibbonServer(serviceId, server, isSecure(server,
				serviceId), serverIntrospector(serviceId).getMetadata(server));

		return execute(serviceId, ribbonServer, request);
	}

	@Override
	public <T> T execute(String serviceId, ServiceInstance serviceInstance, LoadBalancerRequest<T> request) throws IOException {
		Server server = null;
		if(serviceInstance instanceof RibbonServer) {
			server = ((RibbonServer)serviceInstance).getServer();
		}
		if (server == null) {
			throw new IllegalStateException("No instances available for " + serviceId);
		}

		RibbonLoadBalancerContext context = this.clientFactory
				.getLoadBalancerContext(serviceId);
		RibbonStatsRecorder statsRecorder = new RibbonStatsRecorder(context, server);

		try {
			T returnVal = request.apply(serviceInstance);
			statsRecorder.recordStats(returnVal);
			return returnVal;
		}
		// catch IOException and rethrow so RestTemplate behaves correctly
		catch (IOException ex) {
			statsRecorder.recordStats(ex);
			throw ex;
		}
		catch (Exception ex) {
			statsRecorder.recordStats(ex);
			ReflectionUtils.rethrowRuntimeException(ex);
		}
		return null;
	}

	private ServerIntrospector serverIntrospector(String serviceId) {
		ServerIntrospector serverIntrospector = this.clientFactory.getInstance(serviceId,
				ServerIntrospector.class);
		if (serverIntrospector == null) {
			serverIntrospector = new DefaultServerIntrospector();
		}
		return serverIntrospector;
	}

	private boolean isSecure(Server server, String serviceId) {
		IClientConfig config = this.clientFactory.getClientConfig(serviceId);
		ServerIntrospector serverIntrospector = serverIntrospector(serviceId);
		return RibbonUtils.isSecure(config, serverIntrospector, server);
	}

	protected Server getServer(String serviceId) {
		return getServer(getLoadBalancer(serviceId));
	}

	protected Server getServer(ILoadBalancer loadBalancer) {
		if (loadBalancer == null) {
			return null;
		}
		return loadBalancer.chooseServer("default"); // TODO: better handling of key
	}

	protected ILoadBalancer getLoadBalancer(String serviceId) {
		return this.clientFactory.getLoadBalancer(serviceId);
	}

//...

}
首先需要拿到ILoadBalancer 才能获取Server:
	protected ILoadBalancer getLoadBalancer(String serviceId) {
		return this.clientFactory.getLoadBalancer(serviceId);
	}
其中在获取Server时,默认key–default :
protected Server getServer(ILoadBalancer loadBalancer) {
		if (loadBalancer == null) {
			return null;
		}
		return loadBalancer.chooseServer("default"); // TODO: better handling of key
	}
③ ILoadBalancer
源码如下:
package com.netflix.loadbalancer;

import java.util.List;

public interface ILoadBalancer {


	 // 初始化server 列表
	public void addServers(List<Server> newServers);


	 //从一个负载均衡器获取一个server
	public Server chooseServer(Object key);


	 // 通知服务下线
	public void markServerDown(Server server);

	 // 获取服务列表,true表示只会返回存活的服务;已过期,被下面两个方法替代
	@Deprecated
	public List<Server> getServerList(boolean availableOnly);


     //返回存活的服务列表
    public List<Server> getReachableServers();


     //返回所有服务列表
	public List<Server> getAllServers();
}
实现类如下:
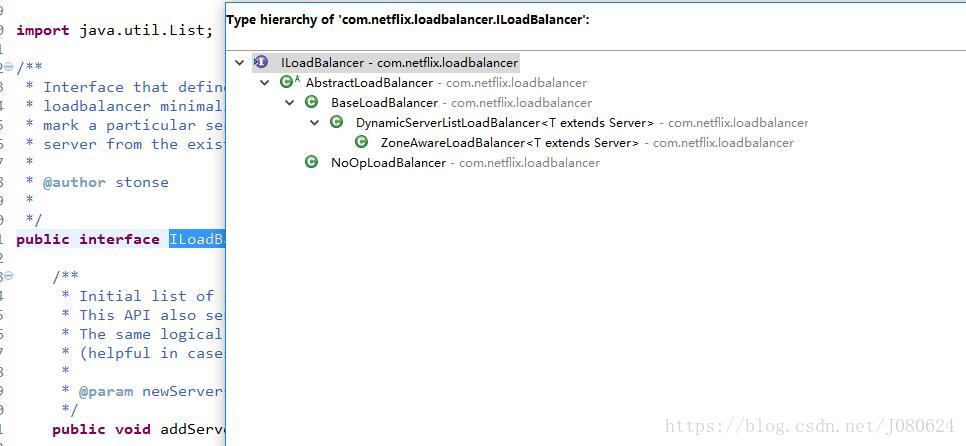
④ BaseLoadBalancer
负载均衡的一个默认实现,可以将任意的服务器列表设置为服务器池。内部维护了allServerList 和 upServerList两个server列表。
/**
 * A basic implementation of the load balancer where an arbitrary list of
 * servers can be set as the server pool. A ping can be set to determine the
 * liveness of a server. Internally, this class maintains an "all" server list
 * and an "up" server list and use them depending on what the caller asks for.
 *
 * @author stonse
 *
 */
public class BaseLoadBalancer extends AbstractLoadBalancer implements
        PrimeConnections.PrimeConnectionListener, IClientConfigAware {

    private static Logger logger = LoggerFactory
            .getLogger(BaseLoadBalancer.class);
    private final static IRule DEFAULT_RULE = new RoundRobinRule();
    // 这里这里这里!!!
    private final static SerialPingStrategy DEFAULT_PING_STRATEGY = new SerialPingStrategy();
    private static final String DEFAULT_NAME = "default";
    private static final String PREFIX = "LoadBalancer_";

    protected IRule rule = DEFAULT_RULE;

    protected IPingStrategy pingStrategy = DEFAULT_PING_STRATEGY;

    protected IPing ping = null;

    @Monitor(name = PREFIX + "AllServerList", type = DataSourceType.INFORMATIONAL)
    protected volatile List<Server> allServerList = Collections
            .synchronizedList(new ArrayList<Server>());
    @Monitor(name = PREFIX + "UpServerList", type = DataSourceType.INFORMATIONAL)
    protected volatile List<Server> upServerList = Collections
            .synchronizedList(new ArrayList<Server>());

    protected ReadWriteLock allServerLock = new ReentrantReadWriteLock();
    protected ReadWriteLock upServerLock = new ReentrantReadWriteLock();

    protected String name = DEFAULT_NAME;

    protected Timer lbTimer = null;
    protected int pingIntervalSeconds = 10;
    protected int maxTotalPingTimeSeconds = 5;
    protected Comparator<Server> serverComparator = new ServerComparator();

    protected AtomicBoolean pingInProgress = new AtomicBoolean(false);

    protected LoadBalancerStats lbStats;

    private volatile Counter counter = Monitors.newCounter("LoadBalancer_ChooseServer");

    private PrimeConnections primeConnections;

    private volatile boolean enablePrimingConnections = false;

    private IClientConfig config;

    private List<ServerListChangeListener> changeListeners = new CopyOnWriteArrayList<ServerListChangeListener>();

    private List<ServerStatusChangeListener> serverStatusListeners = new CopyOnWriteArrayList<ServerStatusChangeListener>();

    /**
     * Default constructor which sets name as "default", sets null ping, and
     * {@link RoundRobinRule} as the rule.
     * <p>
     * This constructor is mainly used by {@link ClientFactory}. Calling this
     * constructor must be followed by calling {@link #init()} or
     * {@link #initWithNiwsConfig(IClientConfig)} to complete initialization.
     * This constructor is provided for reflection. When constructing
     * programatically, it is recommended to use other constructors.
     */
    public BaseLoadBalancer() {
        this.name = DEFAULT_NAME;
        this.ping = null;
        setRule(DEFAULT_RULE);
        // 空参使用默认Rule
        setupPingTask();
        lbStats = new LoadBalancerStats(DEFAULT_NAME);
    }

    public BaseLoadBalancer(String lbName, IRule rule, LoadBalancerStats lbStats) {
        this(lbName, rule, lbStats, null);
    }
    //...
 }
其中setRule(IRule rule) :
 /* Ignore null rules */

    public void setRule(IRule rule) {
        if (rule != null) {
            this.rule = rule;
        } else {
            /* default rule */
            this.rule = new RoundRobinRule();
        }
        if (this.rule.getLoadBalancer() != this) {
            this.rule.setLoadBalancer(this);
        }
    }
到此明白了,为什么会默认使用RoundRobinRule !!!
【5】为什么RestTemplate添加注解@LoadBalanced就可以实现负载均衡?
实例如下:
@Configuration
public class ConfigBean {

	@LoadBalanced//开启负载均衡机制
    @Bean
    public RestTemplate restTemplate(){
        return new RestTemplate(); // 用来进行HTTP通信
    }

}
这里就要联想到SpringBoot中的许许多多自动配置类!!!
LoadBalancerAutoConfiguration 源码如下:
/**
 * Auto configuration for Ribbon (client side load balancing).
 *
 * @author Spencer Gibb
 * @author Dave Syer
 * @author Will Tran
 */
@Configuration
@ConditionalOnClass(RestTemplate.class)
@ConditionalOnBean(LoadBalancerClient.class)
@EnableConfigurationProperties(LoadBalancerRetryProperties.class)
public class LoadBalancerAutoConfiguration {

	@LoadBalanced
	@Autowired(required = false)
	private List<RestTemplate> restTemplates = Collections.emptyList();

	@Bean
	public SmartInitializingSingleton loadBalancedRestTemplateInitializer(
			final List<RestTemplateCustomizer> customizers) {
		return new SmartInitializingSingleton() {
			@Override
			public void afterSingletonsInstantiated() {
				for (RestTemplate restTemplate : LoadBalancerAutoConfiguration.this.restTemplates) {
					for (RestTemplateCustomizer customizer : customizers) {
						customizer.customize(restTemplate);
					}
				}
			}
		};
	}

	@Autowired(required = false)
	private List<LoadBalancerRequestTransformer> transformers = Collections.emptyList();

	@Bean
	@ConditionalOnMissingBean
	public LoadBalancerRequestFactory loadBalancerRequestFactory(
			LoadBalancerClient loadBalancerClient) {
		return new LoadBalancerRequestFactory(loadBalancerClient, transformers);
	}

	@Configuration
	@ConditionalOnMissingClass("org.springframework.retry.support.RetryTemplate")
	static class LoadBalancerInterceptorConfig {
		@Bean
		public LoadBalancerInterceptor ribbonInterceptor(
				LoadBalancerClient loadBalancerClient,
				LoadBalancerRequestFactory requestFactory) {
			return new LoadBalancerInterceptor(loadBalancerClient, requestFactory);
		}

		@Bean
		@ConditionalOnMissingBean
		public RestTemplateCustomizer restTemplateCustomizer(
				final LoadBalancerInterceptor loadBalancerInterceptor) {
			return new RestTemplateCustomizer() {
				@Override
				public void customize(RestTemplate restTemplate) {
					List<ClientHttpRequestInterceptor> list = new ArrayList<>(
							restTemplate.getInterceptors());
					list.add(loadBalancerInterceptor);
					restTemplate.setInterceptors(list);
				}
			};
		}
	}

	@Configuration
	@ConditionalOnClass(RetryTemplate.class)
	static class RetryAutoConfiguration {
		@Bean
		public RetryTemplate retryTemplate() {
			RetryTemplate template =  new RetryTemplate();
			template.setThrowLastExceptionOnExhausted(true);
			return template;
		}

		@Bean
		@ConditionalOnMissingBean
		public LoadBalancedRetryPolicyFactory loadBalancedRetryPolicyFactory() {
			return new LoadBalancedRetryPolicyFactory.NeverRetryFactory();
		}

		@Bean
		public RetryLoadBalancerInterceptor ribbonInterceptor(
				LoadBalancerClient loadBalancerClient, LoadBalancerRetryProperties properties,
				LoadBalancedRetryPolicyFactory lbRetryPolicyFactory,
				LoadBalancerRequestFactory requestFactory) {
			return new RetryLoadBalancerInterceptor(loadBalancerClient, retryTemplate(), properties,
					lbRetryPolicyFactory, requestFactory);
		}

		@Bean
		@ConditionalOnMissingBean
		public RestTemplateCustomizer restTemplateCustomizer(
				final RetryLoadBalancerInterceptor loadBalancerInterceptor) {
			return new RestTemplateCustomizer() {
				@Override
				public void customize(RestTemplate restTemplate) {
					List<ClientHttpRequestInterceptor> list = new ArrayList<>(
							restTemplate.getInterceptors());
					list.add(loadBalancerInterceptor);
					restTemplate.setInterceptors(list);
				}
			};
		}
	}
}
【6】其他算法替换默认RoundRobinRule
如,使用RandomRule替换RoundRobinRule:
@Configuration
public class ConfigBean {

	@LoadBalanced//开启负载均衡机制
    @Bean
    public RestTemplate restTemplate(){
        return new RestTemplate(); // 用来进行HTTP通信
    }
	// 在容器中注册IRule即可
	@Bean
	public IRule myRule(){
		return new RandomRule();
	}

}
【7】自定义Ribbon负载均衡策略
① 主启动类添加@RibbonClient注解
在启动微服务的时候就能去加载我们的自定义Ribbon配置类,从而使配置生效。
@SpringBootApplication
//在启动该微服务的时候就能去加载我们的自定义Ribbon配置类,从而使配置生效
@RibbonClient(name="MICROSERVICECLOUD-DEPT",configuration=MySelfRule.class)
@EnableDiscoveryClient //服务发现
public class DeptConsumer80_App
{
	public static void main(String[] args)
	{
		SpringApplication.run(DeptConsumer80_App.class, args);
	}
}
解释:在调用MICROSERVICECLOUD-DEPT服务时,使用我们自定义的MySelfRule负载均衡策略。
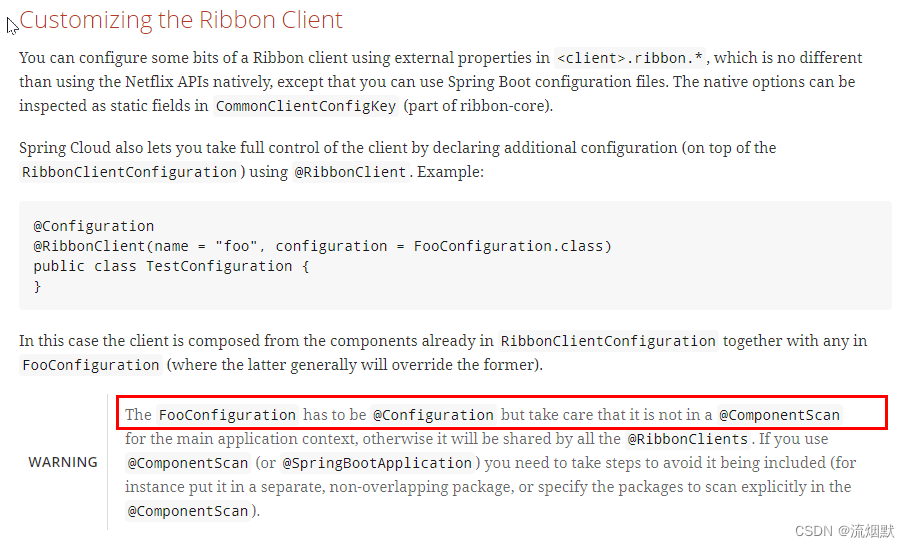
② 自定义配置类位置
这个自定义配置类不能放在@ComponentScan所扫描的当前包与子包下,否则我们自定义的这个配置类就会被所有的Ribbon客户端共享,也就是说我们达不到特殊化定制的目的。
③ 两个需求
第一,针对服务MICROSERVICECLOUD-DEPT使用Ribbon其他自带算法;
第二,依旧轮询策略,但是每个服务器被调用5次。
MySelfRule源码如下:
@Configuration
public class MySelfRule
{
	@Bean
	public IRule myRule()
	{
		//return new RandomRule();// Ribbon默认是轮询,我自定义为随机
		//return new RoundRobinRule();// Ribbon默认是轮询,我自定义为随机

		return new MyRoundRobinRule();// 我自定义为每台机器5次
	}
}
MyRoundRobinRule如下:
package com.web.myrule;

import java.util.List;

import com.netflix.client.config.IClientConfig;
import com.netflix.loadbalancer.AbstractLoadBalancerRule;
import com.netflix.loadbalancer.ILoadBalancer;
import com.netflix.loadbalancer.Server;

public class MyRoundRobinRule extends AbstractLoadBalancerRule
{

	// total = 0 // 当total==5以后,我们指针才能往下走,
	// index = 0 // 当前对外提供服务的服务器地址,
	// total需要重新置为零,但是已经达到过一个5次,我们的index = 1
	// 分析:我们5次,但是微服务只有8001 8002 8003 三台,OK?
	//


	private int total = 0; 			// 总共被调用的次数,目前要求每台被调用5次
	private int currentIndex = 0;	// 当前提供服务的机器号

	public Server choose(ILoadBalancer lb, Object key)
	{
		if (lb == null) {
			return null;
		}
		Server server = null;

		while (server == null) {
			if (Thread.interrupted()) {
				return null;
			}
			List<Server> upList = lb.getReachableServers();
			List<Server> allList = lb.getAllServers();

			int serverCount = allList.size();
			if (serverCount == 0) {
				/*
				 * No servers. End regardless of pass, because subsequent passes only get more
				 * restrictive.
				 */
				return null;
			}

//			int index = rand.nextInt(serverCount);// java.util.Random().nextInt(3);
//			server = upList.get(index);


//			private int total = 0; 			// 总共被调用的次数,目前要求每台被调用5次
//			private int currentIndex = 0;	// 当前提供服务的机器号
            if(total < 5)
            {
	            server = upList.get(currentIndex);
	            total++;
            }else {
	            total = 0;
	            currentIndex++;
	            if(currentIndex >= upList.size())
	            {
	              currentIndex = 0;
	            }
            }


			if (server == null) {
				/*
				 * The only time this should happen is if the server list were somehow trimmed.
				 * This is a transient condition. Retry after yielding.
				 */
				Thread.yield();
				continue;
			}

			if (server.isAlive()) {
				return (server);
			}

			// Shouldn't actually happen.. but must be transient or a bug.
			server = null;
			Thread.yield();
		}

		return server;

	}

	@Override
	public Server choose(Object key)
	{
		return choose(getLoadBalancer(), key);
	}

	@Override
	public void initWithNiwsConfig(IClientConfig clientConfig)
	{
		// TODO Auto-generated method stub

	}

}
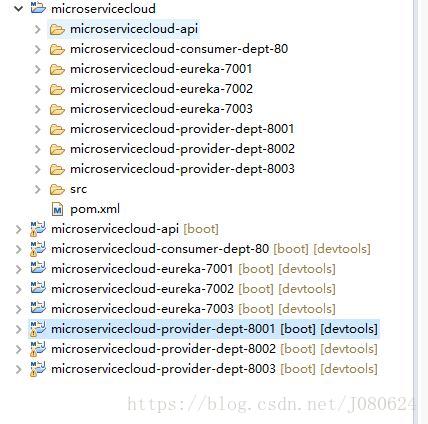
代码结构图如下:
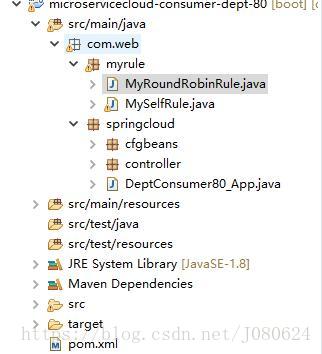
本篇博文项目源码:https://github.com/JanusJ/SpringCloud
【8】Spring Cloud H系列
H系列 Eureka和Ribbonpom文件如下所示:
<dependency>
    <groupId>org.springframework.cloud</groupId>
    <artifactId>spring-cloud-starter-netflix-ribbon</artifactId>
</dependency>


<dependency>
    <groupId>org.springframework.cloud</groupId>
    <artifactId>spring-cloud-starter-netflix-eureka-client</artifactId>
</dependency>
spring-cloud-starter-netflix-eureka-client自带了spring-cloud-starter-ribbon引用,故而不需要显式引入spring-cloud-starter-netflix-ribbon 。


 926
926


 到【灌水乐园】发言


