


 本文档详细介绍了如何在Spring Boot项目中集成并配置Swagger2,以生成RESTful API的文档。首先,你需要在pom.xml中添加Swagger2的两个依赖。接着,创建一个Swagger2配置类,启用Swagger2,并配置扫描的基础包。然后,根据需求,可能需要在Application启动类上添加@EnableSwagger2注解,并在Web配置类中处理静态资源访问。通过这些步骤,你可以实现Swagger2的集成,便于API的管理和文档展示。但请注意,正式环境中应考虑关闭Swagger以避免不必要的安全风险。
废话不多说,四步走:
1.添加maven依赖
        <!-- swagger -->
        <dependency>
            <groupId>io.springfox</groupId>
            <artifactId>springfox-swagger-ui</artifactId>
            <version>2.4.0</version>
        </dependency>
        <dependency>
            <groupId>io.springfox</groupId>
            <artifactId>springfox-swagger2</artifactId>
            <version>2.4.0</version>
        </dependency>
2.Application启动类同级目录下,添加类Swagger2
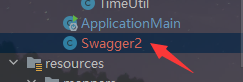
(不用在意类名的颜色)
import org.springframework.boot.autoconfigure.condition.ConditionalOnProperty;
import org.springframework.context.annotation.Bean;
import  org.springframework.context.annotation.Configuration;
import springfox.documentation.builders.ApiInfoBuilder;
import springfox.documentation.builders.PathSelectors;
import  springfox.documentation.builders.RequestHandlerSelectors;
import springfox.documentation.service.ApiInfo;
import springfox.documentation.service.Contact;
import springfox.documentation.spi.DocumentationType;
import springfox.documentation.spring.web.plugins.Docket;
import  springfox.documentation.swagger2.annotations.EnableSwagger2;
//swagger2的配置文件,在项目的启动类的同级文件建立
@Configuration
@EnableSwagger2
//是否开启swagger,正式环境一般是需要关闭的(避免不必要的漏洞暴露!),可根据springboot的多环境配置进行设置
@ConditionalOnProperty(name = "swagger.enable",  havingValue = "true")
public class Swagger2 {
    // swagger2的配置文件,这里可以配置swagger2的一些基本的内容,比如扫描的包等等
    @Bean
    public Docket createRestApi() {
        return new Docket(DocumentationType.SWAGGER_2)
                .apiInfo(apiInfo())
                .select()
                // 为当前包路径
                .apis(RequestHandlerSelectors.basePackage("cn.xdf.springboot.controller")).paths(PathSelectors.any())
                .build();
    }
    // 构建 api文档的详细信息函数,注意这里的注解引用的是哪个
    private ApiInfo apiInfo() {
        return new ApiInfoBuilder()
                // 页面标题
                .title("Spring Boot 测试使用 Swagger2 构建RESTful API")
                // 创建人信息
                .contact(new Contact("Xiaohang",  "https://blog.youkuaiyun.com/IT_TIfarmer",  "844940114@qq.com"))
                // 版本号
                .version("1.0")
                // 描述
                .description("API 描述")
                .build();
    }
}
理论上以上两步已经足够了,可在我的idea环境里,这还不行,有时候要执行第三步,如果执行完第三步访问swagger页面还报错404的话,那就执行第四步!
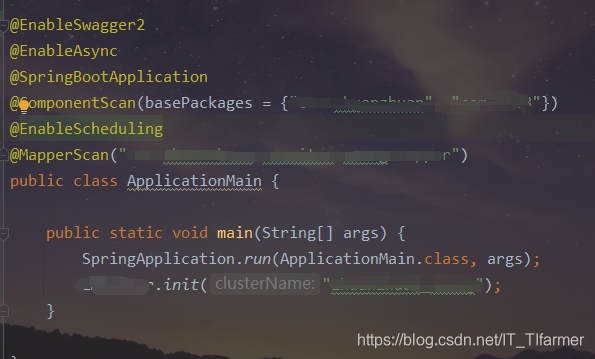
3.Application启动类上添加注解 @EnableSwagger2,不用在意下图中的其它注解
4.在任意文件夹下(可以是自己项目中的controller文件夹下,也可以是util文件夹下,没有的话就新建一个)添加一个配置类:
import org.springframework.context.annotation.Configuration;
import org.springframework.web.servlet.config.annotation.ResourceHandlerRegistry;
import org.springframework.web.servlet.config.annotation.WebMvcConfigurationSupport;

@Configuration
public class Swagger2 extends WebMvcConfigurationSupport {

    @Override
    protected void addResourceHandlers(ResourceHandlerRegistry registry) {

        // 解决静态资源无法访问

        registry.addResourceHandler("/**").addResourceLocations("classpath:/static/");

        // 解决swagger无法访问

        registry.addResourceHandler("/swagger-ui.html").addResourceLocations("classpath:/META-INF/resources/");

        // 解决swagger的js文件无法访问

        registry.addResourceHandler("/webjars/**").addResourceLocations("classpath:/META-INF/resources/webjars/");

    }
}


 788
788

 被折叠的 条评论
为什么被折叠?
被折叠的 条评论
为什么被折叠?
 到【灌水乐园】发言


