


 本文提供了一套详细的SpringBoot结合Maven搭建SSM框架的步骤,包括项目创建、pom.xml配置、数据库设置、实体类定义、Mapper接口、Controller创建及主程序修改,最后通过示例验证了框架的成功搭建。
【超详细图文教程】用SpringBoot+Maven搭建SSM框架
2017年10月09日 11:31:51 零薄狱 阅读数:10386 标签: Spring SpringMVC intellij idea SpringBoot SSM 更多
个人分类: Spring
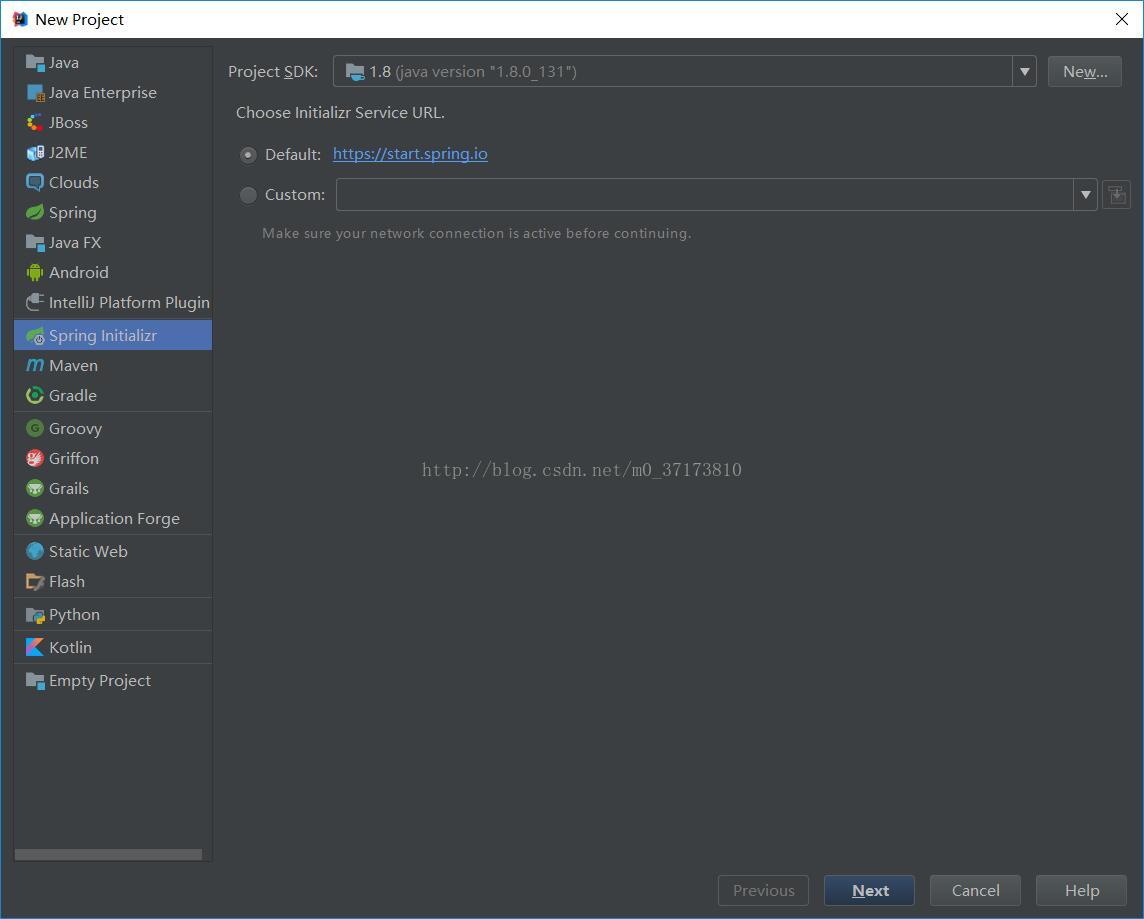
项目用Inteli做的,
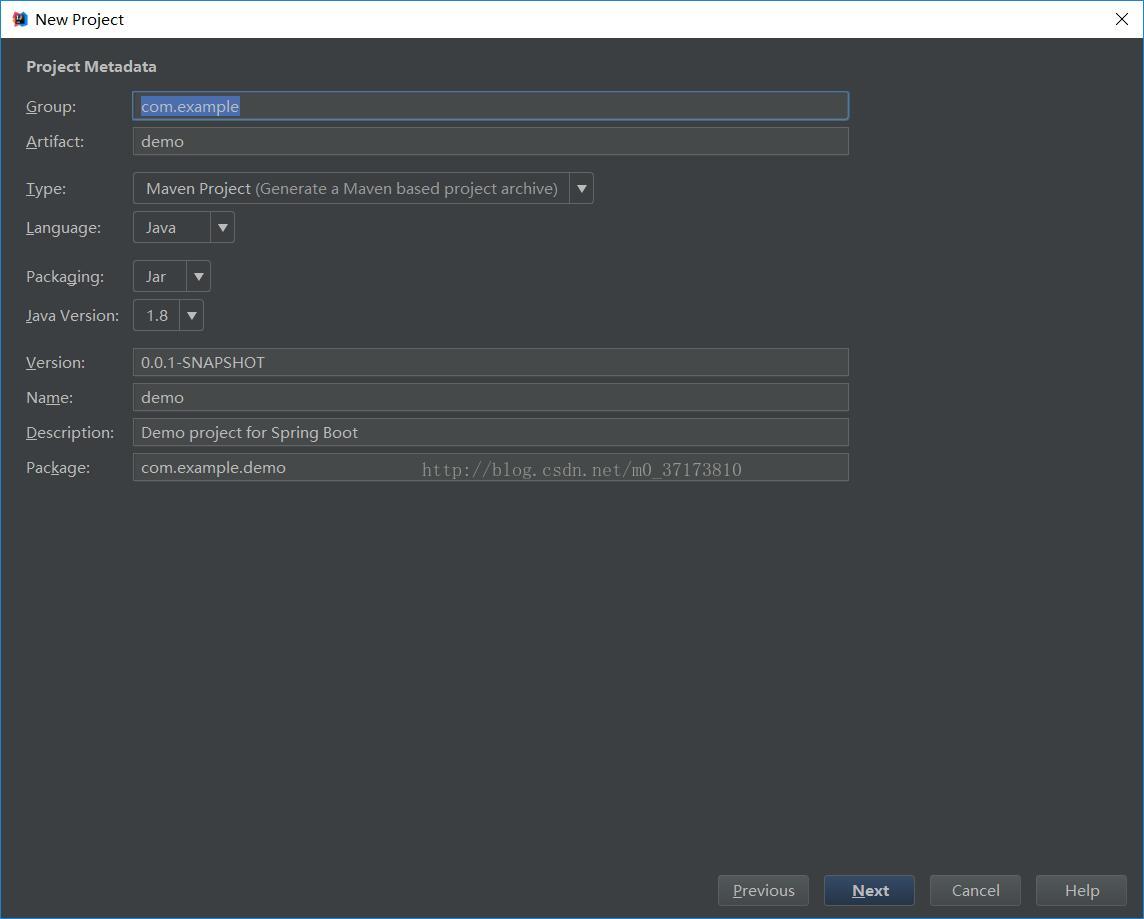
第一步:新建项目
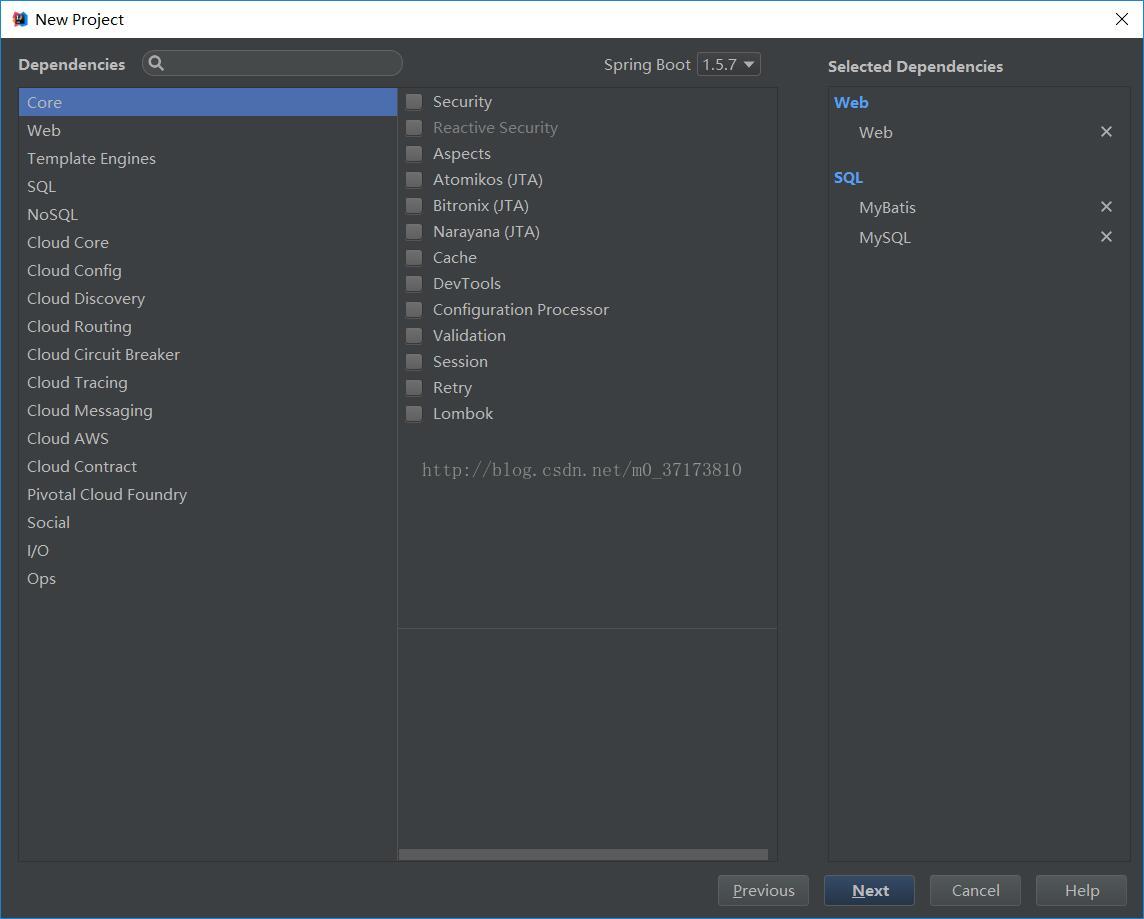

第二步:配置pom.xml
-
<?xml version="1.0" encoding="UTF-8"?> -
<project xmlns="http://maven.apache.org/POM/4.0.0" xmlns:xsi="http://www.w3.org/2001/XMLSchema-instance" -
xsi:schemaLocation="http://maven.apache.org/POM/4.0.0 http://maven.apache.org/xsd/maven-4.0.0.xsd"> -
<modelVersion>4.0.0</modelVersion> -
<groupId>com.example</groupId> -
<artifactId>demo</artifactId> -
<version>0.0.1-SNAPSHOT</version> -
<packaging>jar</packaging> -
<name>demo</name> -
<description>Demo project for Spring Boot</description> -
<parent> -
<groupId>org.springframework.boot</groupId> -
<artifactId>spring-boot-starter-parent</artifactId> -
<version>1.5.7.RELEASE</version> -
<relativePath/> <!-- lookup parent from repository --> -
</parent> -
<properties> -
<project.build.sourceEncoding>UTF-8</project.build.sourceEncoding> -
<project.reporting.outputEncoding>UTF-8</project.reporting.outputEncoding> -
<java.version>1.8</java.version> -
</properties> -
<dependencies> -
<dependency> -
<groupId>org.springframework.boot</groupId> -
<artifactId>spring-boot-starter-aop</artifactId> -
</dependency> -
<dependency> -
<groupId>org.springframework.boot</groupId> -
<artifactId>spring-boot-starter-jdbc</artifactId> -
</dependency> -
<dependency> -
<groupId>org.mybatis.spring.boot</groupId> -
<artifactId>mybatis-spring-boot-starter</artifactId> -
<version>1.3.1</version> -
</dependency> -
<dependency> -
<groupId>org.springframework.boot</groupId> -
<artifactId>spring-boot-starter-web</artifactId> -
</dependency> -
<dependency> -
<groupId>mysql</groupId> -
<artifactId>mysql-connector-java</artifactId> -
<scope>runtime</scope> -
</dependency> -
<dependency> -
<groupId>org.springframework.boot</groupId> -
<artifactId>spring-boot-starter-test</artifactId> -
<scope>test</scope> -
</dependency> -
</dependencies> -
<build> -
<plugins> -
<plugin> -
<groupId>org.springframework.boot</groupId> -
<artifactId>spring-boot-maven-plugin</artifactId> -
</plugin> -
</plugins> -
</build> -
</project>
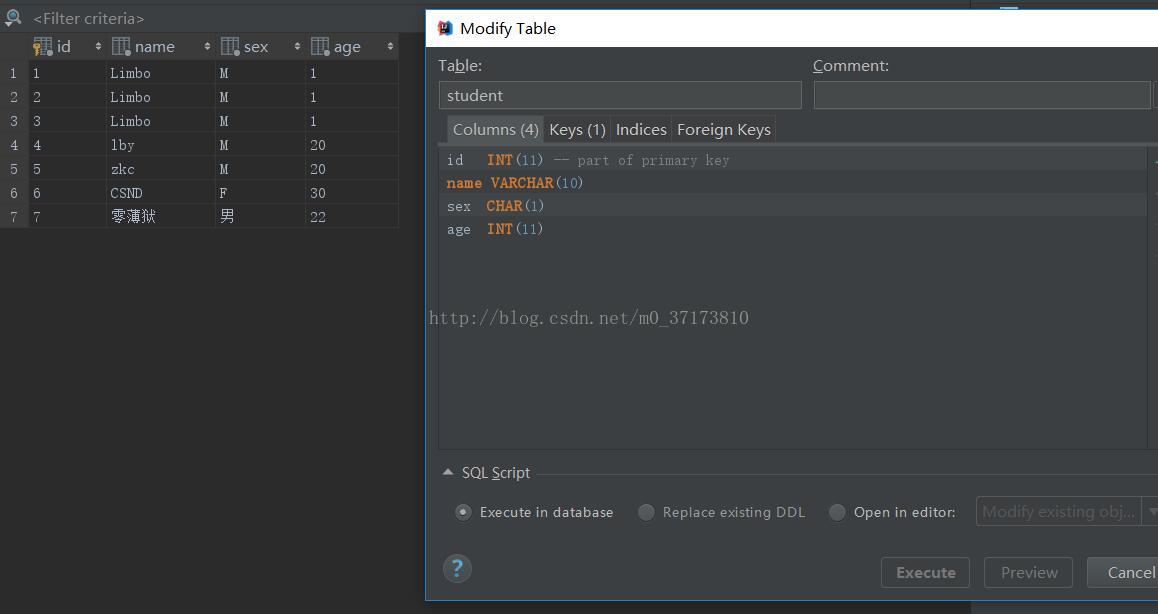
第三步:创建数据库
第四步:创建目录
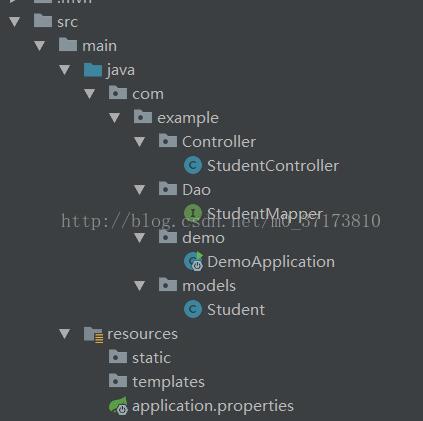
第五步:创建Student.java实体类
Student.java
-
package com.example.models; -
public class Student { -
private int id; -
private String name; -
private String sex; -
private int age; -
public int getId() { -
return id; -
} -
public void setId(int id) { -
this.id = id; -
} -
public String getName() { -
return name; -
} -
public void setName(String name) { -
this.name = name; -
} -
public String getSex() { -
return sex; -
} -
public void setSex(String sex) { -
this.sex = sex; -
} -
public int getAge() { -
return age; -
} -
public void setAge(int age) { -
this.age = age; -
} -
@Override -
public String toString() { -
return "Student{" + -
"id=" + id + -
", name='" + name + '\'' + -
", sex='" + sex + '\'' + -
", age=" + age + -
'}'; -
} -
}
第六步:创建Mapper接口
StudentMapper.java
-
package com.example.Dao; -
import com.example.models.Student; -
import org.apache.ibatis.annotations.Select; -
import org.springframework.stereotype.Repository; -
@Repository -
public interface StudentMapper { -
@Select("SELECT * FROM student WHERE id=#{id}") -
Student getStudentByID(int id); -
}
第七步:创建Controller
StudentController.java
-
package com.example.Controller; -
import com.example.Dao.StudentMapper; -
import com.example.models.Student; -
import org.springframework.beans.factory.annotation.Autowired; -
import org.springframework.web.bind.annotation.RequestMapping; -
import org.springframework.web.bind.annotation.RestController; -
@RestController -
public class StudentController { -
@Autowired -
private StudentMapper studentMapper; -
@RequestMapping("/demo") -
public Student get(){ -
Student student=studentMapper.getStudentByID(2); -
return student; -
} -
@RequestMapping(value = "res") -
public String df(){ -
return "Hello"; -
} -
}
(注意这边新建接口对象的时候会出错误提示,但是不影响正常运行,原因不明,如果有哪位知道怎么解决请告知)
第八步:修改主程序
DemoApplication.java
-
package com.example.demo; -
import org.mybatis.spring.annotation.MapperScan; -
import org.springframework.boot.SpringApplication; -
import org.springframework.boot.autoconfigure.SpringBootApplication; -
import org.springframework.context.annotation.ComponentScan; -
import org.springframework.transaction.annotation.EnableTransactionManagement; -
@SpringBootApplication -
@EnableTransactionManagement -
@ComponentScan("com.example.Controller") -
@MapperScan("com.example.Dao") -
public class DemoApplication { -
public static void main(String[] args) { -
SpringApplication.run(DemoApplication.class, args); -
} -
}
第九步:最后还有个SpringBoot的配置文件
application.properties
-
spring.datasource.url=jdbc:mysql://localhost:3306/world -
spring.datasource.username=root -
spring.datasource.password=a8996855439 -
spring.datasource.driverClassName=com.mysql.jdbc.Driver -
mybatis.type-aliases-package=com.example.models
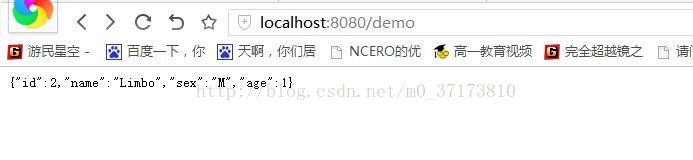
最后运行DemoApplication,在地址栏输入http://localhost:8080/demo
结果如下,就成功了


 被折叠的 条评论
为什么被折叠?
被折叠的 条评论
为什么被折叠?
 到【灌水乐园】发言


