


最近看文章偶然看到一篇关于pygame的,感觉挺有趣就了解了一下;
pygame是一个为编写游戏设计的python模块,可以方便的开发2D游戏;
官网:pygame news
要使用的话直接pip安装即可:
pip install pygame
pygame使用起来也很简单,先初始化设置窗口标题等,再在循环里判断事件,监控按键鼠标,设计游戏逻辑,不断打印到画布上;
基本demo:
#!/usr/bin/env python3
# coding = utf-8
"""
# Project: workspace_py
# File: temp.py
# Author: XWF
# Time: 2024/10/17 9:55
"""
import sys

import pygame

# 初始化pygame
pygame.init()
# 设置窗口大小
screen = pygame.display.set_mode((200, 200))
# 设置标题
pygame.display.set_caption('标题')
# 设置icon
pygame.display.set_icon(pygame.Surface((20, 20)))
# clock对象,用来设置帧率
clock = pygame.time.Clock()

# 循环
while True:
    # 填充屏幕
    screen.fill((255, 255, 255))
    # 处理事件
    for event in pygame.event.get():
        # 处理点击退出叉号
        if event.type == pygame.QUIT:
            pygame.quit()
            sys.exit()
    # 游戏逻辑

    # 刷新屏幕
    pygame.display.flip()
    # 设置帧率,每秒30帧
    clock.tick(30)
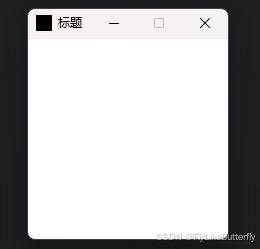
输出一个白底的小窗口,点击叉号就会关闭退出:
可以通过pygame.time.Clock()控制帧率,通过pygame.draw在Surface画布上画各种图形,screen就是最大的那个画布,pygame.event检测键盘鼠标按下弹起等事件,pygame.key按键相关,pygame.mouse鼠标相关,pygame.font字体相关;
一个类似小时候黑白GB游戏机那种弹球的demo,左右方向键控制滑块:
#!/usr/bin/env python3
# coding = utf-8

import sys

import pygame

# 初始化
pygame.init()
screen = pygame.display.set_mode((240, 200))
pygame.display.set_caption('test')
clock = pygame.time.Clock()
# 颜色定义
color_white = (255, 255, 255)
color_black = (0, 0, 0)
color_red = (255, 0, 0)
# 球坐标
x = 100
y = 5
# 球移动增量
xx = 1
yy = 1
# 矩形坐标
x2 = 100
y2 = 200 - 5

while True:
    # 白色背景
    screen.fill(color_white)
    # 画圆形和矩形
    pygame.draw.circle(screen, color_red, (x, y), 5, 0)
    pygame.draw.rect(screen, color_black, (x2, y2, 20, 5), 0)
    for event in pygame.event.get():
        if event.type == pygame.QUIT:
            pygame.quit()
            sys.exit()
        # if event.type == pygame.KEYDOWN:
        #     if event.key == pygame.K_LEFT:
        #         x2 = x2 - 1
        #         if x2 < 0:
        #             x2 = 0
        #     if event.key == pygame.K_RIGHT:
        #         x2 = x2 + 1
        #         if x2 > 240 - 20:
        #             x2 = 240 - 20
    # 检测按键左右移动矩形
    keys = pygame.key.get_pressed()
    if keys[pygame.K_LEFT]:
        x2 = x2 - 1
        if x2 < 0:
            x2 = 0
    if keys[pygame.K_RIGHT]:
        x2 = x2 + 1
        if x2 > 240 - 20:
            x2 = 240 - 20
    # 圆形的坐标变动
    x = x + xx
    y = y + yy
    # 到达边框计算,反向移动
    if x > 240 - 5:  # 右边
        xx = -xx
    if x < 5:  # 左边
        xx = -xx
    if y < 5:  # 上边
        yy = -yy
    if (x > x2) and (x < x2 + 20) and (y + 5 > 195) and (y + 5 < 200):  # 落在矩形里
        if yy > 0:
            yy = -yy
    elif y > 200:  # 掉入下边框以下,打印END,退出
        font = pygame.font.SysFont('simhei', 20)
        text = font.render('END', 1, color_red)
        screen.blit(text, (100, 100))
        pygame.display.update()
        break
    pygame.display.update()
    clock.tick(120)

pygame.time.wait(3000)
运行效果:
pygame_1
通常使用Sprite精灵类来做一些实体,用Group去管理一组精灵类,可以更方便的设置图片形状,设置位置,进行碰撞检测等等;
躲避掉落方块的demo,鼠标移动控制方块:
#!/usr/bin/env python3
# coding = utf-8

import random
import sys

import pygame
 最低0.47元/天 解锁文章


 5597
5597


 到【灌水乐园】发言


