


 本文详细介绍了Spring框架中Bean的配置、实例化、作用域和装配方式。内容包括XML配置文件管理Bean、构造器、静态工厂和实例工厂的Bean实例化方法、singleton和prototype作用域的解析,以及基于XML和注解的Bean装配方式。
目录
重点:
- Bean的配置
- Bean实例化的三种方式
- Bean的三种装配方式
正文:
1、Bean的配置
- 两种格式的配置文件:XML(最常用)和Properties。这种配置方式通过XML文件来注册并管理Bean之间的依赖关系。
- 在Spring中,XML配置文件的根元素是<beans>,<beans>中包含了多个<bean>子元素,每一个子元素定义了一个Bean,并描述该Bean如何被装配到Spring容器中
- 表1-- <bean>元素的常用属性及其子元素
| 属性或子元素名称 | 描述 |
| id | Bean的唯一标识符,Spring容器对Bean的配置、管理都通过该属性来完成 |
| class | 指定了Bean的具体实现类,必须是一个完整的类名,使用类的全限定名 |
| scope | 用来设定Bean的作用域,默认值为singleton |
| constructor-arg | <bean>的子元素,可以使用此元素传入构造参数进行实例化。该元素index属性指定构造参数的序号,type属性指定构造参数的类型,参数值可以通过ref属性或value属性直接指定,也可以通过ref或value子元素指定 |
| property | <bean>的子元素,用于调用Bean实例中的setter方法完成属性赋值,从而完成依赖注入。该元素的name属性指定Bean实例中的相应属性名,ref属性或value属性用于指定参数值 |
| ref | <property>、<constructor-arg>等元素的属性或子元素,可以用于指定对Bean工厂中某个实例的引用 |
| value | <property>、<constructor-arg>等元素的属性或子元素,可以用于直接指定一个常量值。 |
2、Bean的实例化
在面向对象的程序中,想要使用哪个对象,就需要先实例化这个对象。在Spring中,要想使用容器中的Bean,也需要实例化Bean。
实例化Bean的三种方式:
1、构造器实例化
Spring容器通过Bean对应类中默认的无参构造方法来实例化Bean
(1)创建一个名为chapter02的Web项目,创建一个com.itheima.constructor包,在包中创建Bean1类。
package instance.constructor;

public class Bean1 {

}
(2)在包中,创建Spring的配置文件beans1.xml
<?xml version="1.0" encoding="UTF-8"?>
<beans xmlns="http://www.springframework.org/schema/beans"
    xmlns:xsi="http://www.w3.org/2001/XMLSchema-instance"
    xsi:schemaLocation="http://www.springframework.org/schema/beans
        http://www.springframework.org/schema/beans/spring-beans-4.3.xsd">
       <bean id="bean1" class="instance.constructor.Bean1"/>

</beans>
(3)在包中,创建测试类InstanceTest1,来测试构造器能否实例化Bean
package instance.constructor;
import org.springframework.context.ApplicationContext;
import org.springframework.context.support.ClassPathXmlApplicationContext;
public class InstanceTest1 {
	public static void main(String[] args) {
		//定义配置文件路径
		String xmlPath="instance/constructor/beans1.xml";
		//ApplicationContext在加载配置文件时,对Bean进行实例化
		ApplicationContext applicationContext=
				new ClassPathXmlApplicationContext(xmlPath);
		Bean1 bean=(Bean1) applicationContext.getBean("bean1");
		System.out.println(bean);
	}

}
ApplicationContext在加载配置文件时,Spring容器会通过id为bean1的实现类Bean1中默认的无参构造方法对Bean进行实例化。
输出结果:Bean1的地址
![]()
2、静态工厂实例化
该方式要求开发者创建一个静态工厂的方法创建Bean的实例,其Bean配置中的class属性所指定的不再是Bean实例的实现类,而是静态工厂类
(1)创建一个com.itheima.instance.static_factory包,在该包中创建一个Bean2类,不添加任何方法
package instance.static_factory;

public class Bean2 {

}
(2)创建一个MyBean2Factory类,并在类中创建一个createBean()方法来返回Bean2实例
package instance.static_factory;

public class MyBean2Factory {
	//使用自己的工厂创建Bean2实例
	public static Bean2 createBean(){
		return new Bean2();
	}

}
(3)创建配置文件
<?xml version="1.0" encoding="UTF-8"?>
<beans xmlns="http://www.springframework.org/schema/beans"
    xmlns:xsi="http://www.w3.org/2001/XMLSchema-instance"
    xsi:schemaLocation="http://www.springframework.org/schema/beans
        http://www.springframework.org/schema/beans/spring-beans-4.3.xsd">
       <bean id="bean2" class="instance.static_factory.MyBean2Factory"
             factory-method="createBean"/>
</beans>
class属性指定其对应的工厂实现类为MyBean2Factory.由于这种方式配置Bean后,Spring容器不知道哪个是所需要的工厂方法,所以增加了factory-method属性来告诉Spring容器,其方法名为createBean
(4)创建测试类
package instance.static_factory;

import org.springframework.context.ApplicationContext;
import org.springframework.context.support.ClassPathXmlApplicationContext;

public class InstanceTest2 {
	public static void main(String[] args) {
		//定义配置文件路径
		String xmlPath="instance/static_factory/beans2.xml";
		ApplicationContext applicationContext=
				new ClassPathXmlApplicationContext(xmlPath);
        Bean2 bean2= (Bean2) applicationContext.getBean("bean2");
        System.out.println(bean2);
	}

}
输出结果:![]()
3、实例工厂实例化
这种方式的工厂类中,不再使用静态方法创建Bean实例,而是采用直接创建Bean实力的方式。在配置文件中,需要实例化的Bean也不是通过class属性直接指向实例化类,而是通过factory-bean属性只想配置的实例工厂,然后使用factory-method属性确定使用工厂中的哪个方法
(1)在chapter02项目下,创建一个com.itheima.instance.factory包,在包中创建Bean3类,不添加任何方法
package instance.factory;

public class Bean3 {

}
(2)创建工厂类MyBean3Factory
package instance.factory;

public class MyBean3Factory {
	public MyBean3Factory(){
		System.out.println("bean3工厂实例化中");
	}
	//创建Bean3实例的方法
	public Bean3 createBean(){
	 return new Bean3();
	}


}
在类中使用无参构造方法输出“bean3工厂实例化中”语句,若能输出则证明工厂被实例化;并使用createBean()方法创建Bean3对象
(3)创建配置文件beans3.xml
<?xml version="1.0" encoding="UTF-8"?>
<beans xmlns="http://www.springframework.org/schema/beans"
    xmlns:xsi="http://www.w3.org/2001/XMLSchema-instance"
    xsi:schemaLocation="http://www.springframework.org/schema/beans
        http://www.springframework.org/schema/beans/spring-beans-4.3.xsd">
        <!-- 配置工厂 -->
       <bean id="myBean3Factory" class="instance.factory.MyBean3Factory"/>
       <!-- 使用factory-bean属性指向配置的实例工厂 -->
       <bean id="bean3" factory-bean="myBean3Factory"
             factory-method="createBean"/>

</beans>
首先配置了一个工厂Bean,然后配置了需要实例化的Bean
(4)创建测试类
package instance.factory;
import org.springframework.context.ApplicationContext;
import org.springframework.context.support.ClassPathXmlApplicationContext;
public class InstanceTest3 {
	public static void main(String[] args) {
		//指定配置文件路径
		String xmlPath="instance/factory/beans3.xml";
		//ApplicationContext在加载配置文件时,对Bean进行实例化
		ApplicationContext applicationContext=new ClassPathXmlApplicationContext(xmlPath);
		System.out.println(applicationContext.getBean("bean3"));
	}
}
输出结果:

3、Bean的作用域
Spring容器创建一个Bean实例时,不仅可以完成Bean初始化,还可以为Bean指定特定的作用域。
1、singleton作用域
Spring容器的默认作用域,当Bean的作用域为Singleton时,Spring容器只会存在一个共享的Bean实例,并且所有对Bean的请求,只要id与该Bean的id属性相匹配,就会返回同一个Bean实例。
(1)在chapter02项目中,创建一个com.itheima.scope包,在包中创建 Scope类,不添加任何方法。
(2)创建配置文件,通过scope属性设置作用域
<?xml version="1.0" encoding="UTF-8"?>
<beans xmlns="http://www.springframework.org/schema/beans"
    xmlns:xsi="http://www.w3.org/2001/XMLSchema-instance"
    xsi:schemaLocation="http://www.springframework.org/schema/beans
        http://www.springframework.org/schema/beans/spring-beans-4.3.xsd">
       <bean id="scope" class="scope.Scope" scope="singleton"/>

</beans>
(3)创建测试类,来测试singleton作用域
package scope;
import org.springframework.context.ApplicationContext;
import org.springframework.context.support.ClassPathXmlApplicationContext;
public class ScopeTest {
public static void main(String[] args) {
String xmlPath="scope/beans4.xml";
ApplicationContext applicationContext=new ClassPathXmlApplicationContext(xmlPath);
System.out.println(applicationContext.getBean("scope"));
System.out.println(applicationContext.getBean("scope"));
}
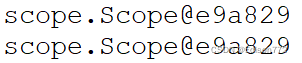
}运行结果:两次输出结果相同,说明Spring容器只创建了一个Scope类的实例
2、prototype作用域
对需要保持会话状态的Bean应该使用prototype作用域,Spring容器会为每个对该Bean的请求都创建一个新的实例。
配置文件:
<bean id="scope" class="scope.Scope" scope="prototype"/>输出结果:两次输出的Bean实例并不相同

4、Bean的装配方式
Bean的装配可以理解为依赖关系注入,Bean的装配方式即Bean依赖注入的方式。
三种装配方式:
1、基于XML的装配
- 两种方式:
- 设值注入:无参构造方法;setter方法;<property>为每个属性注入值
- 构造注入:有参构造方法;<constructor-arg>定义构造方法参数 value设置参数值
(1)创建com.itheima.assemble包,在包中创建User类,在类中定义三个属性及其对应的setter方法
package com.itheima.assemble;

import java.util.List;

public class User {
	private String username;
	private Integer password;
	private List<String> list;
	/**
	 * 1.使用构造注入
	 * 1.1提供带所有参数的有参构造方法
	 */
	public User(String username,Integer password,List<String> list){
		super();
		this.username=username;
		this.password=password;
		this.list=list;
	}
	/**
	 * 2.使用设值注入
	 * 2.1提供默认空参构造方法
	 * 2.2为所有属性提供setter方法
	 */
	public User(){
		super();
	}

	public void setUsername(String username) {
		this.username = username;
	}

	public void setPassword(Integer password) {
		this.password = password;
	}

	public void setList(List<String> list) {
		this.list = list;
	}
	@Override//方法覆盖,对Object类里的toString()进行覆盖,输出结果不再输出地址
	public String toString() {
		return "User [username=" + username + ", password=" + password + ", list=" + list + "]";
	}
}
(2)创建配置文件
<?xml version="1.0" encoding="UTF-8"?>
<beans xmlns="http://www.springframework.org/schema/beans"
    xmlns:xsi="http://www.w3.org/2001/XMLSchema-instance"
    xsi:schemaLocation="http://www.springframework.org/schema/beans
        http://www.springframework.org/schema/beans/spring-beans-4.3.xsd">
        <!-- 1.使用构造注入方式装配User实例 -->
        <bean id="user1" class="com.itheima.assemble.User">
        <constructor-arg index="0" value="tom"/>
        <constructor-arg index="1" value="123456"/>
        <constructor-arg index="2">
            <list>
                <value>"constructorvalue1"</value>
                <value>"constructorvalue2"</value>
            </list>
        </constructor-arg>
        </bean>
        <!-- 2.使用设值注入方式装配User实例 -->
        <bean id="user2" class="com.itheima.assemble.User">
          <property name="username" value="张三"></property>
          <property name="password" value="654321"></property>
          <!-- 注入list集合 -->
          <property name="list">
            <list>
              <value>"setlistvalue1"</value>
              <value>"setlistvalue2"</value>
           </list>
          </property>
        </bean>
</beans>
(3)创建测试类
package com.itheima.assemble;

import org.springframework.context.ApplicationContext;
import org.springframework.context.support.ClassPathXmlApplicationContext;

public class XmlBeanAssembletest {
	public static void main(String[] args) {
		String xmlPath="com/itheima/assemble/beans5.xml";
		ApplicationContext applicationContext=new ClassPathXmlApplicationContext(xmlPath);
        //构造方式输出结果
		System.out.println(applicationContext.getBean("user1"));
       //设置方式输出结果
		System.out.println(applicationContext.getBean("user2"));
	}

}
输出结果:

2、基于Annotation(注解)装配
XML配置文件过于臃肿,注解技术更利于后续的维护和升级工作
表2-常用注解
| @Component | 可以使用此注解描述Spring中的Bean,是一个泛化的概念,仅表示一个组件,可以使用在任何层次。使用时只需将该注解标注在相应类上即可 |
| @Repository | 数据访问层DAO,功能与@Component相同 |
| @Service | 业务层Service,功能与@Component相同 |
| @Controller | 控制层MVC,功能与@Component相同 |
| @Autowired | 用于对Bean的属性变量、属性的setter方法及构造方法进行标注,配合对应的注解处理器完成对Bean的自动配置工作。默认按照Bean的类型进行装配 |
| @Resource | 作用于@Autowired一样,默认按照Bean的实例名称进行装配。有name和type两个属性 |
| @Qualifier | 与@Autowired配合使用,按Bean的实例名称装配 |
(1)创建一个com.itheima.annotation包,在包中创建接口UserDao,并在接口中定义一个save()方法
package com.itheima.annotation;

public interface UserDao {
	public void save();


}
(2)创建UserDao接口的实现类,实现接口中的save()方法
package com.itheima.annotation;

import org.springframework.stereotype.Repository;
@Repository("userDao")//将UserDaoImpl类标识为Spring中的Bean
public class UserDaoImpl implements UserDao {
	public void save() {
		System.out.println("userdao...save...");
		// TODO Auto-generated method stub

	}

}
@Repository注解将UserDaoImpl类标识为SPringle中的Bean,其写法相当于配置文件中
<bean id="userDao" class="com.itheima.annotation.UserDaoImpl"/>的编写,然后在save()方法中打印一句话,用于验证是否成功调用了该方法。
(3)创建接口UserService,在接口中同样定义一个save()方法
(4)创建UserService接口的实现类UserServiceImpl,实现接口中的save()方法
package com.itheima.annotation;

import javax.annotation.Resource;

import org.springframework.stereotype.Service;

@Service("userService")//将UserServiceImpl类标识为Spring中的Bean
public class UserServiceImpl implements UserService {
	@Resource(name="userDao")//该注解标注在属性userDao上,将userDao注入userService中
	private UserDao userDao;
	public void save(){
		//调用userDao中的save方法
		this.userDao.save();
		System.out.println("userservice...save...");
	}

}
@Resource注解标注在属性userDao上,这相当于配置文件中<property name="userDao" ref="userDao"/>
(5)创建控制器类UserController
package com.itheima.annotation;
import javax.annotation.Resource;
import org.springframework.stereotype.Controller;
@Controller("userController")
public class UserController {
	@Resource(name="userService")
	private UserService userService;
	public void save(){
		this.userService.save();
		System.out.println("userController...save...");
	}

}
(6)创建配置文件
<?xml version="1.0" encoding="UTF-8"?>
<beans xmlns="http://www.springframework.org/schema/beans"
    xmlns:context="http://www.springframework.org/schema/context"
    xmlns:xsi="http://www.w3.org/2001/XMLSchema-instance"
    xsi:schemaLocation="http://www.springframework.org/schema/beans
        http://www.springframework.org/schema/beans/spring-beans-4.3.xsd
        http://www.springframework.org/schema/context
        http://www.springframework.org/schema/context/spring-context-4.3.xsd">
       <!--一、 使用context命名空间,在配置文件中开启相应的注解处理器  -->
       <!-- <context:annotation-config/>
      <bean id="userDao" class="com.itheima.annotation.UserDaoImpl"></bean>
      <bean id="userService" class="com.itheima.annotation.UserServiceImpl"></bean>
      <bean id="userController" class="com.itheima.annotation.UserController"></bean>  -->
      <!--二、 使用context 命名空间,通知Spring扫描指定包下所有Bean类,进行注解解析 -->
      <context:component-scan base-package="com.itheima.annotation"/>
</beans>运行时使用第二种扫包方式时报错:Error creating bean with name 'xxxxController' Could not autowire field 错误。错误原因是
Dao层注解错误,写成了@Repository("userDAO")。
但使用第一种配置方式并未报错,不知道为什么。。。
(7)创建测试类
package com.itheima.annotation;
import org.springframework.context.ApplicationContext;
import org.springframework.context.support.ClassPathXmlApplicationContext;
public class AnnotationAssembleTest {
public static void main(String[] args) {
String xmlPath="com/itheima/annotation/beans6.xml";
ApplicationContext applicationContext=new ClassPathXmlApplicationContext(xmlPath);
UserController userController= (UserController) applicationContext.getBean("userController");
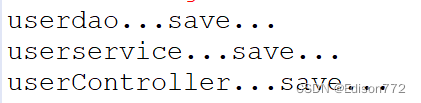
userController.save();
}
}
输出结果:
注:上述案例使用@Autowired注解也可以
3、自动装配
减少更多的代码量,
Spring的<bean>元素中包含一个autowire 属性,可以通过设置autowire的属性值来自动装配Bean,将一个Bean自动地注入到其他Bean的Property中


 1683
1683

 被折叠的 条评论
为什么被折叠?
被折叠的 条评论
为什么被折叠?
 到【灌水乐园】发言


