


 本文详细介绍了如何在SpringBoot中集成Redis,并深入剖析了SpringBoot的自动装配原理,包括@ComponentScan、@EnableAutoConfiguration、@AutoConfigurationPackage、@Import(AutoConfigurationImportSelector.class)的作用。通过示例和源码分析,揭示了自动装配Bean的全过程,特别是SpringFactoriesLoader如何借助SPI机制加载配置。
第1章 集成Redis
-
引入依赖包
<dependency> <groupId>org.springframework.boot</groupId> <artifactId>spring-boot-starter-data-redis</artifactId> </dependency> -
配置参数
spring.redis.host=192.168.8.74 spring.redis.password=123456 spring.redis.database=0 -
controller
package com.example.springbootvipjtdemo.redisdemo;

import org.springframework.beans.factory.annotation.Autowired;
import org.springframework.data.redis.core.RedisTemplate;
import org.springframework.web.bind.annotation.GetMapping;
import org.springframework.web.bind.annotation.RequestMapping;
import org.springframework.web.bind.annotation.RequestParam;
import org.springframework.web.bind.annotation.RestController;

/**
 * @author Eclipse_2019
 * @create 2022/6/9 14:36
 */
@RestController
@RequestMapping("/redis")
public class RedisController {
    @Autowired
    private RedisTemplate redisTemplate;

    @GetMapping("/save")
    public String save(@RequestParam String key,@RequestParam String value){
        redisTemplate.opsForValue().set(key,value);
        return "添加成功";
    }

    @GetMapping("/get")
    public String get(@RequestParam String key){
        String value = (String)redisTemplate.opsForValue().get(key);
        return value;
    }
}
通过上面的案例,我们就能看出来,RedisTemplate这个类的bean对象,我们并没有通过XML的方式也没有通过注解的方式注入到IoC容器中去,但是我们就是可以通过@Autowired注解自动从容器里面拿到相应的Bean对象,再去进行属性注入。
那这是怎么做到的呢?接下来我们来分析一下自动装配的原理,等我们弄明白了原理,自然而然你们就懂了RedisTemplate的bean对象怎么来的。
第2章 自动装配原理
SpringBootApplication注解是入口
@Target(ElementType.TYPE) // 注解的适用范围,其中TYPE用于描述类、接口(包括包注解类型)或enum声明
@Retention(RetentionPolicy.RUNTIME) // 注解的生命周期,保留到class文件中(三个生命周期)
@Documented // 表明这个注解应该被javadoc记录
@Inherited // 子类可以继承该注解
@SpringBootConfiguration // 继承了Configuration,表示当前是注解类
@EnableAutoConfiguration // 开启springboot的注解功能,springboot的四大神器之一,其借助@import的帮助
@ComponentScan(excludeFilters = { // 扫描路径设置
@Filter(type = FilterType.CUSTOM, classes = TypeExcludeFilter.class),
@Filter(type = FilterType.CUSTOM, classes = AutoConfigurationExcludeFilter.class) })
public @interface SpringBootApplication {
...
}
在其中比较重要的有三个注解,分别是:
-
@SpringBootConfiguration:继承了Configuration,表示当前是注解类
- @EnableAutoConfiguration: 开启springboot的注解功能,springboot的四大神器之一,其借助@import的帮助
- @ComponentScan(excludeFilters = { // 扫描路径设置(具体使用待确认)
2.1 ComponentScan
ComponentScan的功能其实就是自动扫描并加载符合条件的组件(比如@Component和@Repository等)或者bean定义;并将这些bean定义加载到IoC容器中.
我们可以通过basePackages等属性来细粒度的定制@ComponentScan自动扫描的范围,如果不指定,则默认Spring框架实现会从声明@ComponentScan所在类的package进行扫描。
注:所以SpringBoot的启动类最好是放在root package下,因为默认不指定basePackages
2.2 EnableAutoConfiguration
此注解顾名思义是可以自动配置,所以应该是springboot中最为重要的注解。
@Target(ElementType.TYPE)
@Retention(RetentionPolicy.RUNTIME)
@Documented
@Inherited
@AutoConfigurationPackage
@Import(AutoConfigurationImportSelector.class)//【重点注解】
public @interface EnableAutoConfiguration {
...
}
其中最重要的两个注解:
-
@AutoConfigurationPackage
-
@Import(AutoConfigurationImportSelector.class)
当然还有其中比较重要的一个类就是:
-
AutoConfigurationImportSelector.class
AutoConfigurationPackage
@Target(ElementType.TYPE)
@Retention(RetentionPolicy.RUNTIME)
@Documented
@Inherited
@Import(AutoConfigurationPackages.Registrar.class)
public @interface AutoConfigurationPackage {

}
通过@Import(AutoConfigurationPackages.Registrar.class)
static class Registrar implements ImportBeanDefinitionRegistrar, DeterminableImports {

        @Override
        public void registerBeanDefinitions(AnnotationMetadata metadata,
                BeanDefinitionRegistry registry) {
            register(registry, new PackageImport(metadata).getPackageName());
        }

        ……

}注册当前启动类的根package;
注册org.springframework.boot.autoconfigure.AutoConfigurationPackages的BeanDefinition。
AutoConfigurationPackage注解的作用是将添加该注解的类所在的package作为自动配置package 进行管理。
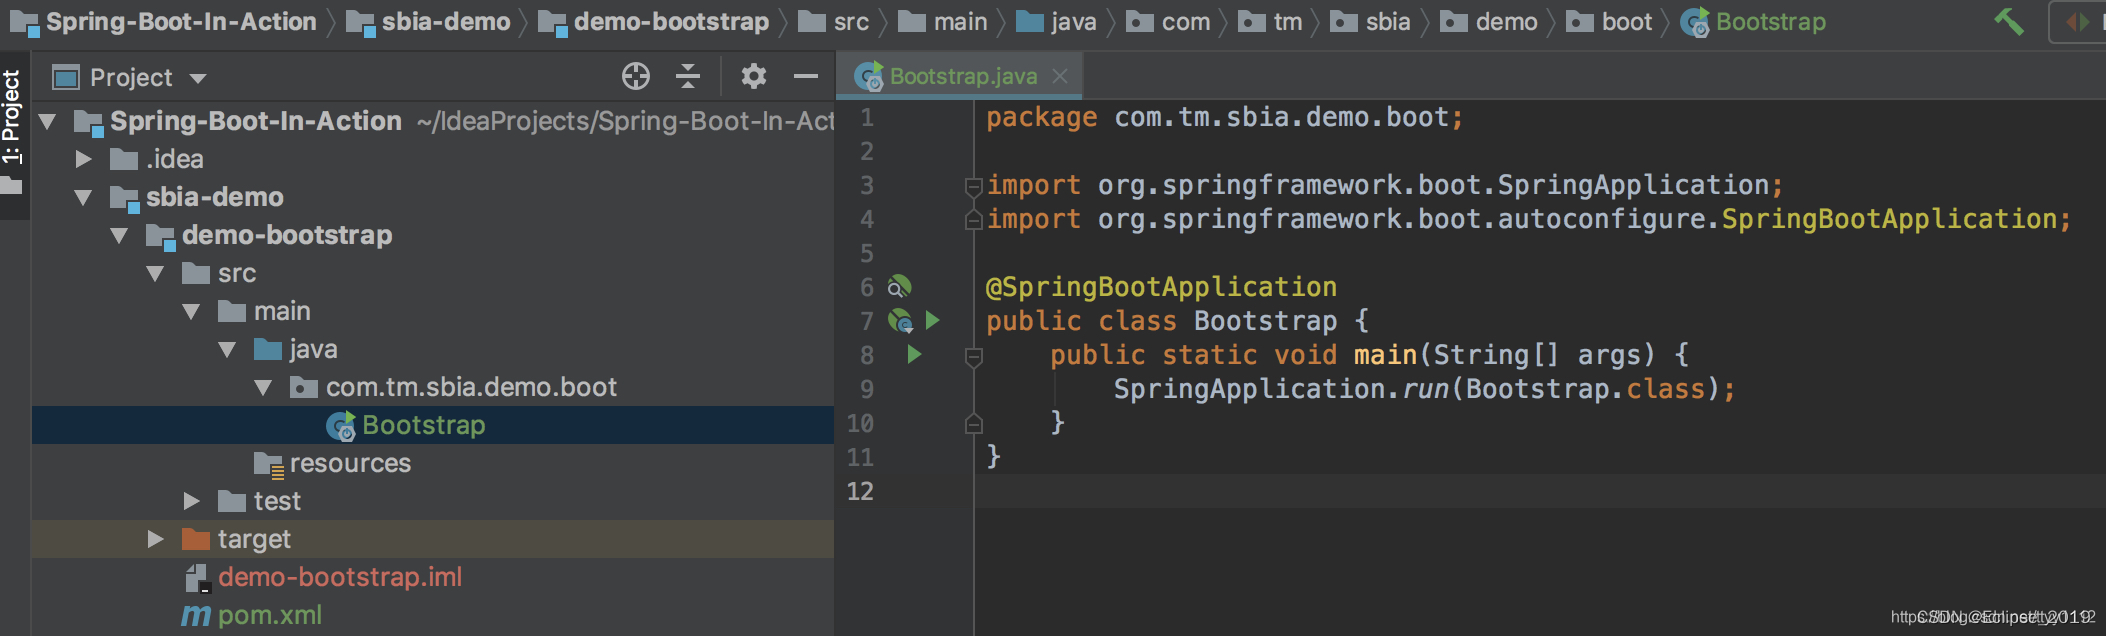
可以通过 AutoConfigurationPackages 工具类获取自动配置package列表。当通过注解@SpringBootApplication标注启动类时,已经为启动类添加了@AutoConfigurationPackage注解。路径为 @SpringBootApplication -> @EnableAutoConfiguration -> @AutoConfigurationPackage。也就是说当SpringBoot应用启动时默认会将启动类所在的package作为自动配置的package。
如我们创建了一个sbia-demo的应用,下面包含一个启动模块demo-bootstrap,启动类时Bootstrap,它添加了@SpringBootApplication注解,我们通过测试用例可以看到自动配置package为com.tm.sbia.demo.boot。
AutoConfigurationImportSelector
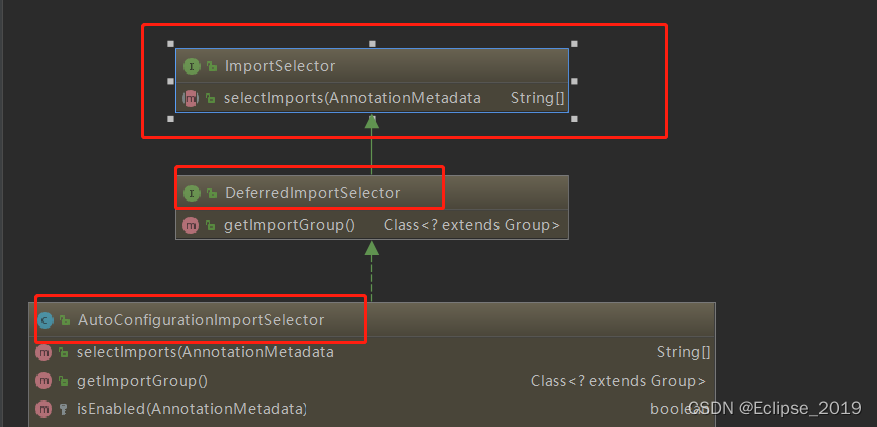
可以从图中看出 AutoConfigurationImportSelector实现了 DeferredImportSelector
 最低0.47元/天 解锁文章


 1万+
1万+

 被折叠的 条评论
为什么被折叠?
被折叠的 条评论
为什么被折叠?
 到【灌水乐园】发言


