


 本文详细介绍如何在Spring框架中整合Mybatis进行数据库事务管理,包括项目搭建、配置文件设置、事务注解使用及测试过程。
一、Spring整合Mybatis框架加入事务操作数据库
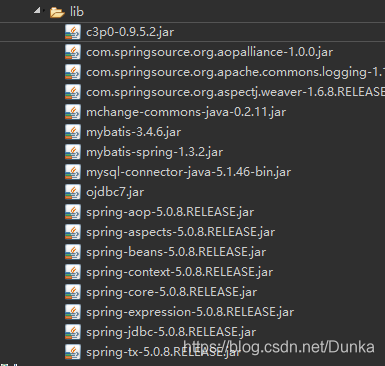
1、创建项目,导入依赖包:spring基本包、aop相关包、c3p0连接池包、事务包、数据库驱动包、mybatis-3.4.5、mybatis-spring-1.3.2
2、创建基本包:bean、mapper、service、test
3、创建数据库信息文件db.properties、mybatis配置文件sqlMapConfig.xml、spring配置文件:applicationContext.xml
jdbc.driverClass=com.mysql.jdbc.Driver
jdbc.jdbcUrl=jdbc:mysql://localhost:3306/ssm_spring
jdbc.user=root
jdbc.password=123
<?xml version="1.0" encoding="UTF-8"?>
<!DOCTYPE configuration
  PUBLIC "-//mybatis.org//DTD Config 3.0//EN"
  "http://mybatis.org/dtd/mybatis-3-config.dtd">

 <configuration>
 	<typeAliases>
 		<package name="com.dunka.bean"/>
 	</typeAliases>
 </configuration>
<?xml version="1.0" encoding="UTF-8"?>
<beans xmlns="http://www.springframework.org/schema/beans"
	xmlns:xsi="http://www.w3.org/2001/XMLSchema-instance"
	xmlns:context="http://www.springframework.org/schema/context"
	xmlns:aop="http://www.springframework.org/schema/aop"
	xmlns:tx="http://www.springframework.org/schema/tx"
	xsi:schemaLocation="http://www.springframework.org/schema/beans http://www.springframework.org/schema/beans/spring-beans-4.3.xsd
		http://www.springframework.org/schema/context http://www.springframework.org/schema/context/spring-context-4.3.xsd
		http://www.springframework.org/schema/aop http://www.springframework.org/schema/aop/spring-aop-4.3.xsd
		http://www.springframework.org/schema/tx http://www.springframework.org/schema/tx/spring-tx-4.3.xsd">

	<!-- 读取配置文件 -->
	<context:property-placeholder location="db.properties"/>

	<!-- 配置dataSource -->
	<bean name="dataSource" class="com.mchange.v2.c3p0.ComboPooledDataSource">
		<property name="driverClass" value="${jdbc.driverClass}"/>
		<property name="jdbcUrl" value="${jdbc.jdbcUrl}"/>
		<property name="user" value="${jdbc.user}"/>
		<property name="password" value="${jdbc.password}"/>
	</bean>

	<!-- Mybatis -->
	<bean name="sqlSessionFactory" class="org.mybatis.spring.SqlSessionFactoryBean">
		<property name="dataSource" ref="dataSource"/>
		<property name="configLocation" value="classpath:sqlMapConfig.xml"/>
	</bean>

	<!-- Mapper 动态扫描 -->
	<bean class="org.mybatis.spring.mapper.MapperScannerConfigurer">
		<property name="basePackage" value="com.dunka.mapper"/>
	</bean>
</beans>
4、还是老套路,写一个测试的小例子 用Account作为bean对象,写入AccountService接口以及实现类,AccountMapper接口以及实现类
public class Account {
	private Integer id;
	private String name;
	private Double money;
	//转账金额
	private Double transMoney;
}
其中转账金额是用于操作,并不真实存在于数据库;
/**
 *      转账接口
 * @author Dunka
 *
 */
public interface AccountService {
	void transferAccount();
}
public class AccountServiceImpl implements AccountService {

	@Resource(type=AccountMapper.class)
	private AccountMapper am;
	@Override
	public void transferAccount() {

		Account pay = new Account();
		pay.setId(1);
		pay.setTransMoney(100d);
		//扣款
		am.subMoney(pay);

		// int i=1/0;
		Account collect = new Account();
		collect.setId(2);
		collect.setTransMoney(100d);
		//加款
		am.addMoney(collect);
	}

}
里面Resource(type=AccountMapper.class)是由于spring容器在设置时并没有往accountService中注入任何信息,所以手动未AccountMapper注入对象;
public interface AccountMapper {
	//先扣款再转账

	//扣款
	void subMoney(Account pay);
	//转账
	void addMoney(Account collect);
}
<?xml version="1.0" encoding="UTF-8" ?>
<!DOCTYPE mapper
  PUBLIC "-//mybatis.org//DTD Mapper 3.0//EN"
  "http://mybatis.org/dtd/mybatis-3-mapper.dtd">
<mapper namespace="com.dunka.mapper.AccountMapper">
    <update id="subMoney" parameterType="Account">
    	update account set money = money - #{transMoney} where id = #{id}
    </update>
	<update id="addMoney" parameterType="Account">
    	update account set money = money + #{transMoney} where id = #{id}
    </update>
</mapper>
在applicationContext.xml中注入AccountService对象
<!-- Service -->
	<bean name="accountService" class="com.dunka.service.AccountServiceImpl">
	</bean>
加入测试类
@RunWith(SpringJUnit4ClassRunner.class)
@ContextConfiguration("classpath:applicationContext.xml")
public class MapperTest {

	@Resource(name="accountService")
	private AccountService as;
	@Test
	public void test1() {
		as.transferAccount();
	}
}
同样,由于没有加入事务,所以数据库操作停留在正常不能抛出异常的状况下。
在加入事务说明之前,我想记录下过程中遇到的两个错误,都是因为不细心犯下的。
(1)、java.lang.NoSuchMethodError: org.springframework.core.annotation.AnnotatedElements.getAttributes
原因是,我在写测试类的时候发现引用不到SpringJUnit4ClassRunner.class,所以我查看我引用的jar包发现没有test包,所以我在我的盘里找到了一个spring-test-4.1.4的版本,就这么用了,然后报错之后发现,我的其他包用的都是spring-xx-5.0猜测是这个错误,所以改用了spring-test-5.0,然后,果然不出我所料,终于不报这个错误了,报出了下一个错误
(2)、Injection of resource dependencies failed; nested exception is org.springframework.beans.factory.NoSuchmethod
原因更好笑,是因为我在写的时候,不小心把动态扫描mapper的bean给删掉了
<!-- mapper工厂 -->
<bean class="org.mybatis.spring.mapper.MapperScannerConfigurer">
<property name="basePackage" value="com.dunka.mapper"/>
</bean>
所以他无法扫描到accountMapper.class,这个Resource(type=AccountMapper.class)无法注入成功,导致accountService这个方法注入不成功。
被自己气笑了哈哈哈哈哈哈哈哈。
5、加入事务配置
	<!-- 1、事务核心管理器 -->
	<bean name="transactionManager" class="org.springframework.jdbc.datasource.DataSourceTransactionManager">
		<property name="dataSource" ref="dataSource"/>
	</bean>
	<!-- 2、事务通知 -->
	<tx:advice id="txAdvice" transaction-manager="transactionManager">
		<tx:attributes>
			<tx:method name="update*" isolation="DEFAULT" propagation="REQUIRED" read-only="false"/>
		</tx:attributes>
	</tx:advice>
	<!-- 3、配置aop -->
	<aop:config>
		<aop:pointcut expression="execution(* com.dunka.service.*ServiceImpl.*(..))" id="txPc"/>
		<aop:advisor advice-ref="txAdvice" pointcut-ref="txPc"/>
	</aop:config>
6、再次测试。


 1万+
1万+

 被折叠的 条评论
为什么被折叠?
被折叠的 条评论
为什么被折叠?
 到【灌水乐园】发言


