


 本文详细介绍了使用Java实现后台管理系统的角色分页查询、保存、更新和删除操作。涉及后端数据库表创建、逆向生成资源、前端分页及查询功能、模态框的使用等,以及前端与后端交互的实现。
1. 角色分页操作
1.1 目标
将角色数据进行分页显示
1.2 思路

1.3 代码:后端
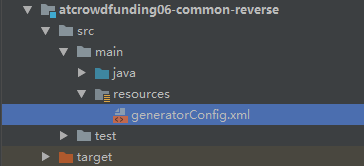
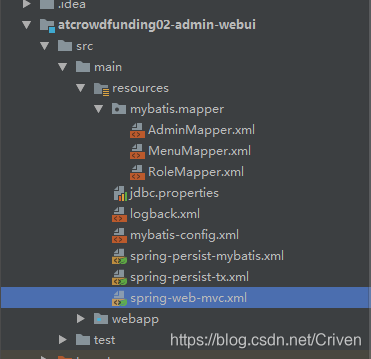
1.3.1 创建数据库表
CREATE TABLE `project_crowd`.`t_role` ( `id` INT NOT NULL, `name` CHAR(100), PRIMARY KEY
(`id`) );
ALTER TABLE `project_crowd`.`t_role` CHANGE `id` `id` INT(11) NOT NULL AUTO_INCREMENT;
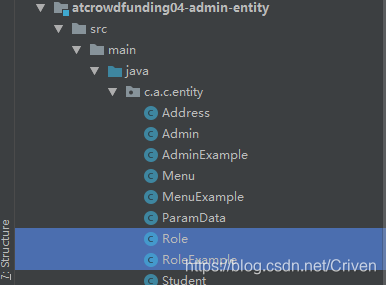
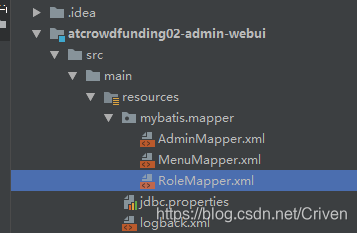
1.3.2 逆向生成资源
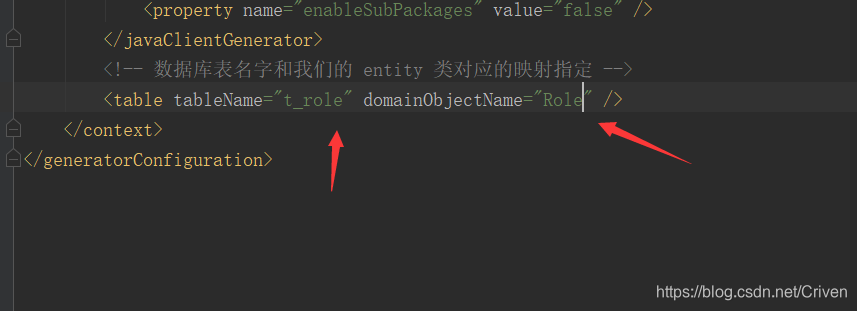
生成资源后各归其位!
+有(空)参+toString
1.3.3 SQL 语句
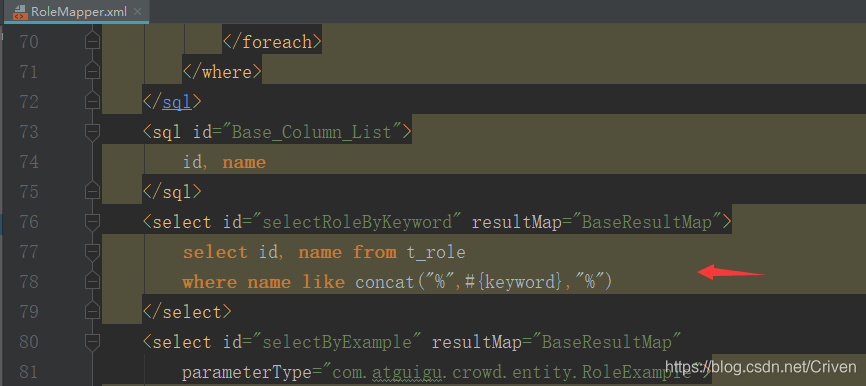
<select id="selectRoleByKeyword" resultMap="BaseResultMap">
		select id, name from t_role
		where name like concat("%",#{keyword},"%")
	</select>
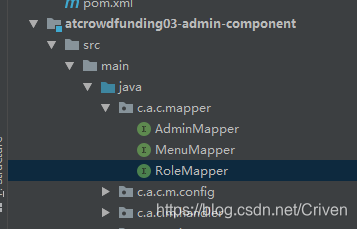
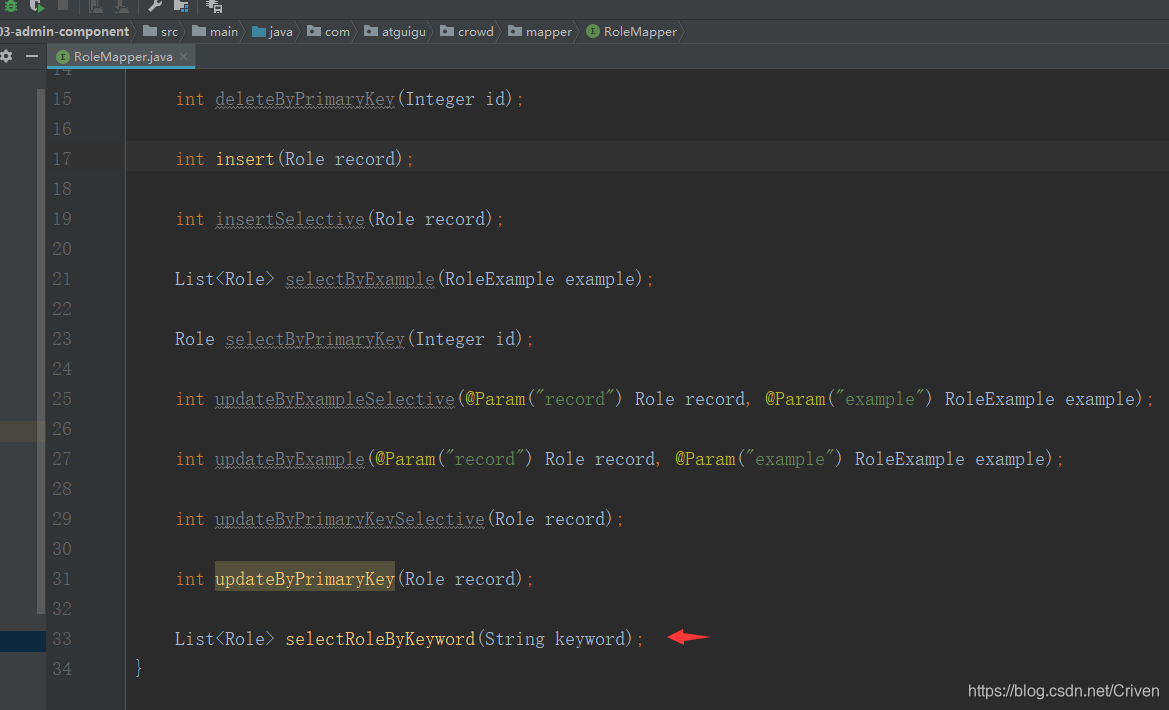
1.3.4 RoleMapper 接口
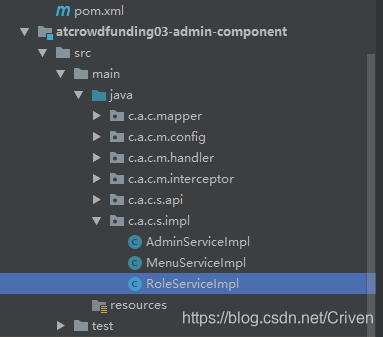
1.3.5 RoleService 接口和实现
package com.atguigu.crowd.service.impl;

import com.atguigu.crowd.entity.Role;
import com.atguigu.crowd.entity.RoleExample;
import com.atguigu.crowd.mapper.RoleMapper;
import com.atguigu.crowd.service.api.RoleService;
import com.github.pagehelper.PageHelper;
import com.github.pagehelper.PageInfo;
import org.springframework.beans.factory.annotation.Autowired;
import org.springframework.stereotype.Service;

import java.util.List;

@Service
public class RoleServiceImpl implements RoleService {

    @Autowired
    private RoleMapper roleMapper;

    @Override
    public PageInfo<Role> getPageInfo(Integer pageNum, Integer pageSize, String keyword) {

        // 1.开启分页功能
        PageHelper.startPage(pageNum, pageSize);

        // 2.执行查询
        List<Role> roleList = roleMapper.selectRoleByKeyword(keyword);

        // 3.封装PageInfo对象返回
        return new PageInfo<>(roleList);
    }
  }
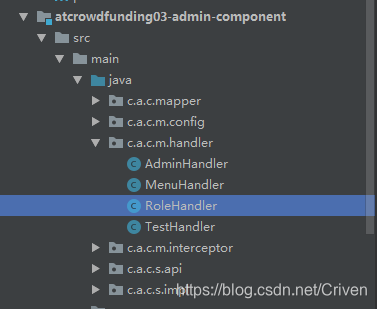
1.3.6 RoleHandler
@Controller
public class RoleHandler {

    @Autowired
    private RoleService roleService;
@ResponseBody
    @RequestMapping("/role/get/page/info.json")
    public ResultEntity<PageInfo<Role>> getPageInfo(
            @RequestParam(value = "pageNum", defaultValue = "1") Integer pageNum,
            @RequestParam(value = "pageSize", defaultValue = "5") Integer pageSize,
            @RequestParam(value = "keyword", defaultValue = "") String keyword
    ){

        // 调用Service方法获取分页数据
        PageInfo<Role> pageInfo = roleService.getPageInfo(pageNum, pageSize, keyword);;

        // 封装到ResultEntity对象中返回(如果上面的操作抛出异常,交给异常映射机制处理)
        return ResultEntity.successWithData(pageInfo);


    }
}
1.4 代码:过渡
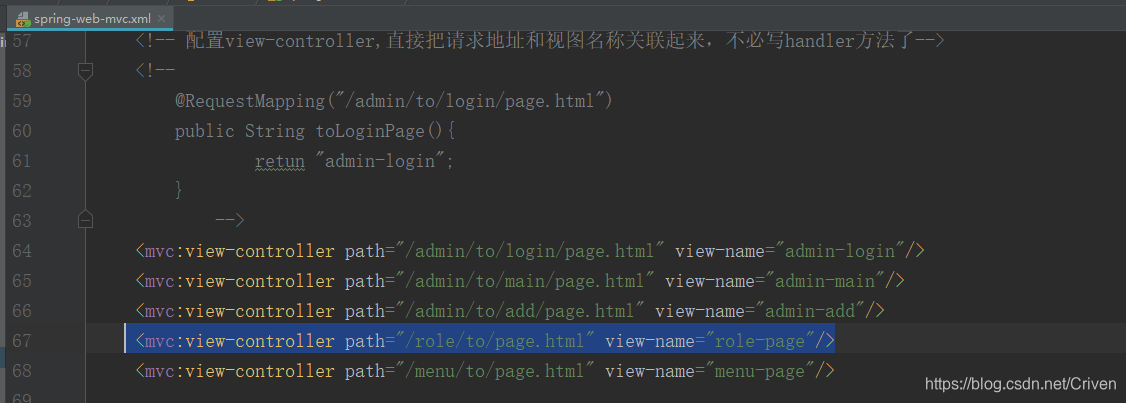
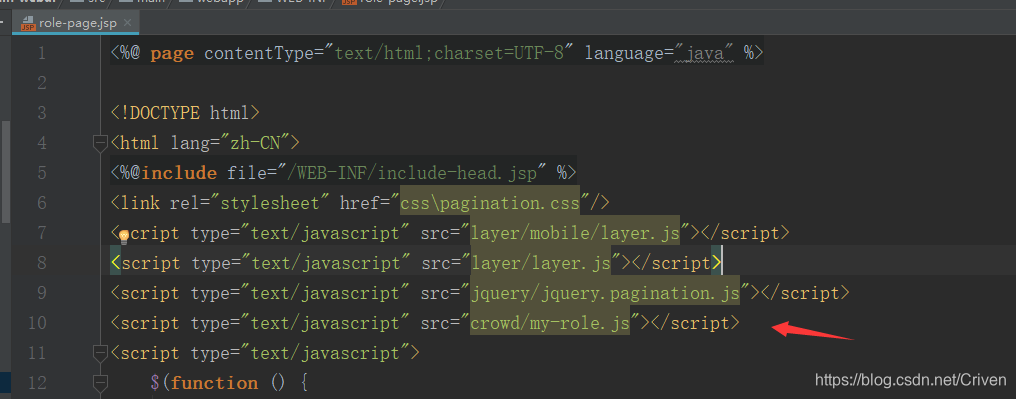
1.4.2 完善 role-page.jsp
<%@ page contentType="text/html;charset=UTF-8" language="java" %>
<!DOCTYPE html>
<html lang="zh-CN">
<%@include file="/WEB-INF/include-head.jsp" %>
<link rel="stylesheet" href="css\pagination.css"/>
<script type="text/javascript" src="layer/mobile/layer.js"></script>
<script type="text/javascript" src="layer/layer.js"></script>
<script type="text/javascript" src="jquery/jquery.pagination.js"></script>
<script type="text/javascript" src="crowd/my-role.js"></script>
<script type="text/javascript">
$(function () {
// 1.为分页操作准备初始化数据
window.pageNum = 1;
window.pageSize = 5;
window.keyword = "";
// 2.调用执行分页的函数,显示分页效果
generatePage();
// 3.给查询按钮绑定单击响应函数
$("#searchBtn").click(function () {
// 3.1获取关键词数据赋值给对应的全员变量
window.keyword = $("#keywordInput").val();
// 3.2调用分页函数刷新页面
generatePage();
});
// 4.点击新增按钮打开模态框
$("#showAddModalBtn").click(function () {
$("#addModal").modal("show");
});
// 5.给新增模态框中的保存按钮绑定单击响应函数
$("#saveRoleBtn").click(function () {
// 5.1获取用户在文本框中输入的角色名称
// #addModal表示找到整个模态框
// 空格表示在候带元素中继续查找
// [name=roleName]表示匹配name属性等于roleName的元素
var roleName = $.trim($("#addModal [name=roleName]").val());
// 5.2发送Ajax请求
$.ajax({
"url": "role/save.json",
"type": "post",
"data": {
"name": roleName
},
"dataType": "json",
"success": function (response) {
var result = response.result;
if (result == "SUCCESS"){
layer.msg("操作成功!");
// 将页码定位到最后一页
window.pageNum = 9999999;
// 重新加载分页数据
generatePage();
}
if (result == "FAILED"){
layer.msg("操作失败!" + response.message);
}
},
"error": function (response) {
layer.msg(response.status+" " +response.statusText);
}
});
// 关闭模态框
$("#addModal").modal("hide");
// 清理模态框
$("#addModal [name=roleName]").val("");
});
// 6.给页面上的"铅笔"按钮绑定单击响应函数,目的是打开模态框
// 传统的事件绑定方式只能在第一关页面有效,翻页后失效了
/*$(".pencilBtn").click(function () {
alert("aaaaaaa");
});*/
// 使用jQuery对象的on()函数可以解决上面问题
// 6.1 首先找到所有“动态生成”的元素所附着的“静态”元素
// 6.2 on()函数的第一个参数是事件类型
// 6.3 on()函数的第二个参数是找到真正要绑定事件的元素的选择器
// 6.4 on()函数的第三个参数是事件的响应函数
$("#rolePageBody").on("click", ".pencilBtn", function () {
// 打开模态框
$("#editModal").modal("show");
// 获取表格中当前行中的角色名称
var roleName = $(this).parent().prev().text();
// 获取当前角色的id
// 依据是:var pencilBtn = "<button id='"+roleId+"' 这段代码中我们把roleId设置到id属性了
// 为了让执行更新的按钮能够获取roleId的值,把它放在全局变量上
window.roleId = this.id;
// 使用roleName的值设置模态框中的文本框
$("#editModal [name=roleName]").val(roleName);
});
// 7.更新模态框中的更新按钮绑定单击响应函数
$("#updateRoleBtn").click(function () {
// 7.1从文本框中获取新的角色名称
var roleName = $("#editModal [name=roleName]").val();
// 7.2发送Ajax请求执行更新
$.ajax({
"url": "role/update.json",
"type": "post",
"data": {
"id": window.roleId,
"name": roleName
},
"dataType": "json",
"success": function (response) {
var result = response.result;
if (result == "SUCCESS"){
layer.msg("操作成功!");
// 重新加载分页数据
generatePage();
}
if (result == "FAILED"){
layer.msg("操作失败!" + response.message);
}
},
"error": function (response) {
layer.msg(response.status+" " +response.statusText);
}
});
// 7.3 关闭模态框
$("#editModal").modal("hide");
});
/*// 临时测试代码
var roleArray = [{roleId:5,roleName:"aaa"},{roleId:5,roleName:"bbb"}];
showConfirmModal(roleArray);*/
// 8.点击确认模态框中的确认删除按钮执行删除
$("#removeRoleBtn").click(function () {
// 从全局变量范围获取roleIdArray,转换为JSON字符串
var requestBody = JSON.stringify(window.roleIdArray);
$.ajax({
"url":"/role/remove/bu/role/id/array.json",
"type": "post",
"data": requestBody,
"contentType": "application/json;charset=UTF-8",
"dataType": "json",
"success": function (response) {
var result = response.result;
if (result == "SUCCESS"){
layer.msg("操作成功!");
// 重新加载分页数据
generatePage();
}
if (result == "FAILED"){
layer.msg("操作失败!" + response.message);
}
},
"error": function (response) {
layer.msg(response.status+" " +response.statusText);
}
});
// 关闭模态框
$("#confirmModal").modal("hide");
});
// 9.给单条删除按钮绑定单击响应函数
$("#rolePageBody").on("click",".removeBtn",function () {
//从当前按钮出发获取角色名称
var roleName = $(this).parent().prev().text();
// 创建role对象存入数组
var roleArray = [{
roleId:this.id,
roleName: roleName
}];
// 调用专门的函数打开模态框
showConfirmModal(roleArray)
});
// 10.给总的checkbox绑定单击响应函数
$("#summaryBox").click(function () {
// 10.1 获取当前多选框自身的状态
var currentStatus = this.checked;
// 10.2 用当前多选框的状态设置其他多选框
$(".itemBox").prop("checked", currentStatus);
});
// 11.全选、全不选的反向操作
$("#rolePageBody").on("click",".itemBox",function () {
// 获取当前已经选中的.itemBox的数量
var checkedBoxCount = $(".itemBox:checked").length;
// 获取区别.itemBox的数量
var totalBoxCount = $(".itemBox").length;
// 使用二者的比较结果设置总的checkbox
$("#summaryBox").prop("checked", checkedBoxCount == totalBoxCount);
});
// 12.给批量删除的按钮绑定单击响应函数
$("#batchRemoveBtn").click(function () {
// 创建 一个数组对象用来存放后面获取到的角色对象
var roleArray = [];
// 遍历当前选择的多选框
$(".itemBox:checked").each(function () {
// 使用this引用当前遍历得到的多选框
var roleId = this.id;
// 通过DOM操作获取角色名称
var roleName = $(this).parent().next().text();
roleArray.push({
"roleId": roleId,
"roleName": roleName
});
});
// 检查roleArray的长度是否为0
if (roleArray.length == 0){
layer.msg("请至少选择一个执行删除");
return ;
}
// 调用专门的函数打开模态框
showConfirmModal(roleArray);
});
});
</script>
<body>
<%@include file="/WEB-INF/include-nav.jsp" %>
<div class="container-fluid">
<div class="row">
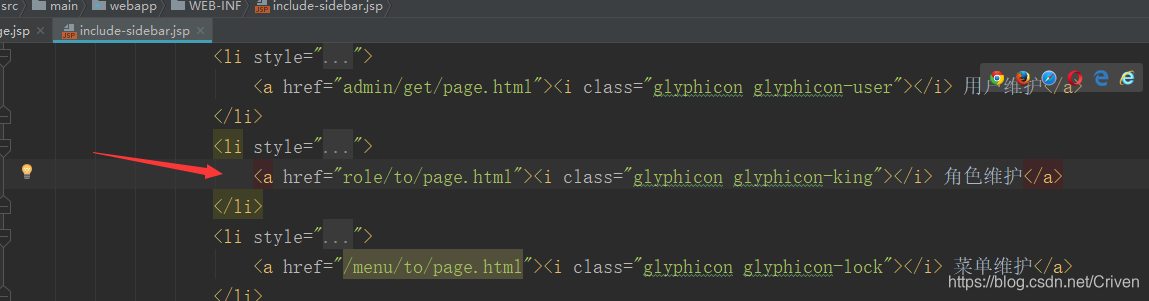
<%@include file="/WEB-INF/include-sidebar.jsp" %>
<div class="col-sm-9 col-sm-offset-3 col-md-10 col-md-offset-2 main">
<div class="panel panel-default">
<div class="panel-heading">
<h3 class="panel-title"><i class="glyphicon glyphicon-th"></i> 数据列表</h3>
</div>
<div class="panel-body">
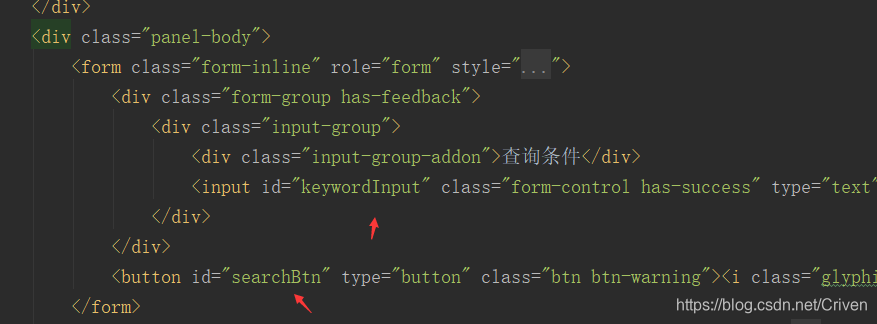
<form class="form-inline" role="form" style="float:left;">
<div class="form-group has-feedback">
<div class="input-group">
<div class="input-group-addon">查询条件</div>
<input id="keywordInput" class="form-control has-success" type="text" placeholder="请输入查询条件">
</div>
</div>
<button id="searchBtn" type="button" class="btn btn-warning"><i class="glyphicon glyphicon-search"></i> 查询</button>
</form>
<button id="batchRemoveBtn" type="button" class="btn btn-danger" style="float:right;margin-left:10px;"><i class=" glyphicon glyphicon-remove"></i> 删除</button>
<button type="button" id="showAddModalBtn" class="btn btn-primary" style="float:right;" ><i class="glyphicon glyphicon-plus"></i> 新增</button>
<br>
<hr style="clear:both;">
<div class="table-responsive">
<table class="table table-bordered">
<thead>
<tr>
<th width="30">#</th>
<th width="30"><input id="summaryBox" type="checkbox"></th>
<th>名称</th>
<th width="100">操作</th>
</tr>
</thead>
<tbody id="rolePageBody">
</tbody>
<tfoot>
<tr>
<td colspan="6" align="center">
<div id="Pagination" class="pagination"><!-- 这里显示分页 --></div>
</td>
</tr>
</tfoot>
</table>
</div>
</div>
</div>
</div>
</div>
</div>
<%@include file="/WEB-INF/modal-role-add.jsp"%>
<%@include file="/WEB-INF/modal-role-edit.jsp"%>
<%@include file="/WEB-INF/modal-role-confirm.jsp"%>
</body>
</html>
1.5 代码:前端
1.5.1 初始化数据
$(function () {

        // 1.为分页操作准备初始化数据
        window.pageNum = 1;
        window.pageSize = 5;
        window.keyword = "";

        // 2.调用执行分页的函数,显示分页效果
        generatePage();
)};
1.5.2 创建外部 JavaScript 文件
在 role-page.jsp 引入外部 JavaScript 文件 my-role.js
在 role-page.jsp 中引入 Pagination 环境
1.5.3 外部函数一:generatePage()
// 执行分页,生成页面效果,调用这个函数都会重新加载页面
function generatePage() {

    // 1.获取分页数据
    var pageInfo = getPageInfoRemote();

    // 2.填充表格
    fillTableBody(pageInfo);

}
1.5.4 外部函数二:getPageInfoRemote()
// 远程访问服务器端程序获取pageInfo数据
function getPageInfoRemote() {

    // 调用$.ajax()函数发送请求并接受$.ajax()函数的返回值
    var ajaxResult = $.ajax({
       "url": "role/get/page/info.json",
       "type": "post",
       "data": {
           "pageNum": window.pageNum,
           "pageSize": window.pageSize,
           "keyword": window.keyword
       },
        "async": false,
       "dataType": "json"

    });
    console.log(ajaxResult);

    // 判断当前响应状态代码是否为200
    var statusCode = ajaxResult.status;

    // 如果当前响应状态码不是200, 说明发生了错误或其他意外情况,显示提示消息,让当前函数停止执行
    if (statusCode != 200){
        layer.msg("服务器端程序调用失败!响应状态码=" + statusCode + "说明信息=" + ajaxResult.statusText);
        return null;
    }

    // 如果响应状态码是200,说明请求处理成功,获取pageInfo
    var resultEntity = ajaxResult.responseJSON;

    // 从resultEntity中获取result属性
    var result = resultEntity.result;

    // 判断result是否成功
    if (result == "FAILED"){
        layer.msg(resultEntity.message);
        return null;
    }

    // 确认result为成功后获取pageInfp
    var pageInfo = resultEntity.data;

    // 返回pageInfo
    return pageInfo;
}
1.5.5 外部函数三:fillTableBody(pageInfo)
// 填充表格
function fillTableBody(pageInfo) {

    // 清除tbody中的旧的内容

    $("#rolePageBody").empty();

    !// 这里清空是为了让没有搜索结果时不显示页码导航条
    $("#Pagination").empty();

    // 判断pageInfo对象是否有效
    if (pageInfo == null || pageInfo == undefined || pageInfo.list == null || pageInfo.list.length == 0){
        $("#rolePageBody").append("<tr><td colspan='4' align='center'>抱歉!没有查询到您搜索的数据!</td></tr>");

        return ;
    }

    // 使用pageInfo的list属性填充tbody
    for (var i = 0; i < pageInfo.list.length; i++) {

        var role = pageInfo.list[i];

        var roleId = role.id;

        var roleName = role.name;

        var numberTd = "<td>" +(i+1)+ "</td>";
        var checkboxTd = "<td><input id = '"+roleId+"'  class='itemBox'   type='checkbox'></td>";
        var roleNameTd = "<td>" +roleName+"</td>";

        var checkBtn = "<button type='button' class='btn btn-success btn-xs'><i class=' glyphicon glyphicon-check'></i></button>";

        // 通过button标签的id属性(别的属性其实也可以)把roleId值传递到button按钮的单击响应函数中,在单击响应函数中使用this.id
        var pencilBtn = "<button id='"+roleId+"' type='button' class='btn btn-primary btn-xs pencilBtn'><i class=' glyphicon glyphicon-pencil'></i></button>";

        // 通过button标签的id属性(别的属性其实也可以)把roleId值传递到button按钮的单击响应函数中,在单击响应函数中使用this.id
        var removeBtn = "<button id='"+roleId+"' type='button' class='btn btn-danger btn-xs removeBtn'><i class=' glyphicon glyphicon-remove'></i></button>";

        var buttonTd = "<td>"+checkBtn+ " " +pencilBtn+ " " +removeBtn +"</td>";

        var tr = "<tr>" +numberTd+checkboxTd+roleNameTd+buttonTd+ "</tr>";

        $("#rolePageBody").append(tr);
    }

    // 生成分页导航条
    generateNavigator(pageInfo);
}
1.5.6 外部函数四:generateNavigator(pageInfo)
//生成分页页码导航条
function generateNavigator(pageInfo) {

    // 获取总记录数
    var totalRecord = pageInfo.total;

    // 声明相关属性
    var properties = {
        "num_edge_entries": 3,
        "num_display_entries": 5,
        "callback": paginationCallBack,
        "items_per_page": pageInfo.pageSize,
        "current_page": pageInfo.pageNum - 1,
        "prev_text": "上一页",
        "next_text": "下一页"
    }

    // 调用pagination()函数
    $("#Pagination").pagination(totalRecord, properties);

}
1.5.8 外部函数五:paginationCallBack(pageIndex, jQuery)
// 翻页时的回调函数
function paginationCallBack(pageIndex, jQuery) {

    // 修改window对象pageNum属性
    window.pageNum = pageIndex + 1;

    // 调用分页函数
    generatePage();

    // 取消页码超链接的默认行为
    return false;

}
2. 角色查询操作
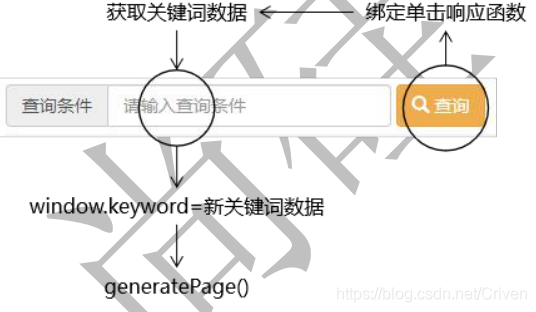
2.1 目标
把页面上的“查询”表单和已经封装好的执行分页的函数连起来即可。
2.2 思路
2.3 代码
2.3.1 HTML 代码中标记 id
2.3.2 jQuery 代码
// 3.给查询按钮绑定单击响应函数
        $("#searchBtn").click(function () {
            // 3.1获取关键词数据赋值给对应的全员变量
            window.keyword = $("#keywordInput").val();

            // 3.2调用分页函数刷新页面
            generatePage();
        });
3. 角色保存操作
3.1 目标
通过在打开的模态框中输入角色名称,执行对新角色的保存。
3.2 思路

3.3 代码:页面引入模态框

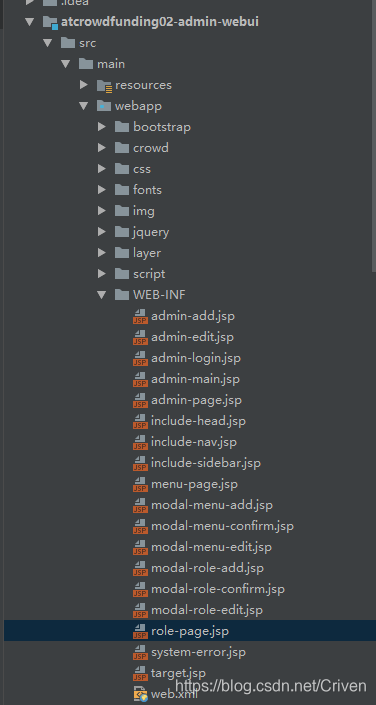
3.3.1 创建 JSP 文件
3.3.2 加入模态框 HTML 代码
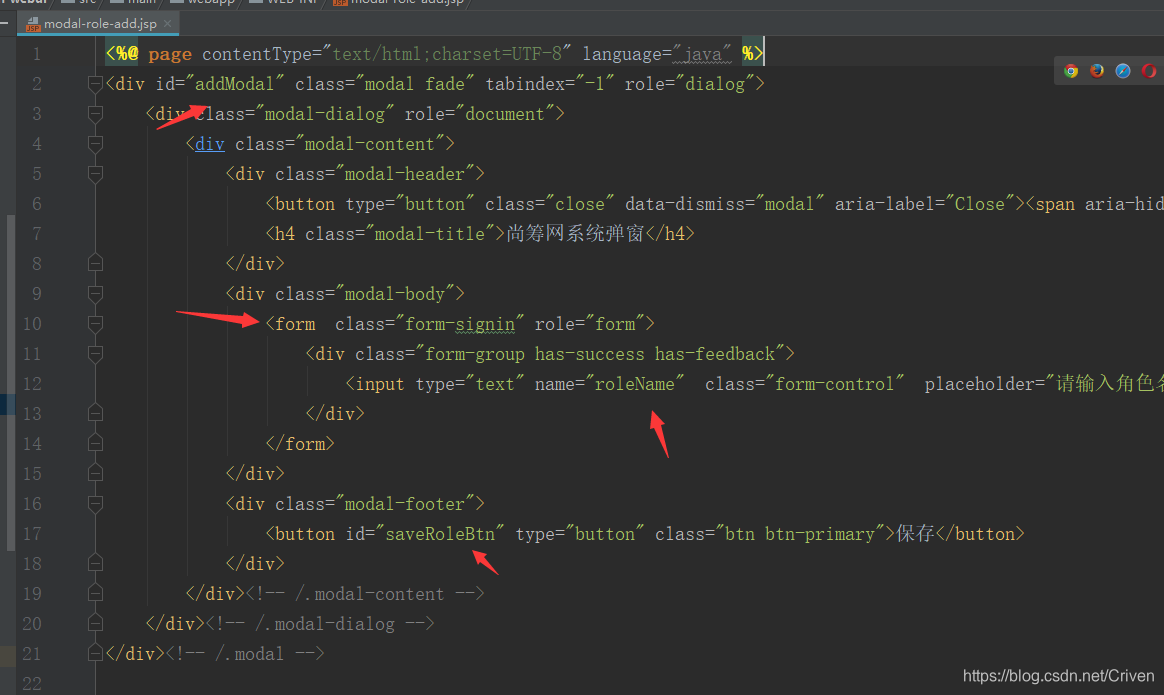
3.3.3 在 role-page.jsp 引入上面的文件
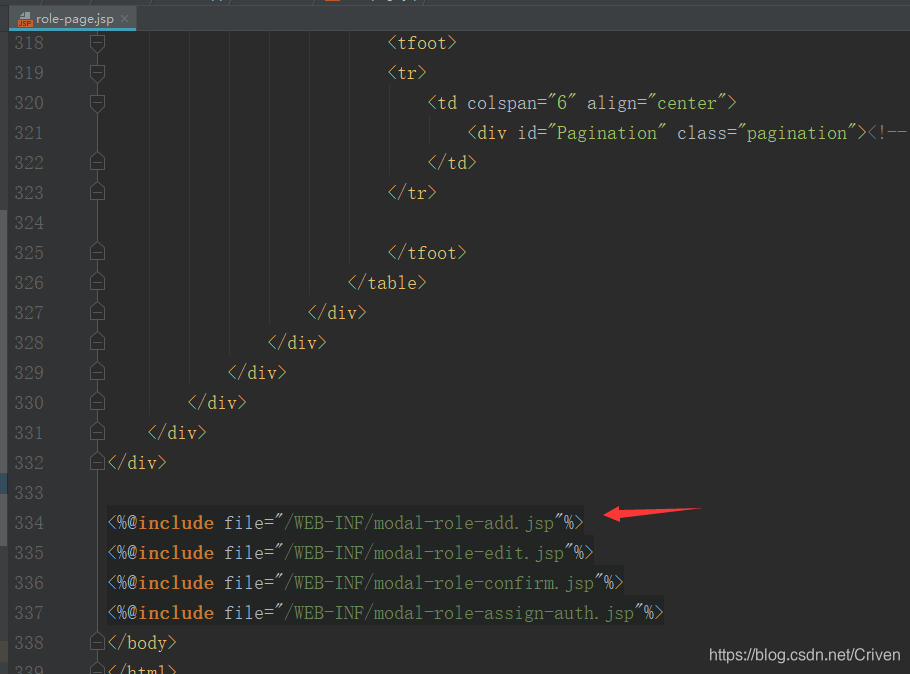
模态框默认情况下是隐藏的,为了页面整洁,统一放在最后的位置
3.4 代码:打开模态框
3.4.1 修改新增按钮
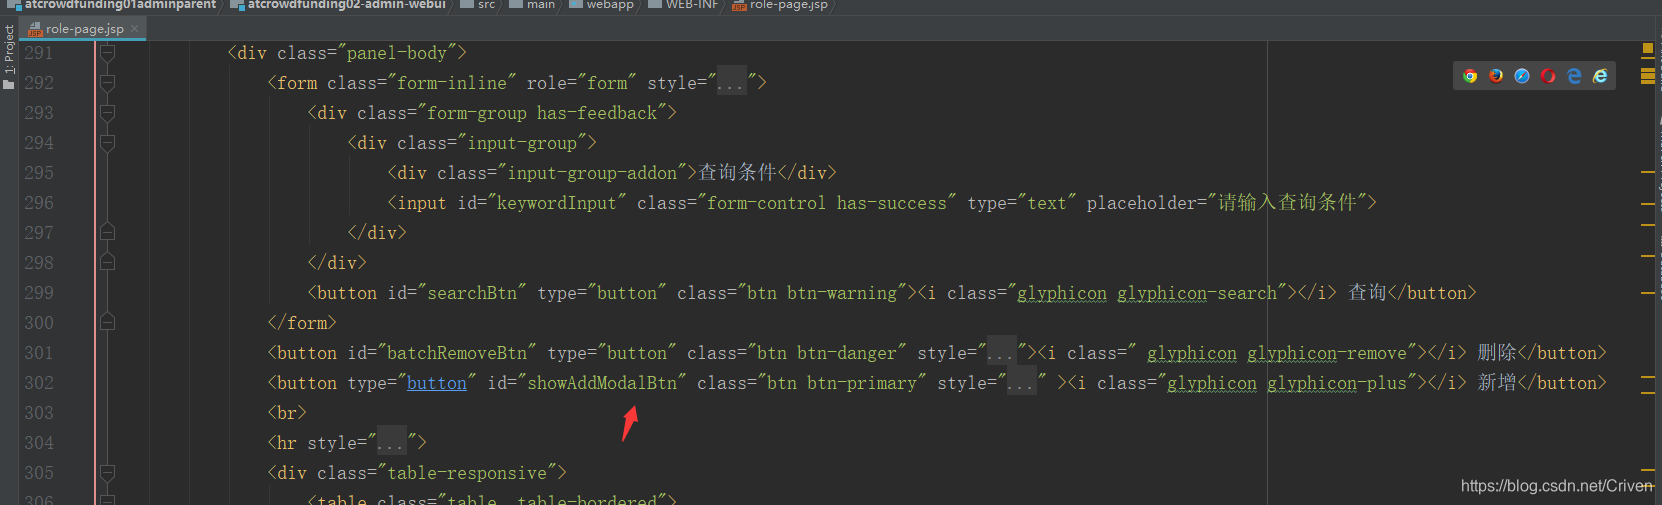
去掉了原来的 onclick 属性
3.4.2 给新增按钮绑定单击响应函数
// 4.点击新增按钮打开模态框
        $("#showAddModalBtn").click(function () {

            $("#addModal").modal("show");

            // 在模态框中装载树Auth的形结构数据
            fillAuthTree();
        });
3.5 代码:执行保存
3.5.1 前端代码

// 5.给新增模态框中的保存按钮绑定单击响应函数
        $("#saveRoleBtn").click(function () {

            // 5.1获取用户在文本框中输入的角色名称
            // #addModal表示找到整个模态框
            // 空格表示在候带元素中继续查找
            // [name=roleName]表示匹配name属性等于roleName的元素
            var roleName = $.trim($("#addModal [name=roleName]").val());

            // 5.2发送Ajax请求
            $.ajax({
                "url": "role/save.json",
                "type": "post",
                "data": {
                    "name": roleName
                },
                "dataType": "json",
                "success": function (response) {

                    var result = response.result;

                    if (result == "SUCCESS"){
                        layer.msg("操作成功!");

                        // 将页码定位到最后一页
                        window.pageNum = 9999999;
                        // 重新加载分页数据
                        generatePage();
                    }

                    if (result == "FAILED"){
                            layer.msg("操作失败!" + response.message);
                    }
                },
                "error": function (response) {
                    layer.msg(response.status+" " +response.statusText);
                }
            });

            // 关闭模态框
            $("#addModal").modal("hide");

            // 清理模态框
            $("#addModal [name=roleName]").val("");


        });
3.5.2 后端代码

//@Controller
@RestController
public class RoleHandler {

    @Autowired
    private RoleService roleService;
//    @ResponseBody
    @RequestMapping("/role/save.json")
    public ResultEntity<String> saveRole(Role role){

        roleService.saveRole(role);
        return ResultEntity.successWithoutData();
    }
  }

@Service
public class RoleServiceImpl implements RoleService {

    @Autowired
    private RoleMapper roleMapper;
    @Override
    public void saveRole(Role role) {
        roleMapper.insert(role);
    }
  }
4. 角色更新操作
4.1 目标
修改角色信息。
4.2 思路

4.3 代码:页面引入模态框
4.3.1 创建 JSP 文件

4.3.3 在 role-page.jsp 引入
<%@include file="/WEB-INF/modal-role-edit.jsp"%>
4.4 代码:打开模态框(回显)
4.4.1 修改“铅笔”按钮
修改 fillTableBody()函数
// 填充表格
function fillTableBody(pageInfo) {

    // 清除tbody中的旧的内容

    $("#rolePageBody").empty();

    !// 这里清空是为了让没有搜索结果时不显示页码导航条
    $("#Pagination").empty();

    // 判断pageInfo对象是否有效
    if (pageInfo == null || pageInfo == undefined || pageInfo.list == null || pageInfo.list.length == 0){
        $("#rolePageBody").append("<tr><td colspan='4' align='center'>抱歉!没有查询到您搜索的数据!</td></tr>");

        return ;
    }

    // 使用pageInfo的list属性填充tbody
    for (var i = 0; i < pageInfo.list.length; i++) {

        var role = pageInfo.list[i];

        var roleId = role.id;

        var roleName = role.name;

        var numberTd = "<td>" +(i+1)+ "</td>";
        var checkboxTd = "<td><input id = '"+roleId+"'  class='itemBox'   type='checkbox'></td>";
        var roleNameTd = "<td>" +roleName+"</td>";

        var checkBtn = "<button id='"+roleId+"' type='button' class='btn btn-success btn-xs checkBtn'><i class=' glyphicon glyphicon-check'></i></button>";

        // 通过button标签的id属性(别的属性其实也可以)把roleId值传递到button按钮的单击响应函数中,在单击响应函数中使用this.id
        var pencilBtn = "<button id='"+roleId+"' type='button' class='btn btn-primary btn-xs pencilBtn'><i class=' glyphicon glyphicon-pencil'></i></button>";

        // 通过button标签的id属性(别的属性其实也可以)把roleId值传递到button按钮的单击响应函数中,在单击响应函数中使用this.id
        var removeBtn = "<button id='"+roleId+"' type='button' class='btn btn-danger btn-xs removeBtn'><i class=' glyphicon glyphicon-remove'></i></button>";

        var buttonTd = "<td>"+checkBtn+ " " +pencilBtn+ " " +removeBtn +"</td>";

        var tr = "<tr>" +numberTd+checkboxTd+roleNameTd+buttonTd+ "</tr>";

        $("#rolePageBody").append(tr);
    }
4.4.2 给“铅笔”按钮绑定单击响应函数
 // 6.给页面上的"铅笔"按钮绑定单击响应函数,目的是打开模态框
        // 传统的事件绑定方式只能在第一关页面有效,翻页后失效了
        /*$(".pencilBtn").click(function () {
            alert("aaaaaaa");
        });*/

        // 使用jQuery对象的on()函数可以解决上面问题
        // 6.1 首先找到所有“动态生成”的元素所附着的“静态”元素
        // 6.2 on()函数的第一个参数是事件类型
        // 6.3 on()函数的第二个参数是找到真正要绑定事件的元素的选择器
        // 6.4 on()函数的第三个参数是事件的响应函数
        $("#rolePageBody").on("click", ".pencilBtn", function () {
            // 打开模态框
            $("#editModal").modal("show");

            // 获取表格中当前行中的角色名称
            var roleName = $(this).parent().prev().text();

            // 获取当前角色的id
            // 依据是:var pencilBtn = "<button id='"+roleId+"' 这段代码中我们把roleId设置到id属性了
            // 为了让执行更新的按钮能够获取roleId的值,把它放在全局变量上
            window.roleId = this.id;

            // 使用roleName的值设置模态框中的文本框
            $("#editModal [name=roleName]").val(roleName);
        });
4.5 代码:执行更新
4.5.1 前端
        // 7.更新模态框中的更新按钮绑定单击响应函数
        $("#updateRoleBtn").click(function () {

            // 7.1从文本框中获取新的角色名称
            var roleName = $("#editModal [name=roleName]").val();

            // 7.2发送Ajax请求执行更新

            $.ajax({
                "url": "role/update.json",
                "type": "post",
                "data": {
                    "id": window.roleId,
                    "name": roleName
                },
                "dataType": "json",
                "success": function (response) {

                    var result = response.result;

                    if (result == "SUCCESS"){
                        layer.msg("操作成功!");

                        // 重新加载分页数据
                        generatePage();
                    }

                    if (result == "FAILED"){
                        layer.msg("操作失败!" + response.message);
                    }
                },
                "error": function (response) {
                    layer.msg(response.status+" " +response.statusText);
                }
            });

            // 7.3 关闭模态框
            $("#editModal").modal("hide");
        });
4.5.2 后端

//    @ResponseBody
    @RequestMapping("/role/update.json")
    public ResultEntity<String> updateRole(Role role){

        roleService.updateRole(role);
        return ResultEntity.successWithoutData();
    }
Override
    public void updateRole(Role role) {
        roleMapper.updateByPrimaryKey(role);
    }
5. 角色删除操作
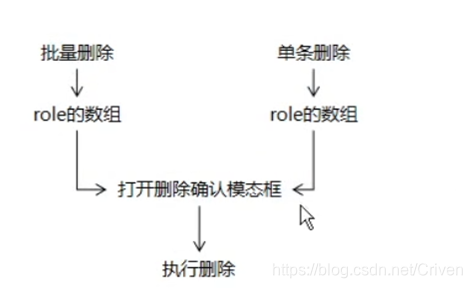
5.1 目标
前端的“单条删除”和“批量删除”在后端合并为同一套操作。合并的依据是:单条删除时 id 也放在数组中,后端完全根据 id 的数组进行删除。
5.2 思路

5.3 后端代码

//@Controller
@RestController
public class RoleHandler {

    @Autowired
    private RoleService roleService;

//    @ResponseBody
    @RequestMapping("/role/remove/bu/role/id/array.json")
    public ResultEntity<String> removeByRoleIdAarry(@RequestBody List<Integer> roleIdList){

        roleService.removeRole(roleIdList);

        return ResultEntity.successWithoutData();
    }
}
@Service
public class RoleServiceImpl implements RoleService {
@Autowired
    private RoleMapper roleMapper;
@Override
    public void removeRole(List<Integer> roleIdList) {

        RoleExample example = new RoleExample();

        RoleExample.Criteria criteria = example.createCriteria();

        //delete from t_role where id in (5,8,12)
        criteria.andIdIn(roleIdList);
        roleMapper.deleteByExample(example);
    }
}
5.4 前端代码
5.4.1 打开模态框
5.4.2 创建 JSP 文件

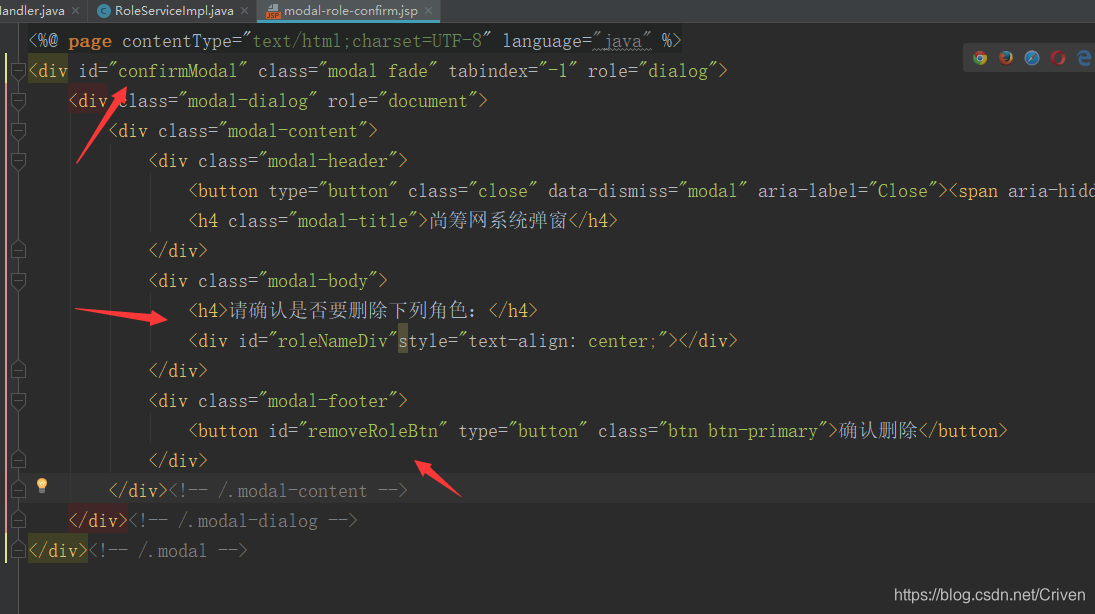
5.4.3 在 role-page.jsp 引入
<%@include file="/WEB-INF/modal-role-confirm.jsp"%>
5.5 代码:打开模态框(回显)
修改 fillTableBody()函数
var removeBtn = "<button id='"+roleId+"' type='button' class='btn btn-danger btn-xs removeBtn'><i class=' glyphicon glyphicon-remove'></i></button>";
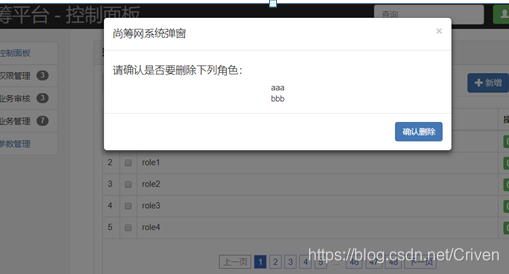
5.6 测试
// 临时测试代码
        var roleArray = [{roleId:5,roleName:"aaa"},{roleId:5,roleName:"bbb"}];
        showConfirmModal(roleArray);
效果图:
5.7 执行删除
// 声明专门的函数显示确认模态框
function showConfirmModal(roleArray) {

        // 打开模态框
    $("#confirmModal").modal("show");

    // 清除旧的数据
    $("#roleNameDiv").empty();

    // 在全局遍历范围创建数组用来存放角色id
    window.roleIdArray = [];

    // 遍历roleArray数组
    for (var i = 0; i < roleArray.length; i++) {
        var role = roleArray[i];
        var roleName = role.roleName;
        $("#roleNameDiv").append(roleName+"<br/>");

        var roleId = role.roleId;

        // 调用数组对象的push()方法存入新的元素
        window.roleIdArray.push(roleId);
    }
}

// 8.点击确认模态框中的确认删除按钮执行删除
        $("#removeRoleBtn").click(function () {

            // 从全局变量范围获取roleIdArray,转换为JSON字符串
            var requestBody = JSON.stringify(window.roleIdArray);

            $.ajax({
                "url":"/role/remove/bu/role/id/array.json",
                "type": "post",
                "data": requestBody,
                "contentType": "application/json;charset=UTF-8",
                "dataType": "json",
                "success": function (response) {

                    var result = response.result;

                    if (result == "SUCCESS"){
                        layer.msg("操作成功!");

                        // 重新加载分页数据
                        generatePage();
                    }

                    if (result == "FAILED"){
                        layer.msg("操作失败!" + response.message);
                    }
                },
                "error": function (response) {
                    layer.msg(response.status+" " +response.statusText);
                }
            });

            // 关闭模态框
            $("#confirmModal").modal("hide");

        });
5.8 单条删除

// 9.给单条删除按钮绑定单击响应函数
        $("#rolePageBody").on("click",".removeBtn",function () {

            //从当前按钮出发获取角色名称
            var roleName = $(this).parent().prev().text();

            // 创建role对象存入数组
            var roleArray = [{
                roleId:this.id,
                roleName: roleName
            }];

            // 调用专门的函数打开模态框
            showConfirmModal(roleArray)

        });
5.9 批量删除-全选全不选功能
 // 10.给总的checkbox绑定单击响应函数
        $("#summaryBox").click(function () {

            // 10.1 获取当前多选框自身的状态
            var currentStatus = this.checked;

            // 10.2 用当前多选框的状态设置其他多选框
            $(".itemBox").prop("checked", currentStatus);
        });

        // 11.全选、全不选的反向操作
        $("#rolePageBody").on("click",".itemBox",function () {

          // 获取当前已经选中的.itemBox的数量
            var checkedBoxCount = $(".itemBox:checked").length;

            // 获取区别.itemBox的数量
            var totalBoxCount = $(".itemBox").length;

            // 使用二者的比较结果设置总的checkbox
            $("#summaryBox").prop("checked", checkedBoxCount == totalBoxCount);

        });
5.9.1 收集要删除的信息


// 12.给批量删除的按钮绑定单击响应函数
        $("#batchRemoveBtn").click(function () {

                // 创建 一个数组对象用来存放后面获取到的角色对象
            var  roleArray = [];

            // 遍历当前选择的多选框
            $(".itemBox:checked").each(function () {

                // 使用this引用当前遍历得到的多选框
                var roleId = this.id;

                // 通过DOM操作获取角色名称
                var roleName = $(this).parent().next().text();

                roleArray.push({
                   "roleId": roleId,
                    "roleName": roleName
                });
            });

            // 检查roleArray的长度是否为0
            if (roleArray.length == 0){
                layer.msg("请至少选择一个执行删除");
                return ;
            }

            // 调用专门的函数打开模态框
            showConfirmModal(roleArray);
        });


 232
232

 被折叠的 条评论
为什么被折叠?
被折叠的 条评论
为什么被折叠?
 到【灌水乐园】发言


