


 本文介绍了如何使用Maven Repository下载JDBC驱动并添加到Eclipse项目中,详细讲解了Java连接MySQL数据库的步骤,包括加载驱动、建立连接,并展示了增删改操作的SQL示例。此外,还提到了SQL注入问题及其防范措施。
1.介绍网站
Maven Repository 是一个开源的下载jar包的网站
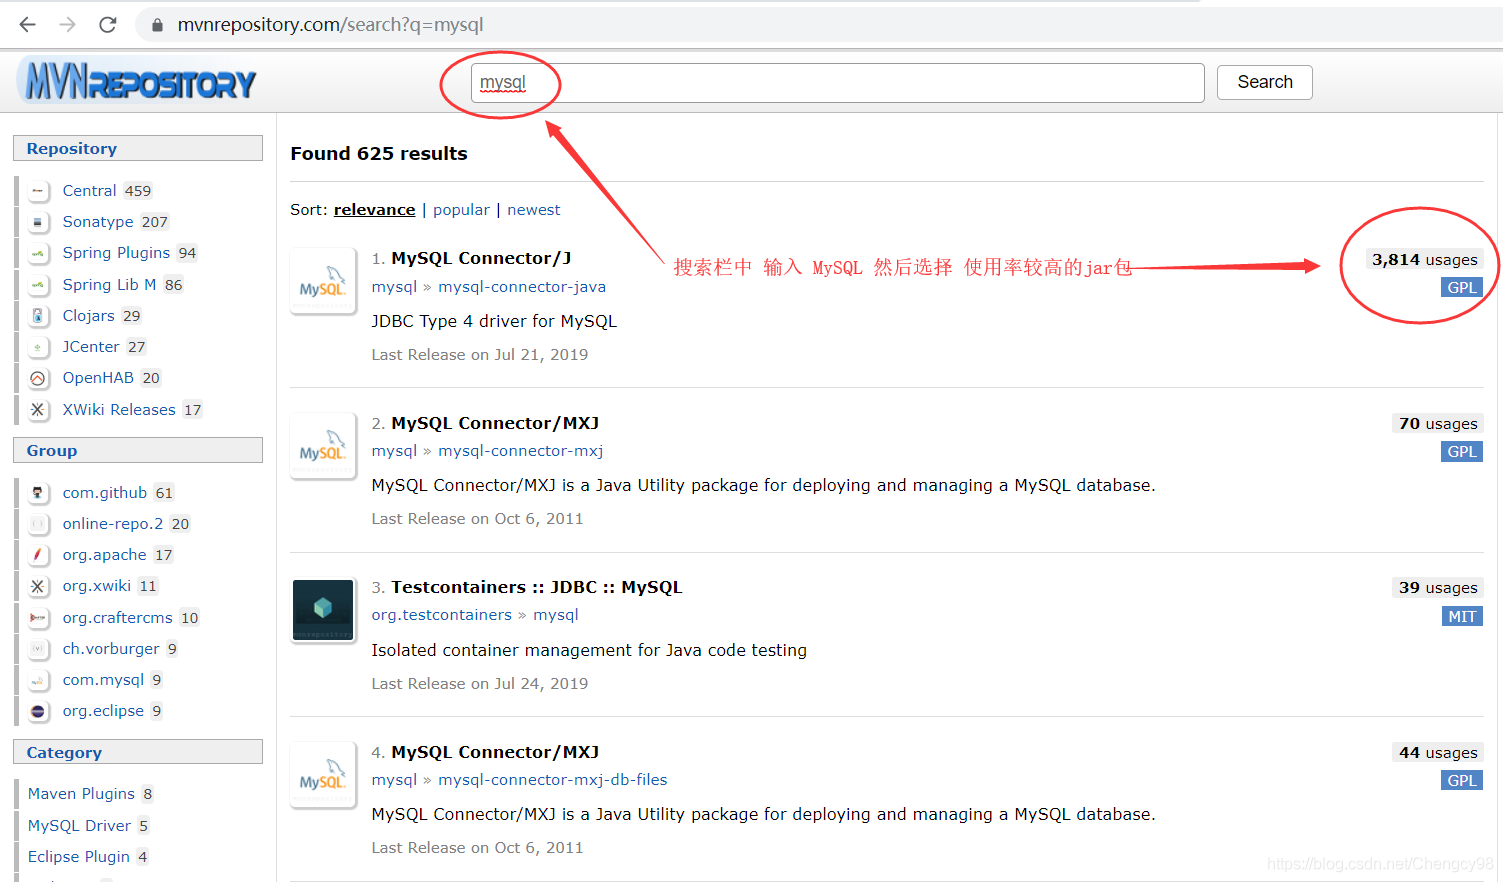
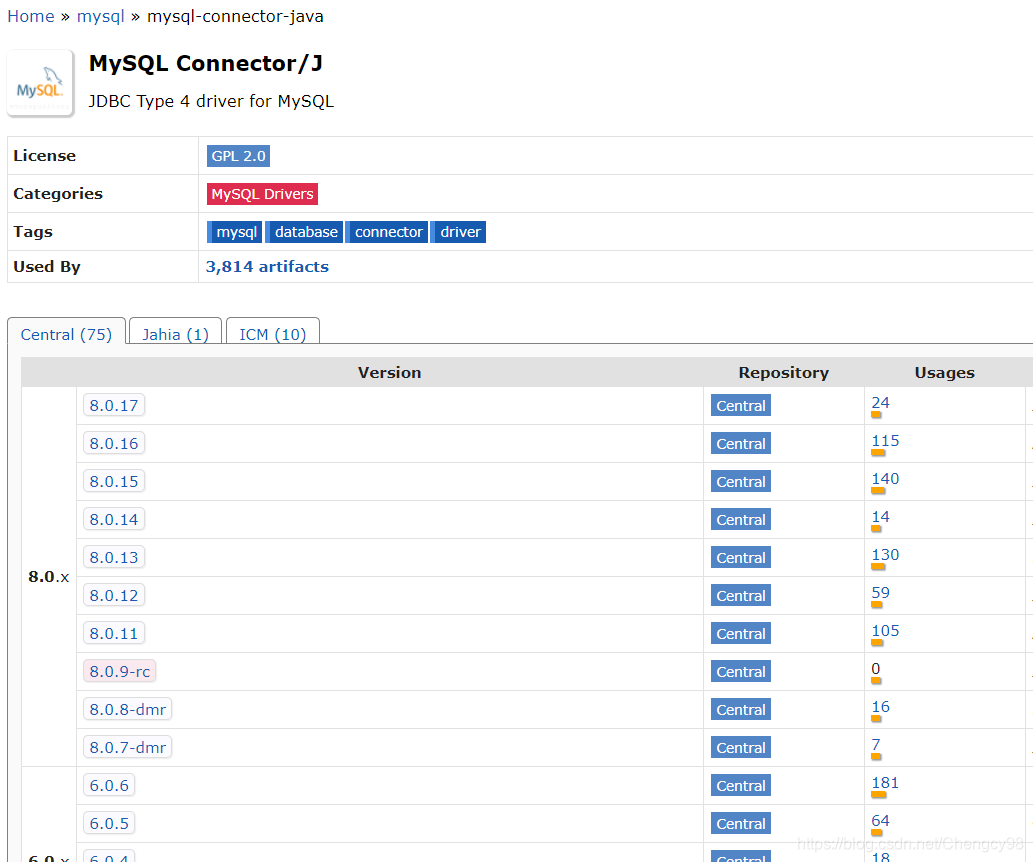
选择你需要的包点击后如下图所示 选择需要的版本号
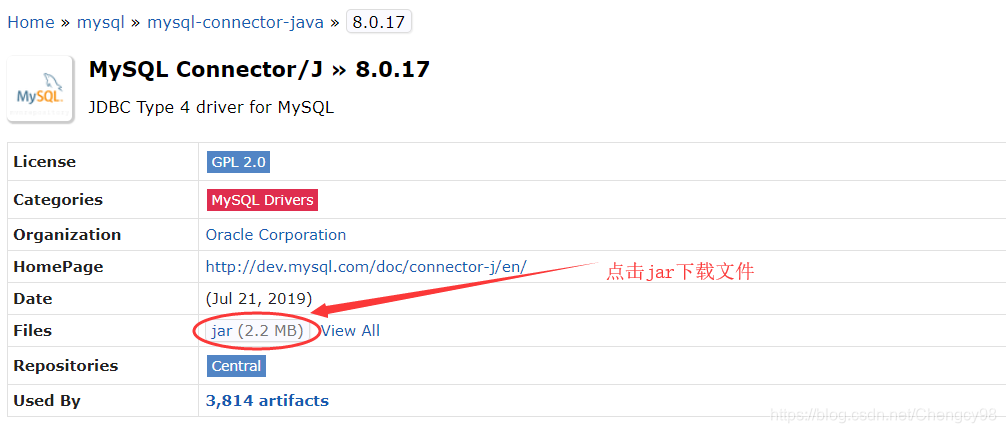
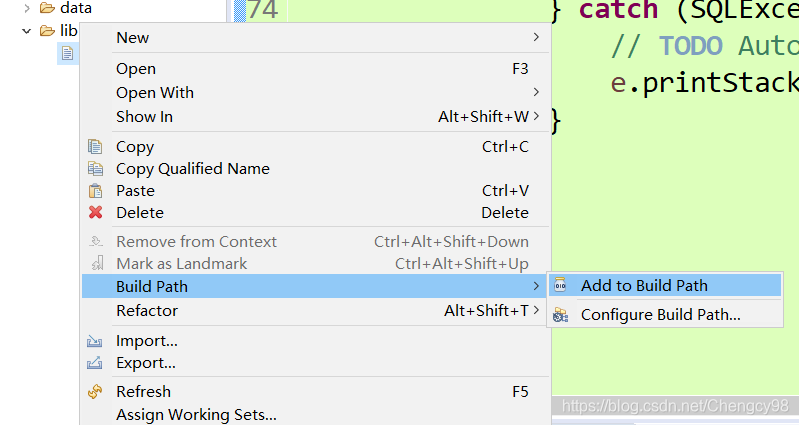
下载后打开 eclipse 创建工程 在工程目录下新建一个lib文件夹 将下载的jar包粘贴到文件夹中

点击右键选择Add to Build Path
2.使用Java连接数据库
注意: 一定要确保MySQL数据库服务是开启状态(系统服务中mysql157启动中)。
-
加载MySQL的驱动类 com.mysql.jdbc.Driver
/*
* 扩展问题 JVM什么时候将类加载到内存中?
* class.forname 就是查询这个类存不存在 在查询的同时就加载到内存中
*/Class.forName("com.mysql.jdbc.Driver");//jdk1.7及以下必须要 1.8以上不是必须建议写 -
获取数据库连接对象
连接数据库需要哪些要素
// host port user password//url提供连接数据库需要的 host 和 port String url = "jdbc:mysql://localhost:3306/ishopn?characterEncoding=utf8"; String user = "root"; //提供 user String password = "1234"; //提供 password Connection conn = DriverManager.getConnection(url, user, password); -
实现数据库的操作
3.1 编写sql语句 实现增删改
String insert_sql = “insert into commoditytype (ct_id,ct_name) values (‘7’,‘网络游戏’)”;
String delete_sql = "delete from commoditytype where ct_id=7 ";
String update_sql = “update commoditytype set ct_name=‘电脑配件’ where ct_id=‘7’”;
3.2 获取执行对象
Statement state = conn.createStatement();
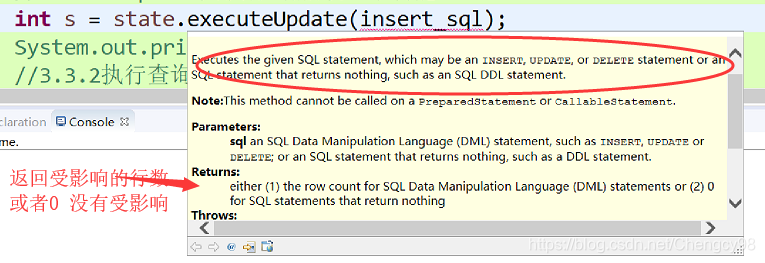
3.3.1返回受影响行数executeUpdate只执行 增删改三个功能 int s = state.executeUpdate(insert_sql); System.out.println(s);
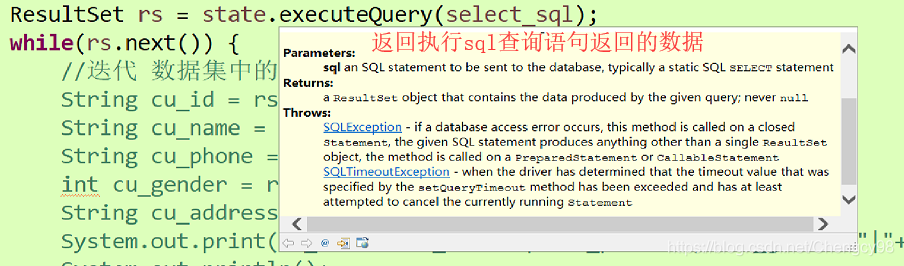
3.3.2执行查询语句
		String select_sql = "select * from customer";
		ResultSet rs = state.executeQuery(select_sql);
		while(rs.next()) {
			//迭代 数据集中的每一行 从每一行中获取相应的数据
			String cu_id = rs.getString(1);//从1 开始
			String cu_name = rs.getString(2);
			String cu_phone = rs.getString(3);
			int cu_gender = rs.getInt(4);
			String cu_address = rs.getString(5);
			System.out.print(cu_id+":"+cu_name+"|"+cu_phone+"|"+cu_gender+"|"+cu_address);
			System.out.println();
			//根据字段名称来获取
			//rs.getString("cu_id"); 等同于rs.getString(1);
			//select cu_id as '商品名称'  则要写 rs.getString("商品名称");

			String cu_id = rs.getString("cu_id");	//从1 开始
			String cu_name = rs.getString("cu_name");
			String cu_phone = rs.getString("cu_phone");
			int cu_gender = rs.getInt("cu_gender");
			String cu_address = rs.getString("cu_address");
			System.out.print(cu_id+":"+cu_name+"|"+cu_phone+"|"+cu_gender+"|"+cu_address);
3. 模拟登陆功能
    SQL语句操作
    登录功能

	在数据库中查找你所输入的账号密码所对应的数据
	假如数据条数大于0,说明存在该账号,反正不存在

public static void main(String[] args) {
		Connection coon = null;
		try {
			Class.forName("com.mysql.jdbc.Driver");  //获取所需的驱动
			String url = "jdbc:mysql://localhost:3306/ishopn?characterEncoding=utf8";
			String user = "root";
			String password = "1234";
			coon = DriverManager.getConnection(url, user, password);// 建立连接
			Scanner input = new Scanner(System.in);
			System.out.println("请输入你的账号:");
			String cu_name = input.next();
			System.out.println("请输入你的密码:");
			String cu_phone = input.next();

			String sql = "select count(*) from customer where cu_name='"+cu_name+"' and cu_phone='"+cu_phone+"'";
			Statement state = coon.createStatement();  //获取执行对象
			ResultSet rs = state.executeQuery(sql);  //执行SQL语句
			rs.next(); //由于查询语句返回的是一个结果集,需要迭代方法,next()就是获取下一个
			if(rs.getInt(1)>0) {
				System.out.println("登录成功");
			}else {
				System.out.println("登录失败");
			}
		} catch (Exception e) {
			e.printStackTrace();
		} finally {
			if(coon!=null) {
				try {
					coon.close();
				} catch (SQLException e) {
					e.printStackTrace();
				}
			}
		}
	}
由于SQL语句是通过拼接完成的,那么就有可能存在SQL注入攻击
例如:
String cu_name = "' or 1=1 #";
System.out.println("请输入电话号码: ");
String cu_phone = sc.next();

String sql = "select count(*) from customer where cu_name='"
+cu_name+"' and cu_phone='"+cu_phone+"'";
//这样无论密码输入什么
sql语句都是select count(*) from customer where cu_name='' or 1=1 # and cu_phone='cu_phone'

//密码部分被#注释了,前面的账号部分用了or1=1 一直是true,所以在不知道账号密码时也能通过验证了
为了解决上述问题 一下我们将用一个新方法来写登陆命令
String sql = "select count(*) from customer where cu_name=? and cu_phone=?";

//将sql语句中的?用setString的方式改成Java中的参数 不用字符串拼接了

PreparedStatement ps = coon.prepareStatement(sql);//这里使用了prepareStatement()方法
ps.setString(1, cu_name);//这里设置?的值  1对应第一个‘?’
ps.setString(2, cu_phone);
ResultSet rs = ps.executeQuery();


 2199
2199

 被折叠的 条评论
为什么被折叠?
被折叠的 条评论
为什么被折叠?
 到【灌水乐园】发言


