


官方网站:https://dolphinscheduler.apache.org/zh-cn
改动的功能:
1、新增一个task类型
- 找到TaskType.java文件,新增一个任务类型
/* * Licensed to the Apache Software Foundation (ASF) under one or more * contributor license agreements. See the NOTICE file distributed with * this work for additional information regarding copyright ownership. * The ASF licenses this file to You under the Apache License, Version 2.0 * (the "License"); you may not use this file except in compliance with * the License. You may obtain a copy of the License at * * http://www.apache.org/licenses/LICENSE-2.0 * * Unless required by applicable law or agreed to in writing, software * distributed under the License is distributed on an "AS IS" BASIS, * WITHOUT WARRANTIES OR CONDITIONS OF ANY KIND, either express or implied. * See the License for the specific language governing permissions and * limitations under the License. */ package com.grgbanking.ds.datazone.common.enums; import com.baomidou.mybatisplus.annotation.EnumValue; /** * task node type */ public enum TaskType { /** * 0 SHELL * 1 SQL * 2 SUB_PROCESS * 3 PROCEDURE * 4 MR * 5 SPARK * 6 PYTHON * 7 DEPENDENT * 8 FLINK * 9 HTTP * 10 DATAX * 11 CONDITIONS * 12 SQOOP * 13 SYNC(新增的) */ SHELL(0, "shell"), SQL(1, "sql"), SUB_PROCESS(2, "sub_process"), PROCEDURE(3, "procedure"), MR(4, "mr"), SPARK(5, "spark"), PYTHON(6, "python"), DEPENDENT(7, "dependent"), FLINK(8, "flink"), HTTP(9, "http"), DATAX(10, "datax"), CONDITIONS(11, "conditions"), SQOOP(12, "sqoop"), SYNC(13, "sync"); TaskType(int code, String descp){ this.code = code; this.descp = descp; } @EnumValue private final int code; private final String descp; public static boolean typeIsNormalTask(String typeName) { TaskType taskType = TaskType.valueOf(typeName); return !(taskType == TaskType.SUB_PROCESS || taskType == TaskType.DEPENDENT); } public int getCode() { return code; } public String getDescp() { return descp; } } - 定义你的参数类,用于json解析参数
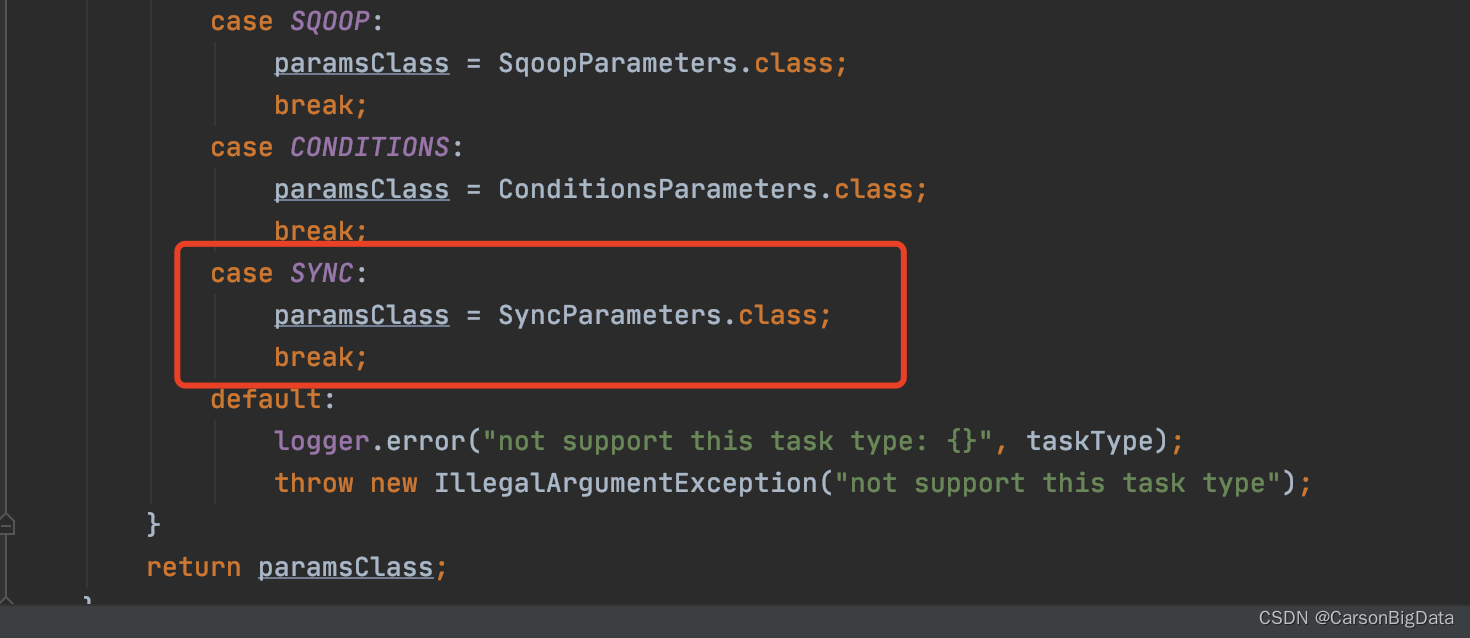
/* * Licensed to the Apache Software Foundation (ASF) under one or more * contributor license agreements. See the NOTICE file distributed with * this work for additional information regarding copyright ownership. * The ASF licenses this file to You under the Apache License, Version 2.0 * (the "License"); you may not use this file except in compliance with * the License. You may obtain a copy of the License at * * http://www.apache.org/licenses/LICENSE-2.0 * * Unless required by applicable law or agreed to in writing, software * distributed under the License is distributed on an "AS IS" BASIS, * WITHOUT WARRANTIES OR CONDITIONS OF ANY KIND, either express or implied. * See the License for the specific language governing permissions and * limitations under the License. */ package com.grgbanking.ds.datazone.common.task.sync; import com.grgbanking.ds.datazone.common.process.ResourceInfo; import com.grgbanking.ds.datazone.common.task.AbstractParameters; import java.util.ArrayList; import java.util.List; import java.util.Map; /** * 数据同步参数 */ @Data public class SyncParameters extends AbstractParameters { /** * 源数据host */ private String sourceHost; /** * 源数据port */ private String sourcePort; /** * 源数据类型 */ private String sourceType; /** * 源数据库 */ private String sourceDatabase; /** * 源数据schema */ private String sourceSchema; /** * 源数据用户 */ private String sourceUser; /** * 源数据密码 */ private String sourcePassword; /** * 源数据信息id */ private int sourceId; /** * 目标数据host */ private String targetHost; /** * 目标数据port */ private String targetPort; /** * 目标数据类型 */ private String targetType; /** * 目标数据库 */ private String targetDatabase; /** * 目标数据schema */ private String targetSchema; /** * 目标数据用户 */ private String targetUser; /** * 目标数据密码 */ private String targetPassword; /** * 目标数据信息id */ private int targetId; /** * 同步列表 */ private List<Map<String, String>> syncList; @Override public boolean checkParameters() { return syncList != null && !syncList.isEmpty(); } @Override public List<ResourceInfo> getResourceFilesList() { return new ArrayList<>(); } } - 在 AbstractTask.java下新增类型
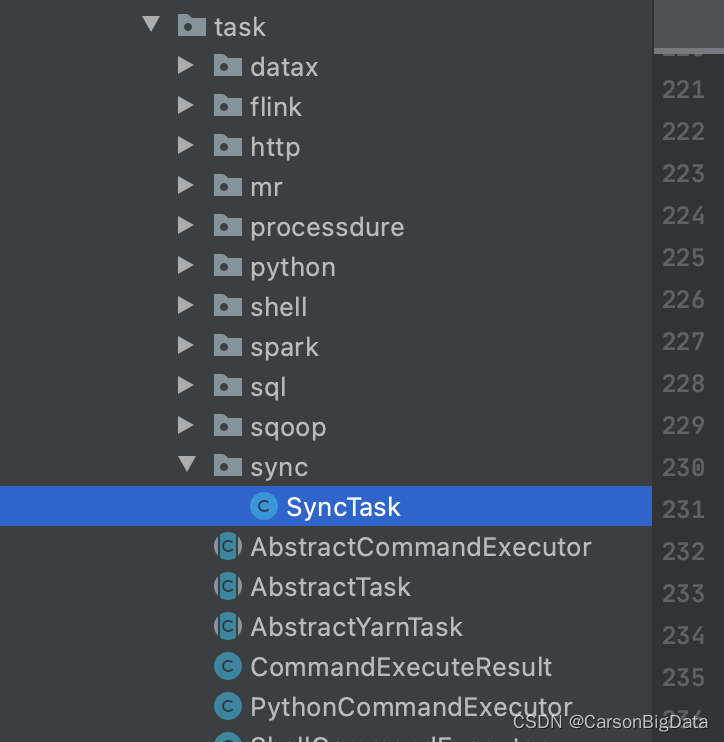
- 在worker文件夹下,找到task目录,新增sync文件夹,然后新建SyncTask.java
- SyncTask.java如下,可作为参考
package com.grgbanking.ds.datazone.server.worker.task.sync;

import com.alibaba.fastjson.JSON;
import com.alibaba.fastjson.JSONObject;
import com.grgbanking.ds.datazone.common.Constants;
import com.grgbanking.ds.datazone.common.task.AbstractParameters;
import com.grgbanking.ds.datazone.common.task.sync.SyncParameters;
import com.grgbanking.ds.datazone.common.utils.JSONUtils;
import com.grgbanking.ds.datazone.server.entity.TaskExecutionContext;
import com.grgbanking.ds.datazone.server.worker.config.WorkerConfig;
import com.grgbanking.ds.datazone.server.worker.task.AbstractTask;
import com.grgbanking.ds.datazone.service.bean.SpringApplicationContext;
import org.apache.commons.lang.StringUtils;
import org.slf4j.Logger;
import org.springframework.http.HttpHeaders;
import org.springframework.http.MediaType;
import org.springframework.http.ResponseEntity;
import org.springframework.web.client.HttpClientErrorException;
import org.springframework.web.client.ResourceAccessException;
import org.springframework.web.client.RestTemplate;


public class SyncTask extends AbstractTask {

    /**
     * 数据同步参数
     */
    private SyncParameters syncParameters;

    /**
     * taskExecutionContext
     */
    private TaskExecutionContext taskExecutionContext;

    /**
     *  worker config
     */
    private final WorkerConfig workerConfig;

    /**
     * constructor
     *
     * @param taskExecutionContext taskExecutionContext
     * @param logger               logger
     */
    protected SyncTask(TaskExecutionContext taskExecutionContext, Logger logger) {
        super(taskExecutionContext, logger);

        this.taskExecutionContext = taskExecutionContext;
        this.workerConfig = SpringApplicationContext.getBean(WorkerConfig.class);
    }


    @Override
    public void init() {

        logger.info("sync task params {}", taskExecutionContext.getTaskParams());
        this.syncParameters = JSONUtils.parseObject(taskExecutionContext.getTaskParams(), SyncParameters.class);

        if (!syncParameters.checkParameters()) {
            throw new RuntimeException("sync task params is not valid");
        }
    }

    @Override
    public void handle() throws Exception {

        String threadLoggerInfoName = String.format(Constants.TASK_LOG_INFO_FORMAT, taskExecutionContext.getTaskAppId());
        Thread.currentThread().setName(threadLoggerInfoName);

        try{
            RestTemplate restTemplate = new RestTemplate();
            //创建请求头
            HttpHeaders headers = new HttpHeaders();
            headers.setContentType(MediaType.APPLICATION_JSON);
            headers.add("API_KEY", workerConfig.getApiKey());
            headers.add("API_SECRET", workerConfig.getApiSecret());
            int migrateTaskId = createTask(restTemplate);
            if(migrateTaskId == -1){
                setExitStatusCode(-1);
                throw new Exception("与数据同步服务器通讯失败");
            }

            long startTime = System.currentTimeMillis();
            while(true){

                int taskStatus = queryTask(restTemplate, migrateTaskId);
                //假设2为完成状态
                if(taskStatus == 2){
                    break;
                }
                if(System.currentTimeMillis() - startTime >= 3 * 60 * 1000){
                    exitStatusCode = -1;
                    throw new Exception("查询任务状态信息超时");
                }
                Thread.sleep(3000);
            }
            JSONObject logResult = queryLogMsg(restTemplate, migrateTaskId);
            setExitStatusCode(Constants.EXIT_CODE_SUCCESS);
            //处理日志信息
            //...
        } catch (Exception e){
            exitStatusCode = -1;
            throw e;
        }
    }

    @Override
    public AbstractParameters getParameters() {
        return syncParameters;
    }

    private int createTask(RestTemplate restTemplate){
        //返回创建的任务ID,用于查询任务状态信息
        JSONObject json=new JSONObject();
        json.put("destDetails",syncParameters.getTargetUrl());
        json.put("sourceDetails",syncParameters.getSourceUrl());
        try {
            String requestUrl = workerConfig.getApiUrl() + "/MigrateTask";
            ResponseEntity<String> responseEntity = restTemplate.postForEntity(requestUrl, json, String.class);
            String resultStr = responseEntity.getBody();
            JSONObject result = JSON.parseObject(resultStr, JSONObject.class);
            if(result.getBoolean("success")!=true){
                logger.error("服务通讯反馈的信息:{}", resultStr);
            }
            return result.getInteger("data");

        } catch (ResourceAccessException e) {
            logger.error(e.getMessage(), e);
            return -1;
        } catch (HttpClientErrorException e) {
            logger.error("调用异常", e);
            if (StringUtils.contains(e.getMessage(), "404")) {
                return -1;
            }
            return -1;
        } catch (Exception e) {
            logger.error(e.getMessage());
            return -1;
        }
    }

    private int queryTask(RestTemplate restTemplate, int migrateTaskId){
        try {
            String requestUrl = workerConfig.getApiUrl() + "/MigrateTask/" + migrateTaskId;
            ResponseEntity<String> responseEntity = restTemplate.getForEntity(requestUrl, String.class);
            String resultStr = responseEntity.getBody();
            JSONObject result = JSON.parseObject(resultStr, JSONObject.class);
            if(result.getBoolean("success")!=true){
                logger.error("服务通讯反馈的信息:{}", resultStr);
            }
//            return result.getInteger("data");
            return 2;

        } catch (ResourceAccessException e) {
            logger.error(e.getMessage(), e);
            return -1;
        } catch (HttpClientErrorException e) {
            logger.error("调用异常", e);
            if (StringUtils.contains(e.getMessage(), "404")) {
                return -1;
            }
            return -1;
        } catch (Exception e) {
            logger.error(e.getMessage());
            return -1;
        }
    }

    private JSONObject queryLogMsg(RestTemplate restTemplate, int migrateTaskId){
        try {
            String requestUrl = workerConfig.getApiUrl() + "/MigrateTask/log/" + migrateTaskId;
            ResponseEntity<String> responseEntity = restTemplate.getForEntity(requestUrl, String.class);
            String resultStr = responseEntity.getBody();
            JSONObject result = JSON.parseObject(resultStr, JSONObject.class);
            if(result.getBoolean("success")!=true){
                logger.error("服务通讯反馈的信息:{}", resultStr);
            }
//            return result.getInteger("data");
            return result;

        } catch (ResourceAccessException e) {
            logger.error(e.getMessage(), e);
            throw e;
        } catch (HttpClientErrorException e) {
            logger.error("调用异常", e);
            if (StringUtils.contains(e.getMessage(), "404")) {
                throw new RuntimeException("404");
            }
            throw e;
        } catch (Exception e) {
            logger.error(e.getMessage());
            throw e;
        }
    }
}
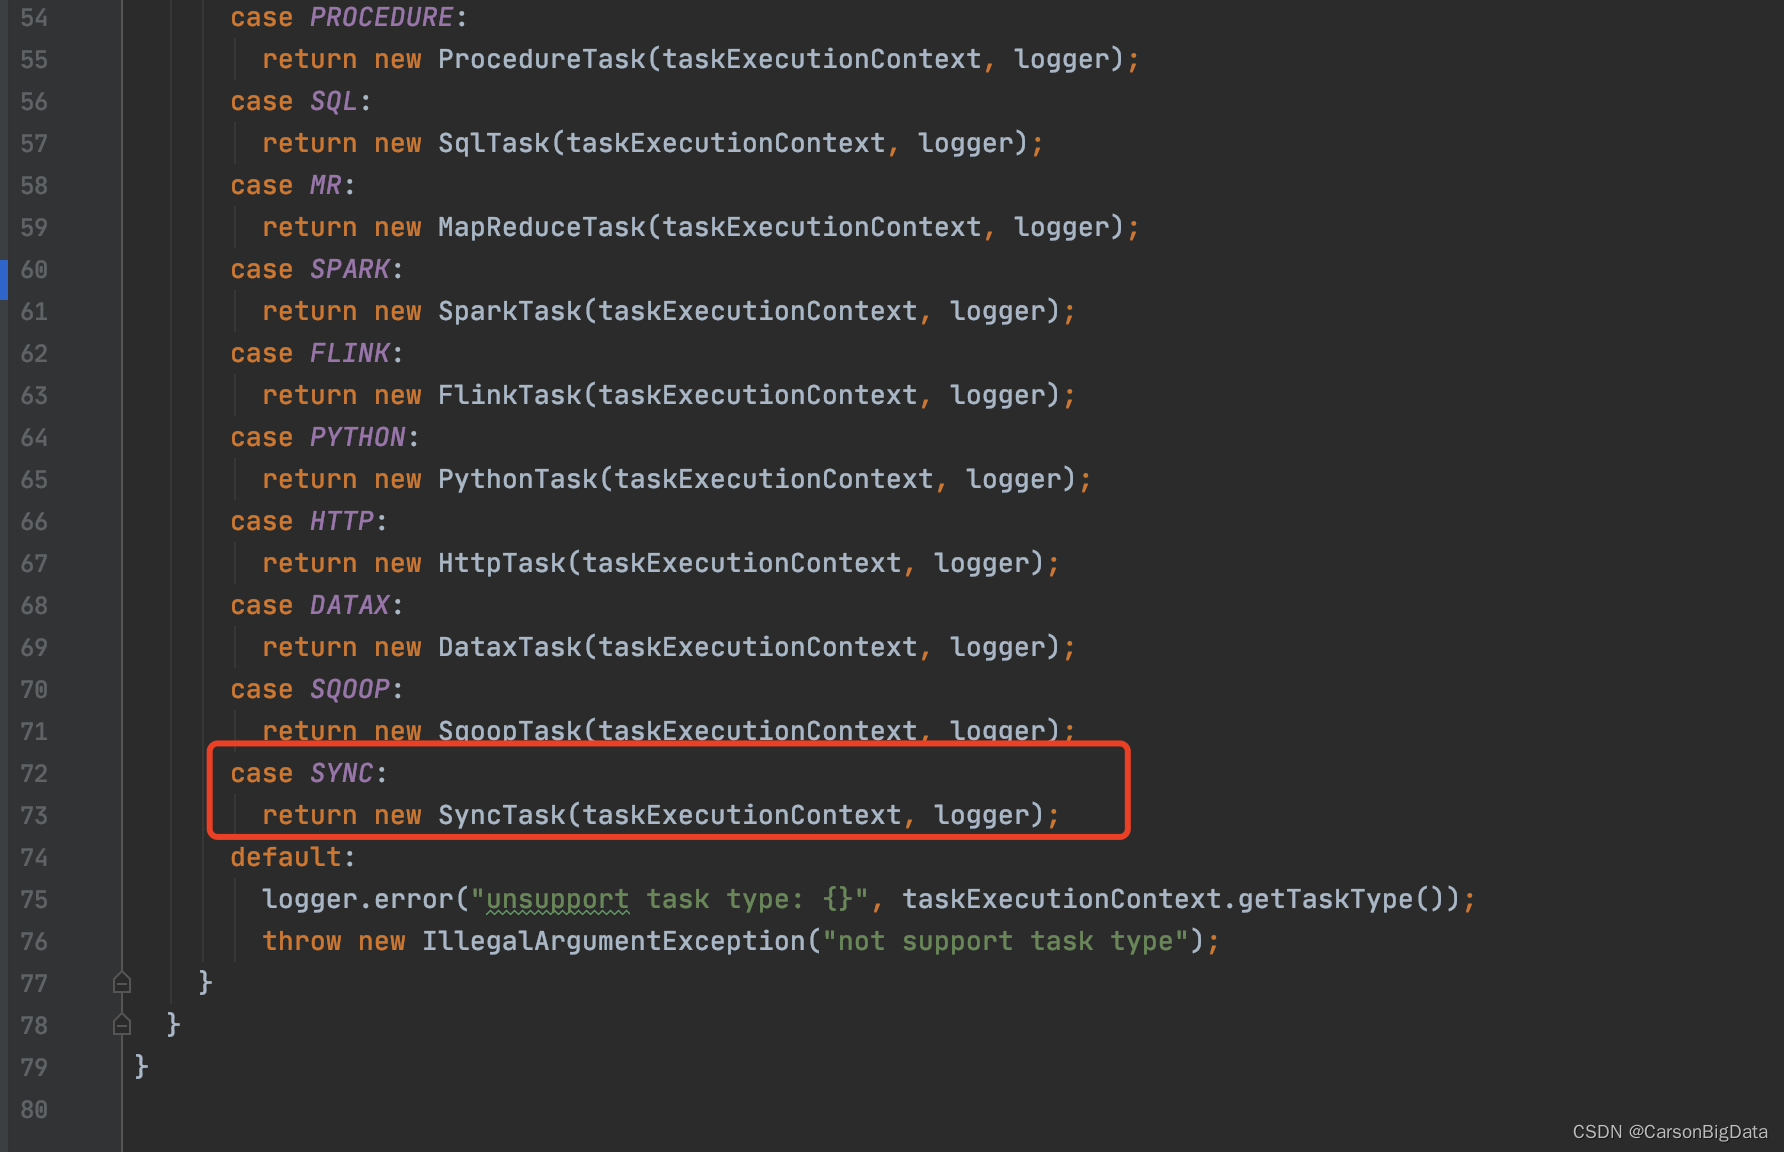
6. 找到TaskManager.java,在里面新增任务类型
2、登录授权修改,整合第三方认证中心
3、API整合nacos实现声明式服务调用
4、集成Python3 Python DataX的基础镜像
DockerFile:
FROM openjdk:8-jre-slim-buster

# 1. install command/library/software
# If install slowly, you can replcae debian's mirror with new mirror, Example:
RUN { \
 echo "deb http://mirrors.tuna.tsinghua.edu.cn/debian/ buster main contrib non-free"; \
 echo "deb http://mirrors.tuna.tsinghua.edu.cn/debian/ buster-updates main contrib non-free"; \
 echo "deb http://mirrors.tuna.tsinghua.edu.cn/debian/ buster-backports main contrib non-free"; \
 echo "deb http://mirrors.tuna.tsinghua.edu.cn/debian-security buster/updates main contrib non-free"; \
} > /etc/apt/sources.list

RUN apt-get update && \
    apt-get install -y --no-install-recommends tzdata dos2unix python3 python supervisor procps psmisc netcat sudo tini curl iputils-ping wget && \
    echo "Asia/Shanghai" > /etc/timezone && \
    rm -f /etc/localtime && \
    dpkg-reconfigure tzdata && \
    rm -rf /var/lib/apt/lists/* /tmp/* && \
    wget http://datax-opensource.oss-cn-hangzhou.aliyuncs.com/datax.tar.gz && \
    mkdir /opt/soft && \
    tar -zxvf datax.tar.gz -C /opt/soft && \
    rm -rf datax.tar.gz && \
    rm -rf /opt/soft/datax/plugin/writer/._* && \
    rm -rf /opt/soft/datax/plugin/reader/._*
制作完这个基础镜像,然后原先的openjdk:8-jre-slim-buster基础镜像改成你自定义的镜像。
5、统一数据源中心,新建嵌入Feign远程调用数据源中心保持强一致性,定时同步实现最终一致性。
遇到的坑:
1、master 读取配置文件失败导致启动失败
2、集成DataX遇到的坑
datax执行自测脚本异常:
2022-02-18 09:04:50.468 [main] WARN  ConfigParser - 插件[streamreader,streamwriter]加载失败,1s后重试... Exception:Code:[Common-00], Describe:[您提供的配置文件存在错误信息,请检查您的作业配置 .] - 配置信息错误,您提供的配置文件[/Users/chenweifeng/Downloads/datax/plugin/reader/.DS_Store/plugin.json]不存在. 请检查您的配置文件.
2022-02-18 09:04:51.486 [main] ERROR Engine -

经DataX智能分析,该任务最可能的错误原因是:
com.alibaba.datax.common.exception.DataXException: Code:[Common-00], Describe:[您提供的配置文件存在错误信息,请检查您的作业配置 .] - 配置信息错误,您提供的配置文件[/Users/chenweifeng/Downloads/datax/plugin/reader/.DS_Store/plugin.json]不存在. 请检查您的配置文件.
	at com.alibaba.datax.common.exception.DataXException.asDataXException(DataXException.java:26)
	at com.alibaba.datax.common.util.Configuration.from(Configuration.java:95)
	at com.alibaba.datax.core.util.ConfigParser.parseOnePluginConfig(ConfigParser.java:153)
	at com.alibaba.datax.core.util.ConfigParser.parsePluginConfig(ConfigParser.java:125)
	at com.alibaba.datax.core.util.ConfigParser.parse(ConfigParser.java:63)
	at com.alibaba.datax.core.Engine.entry(Engine.java:137)
	at com.alibaba.datax.core.Engine.main(Engine.java:204)
网上查了之后的说法是
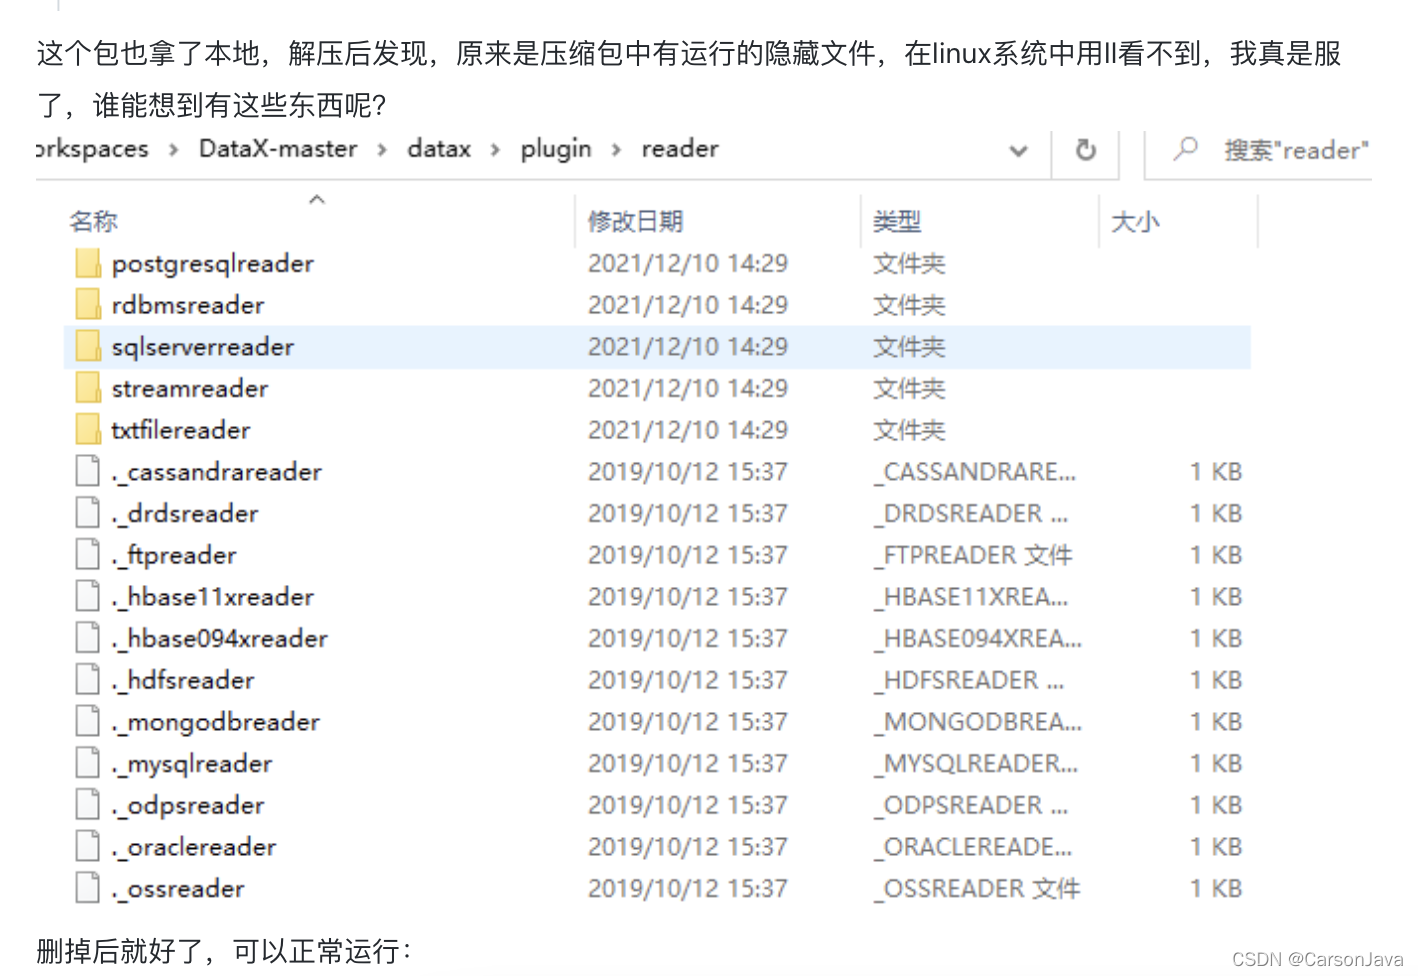
然后我就按照操作:
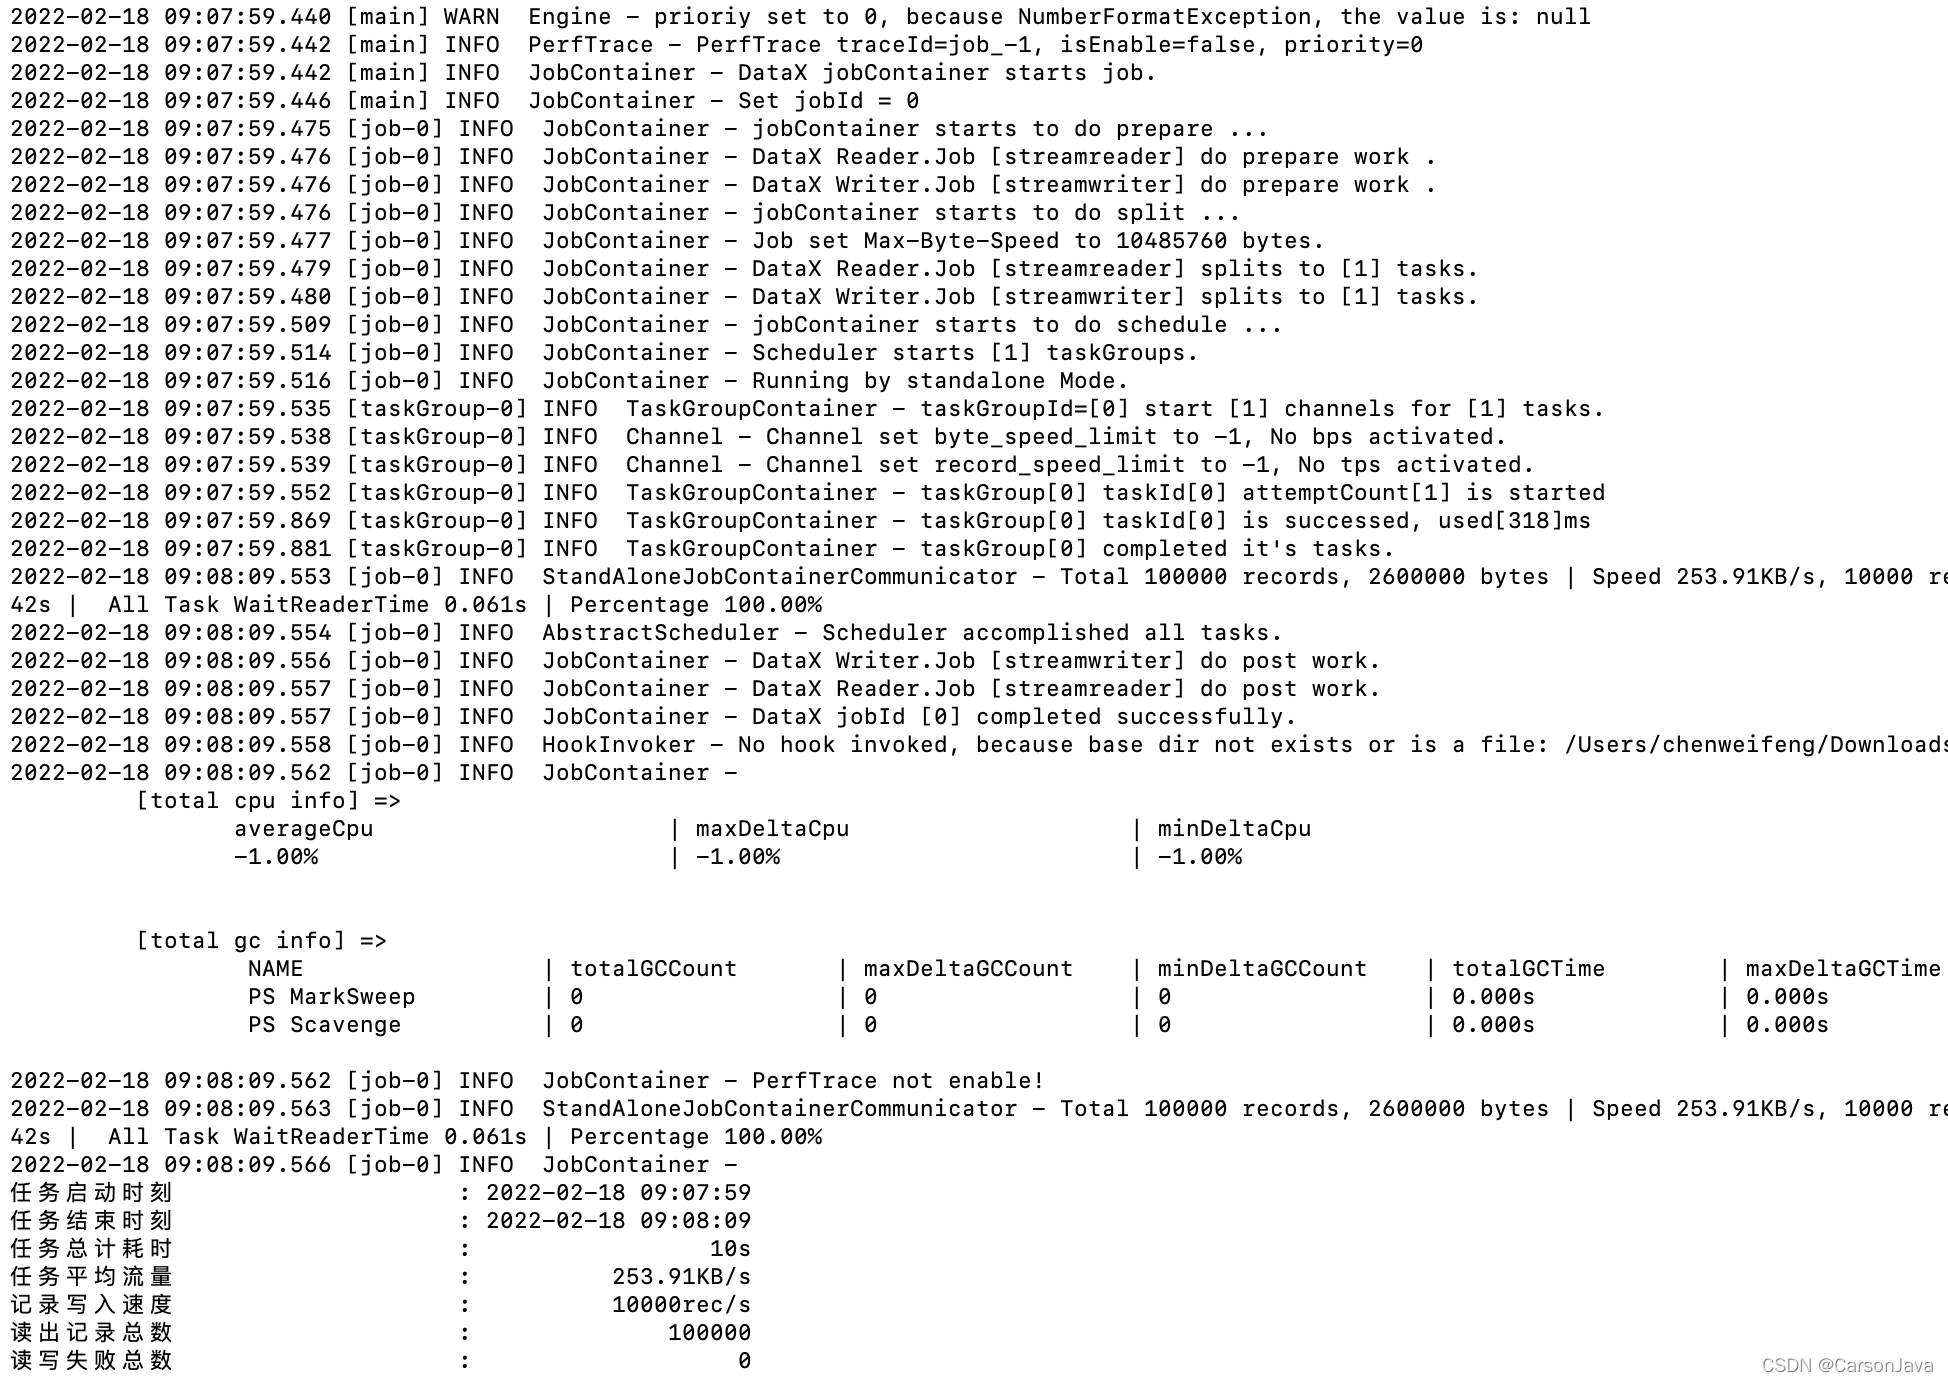
rm -rf ./plugin/reader/._*

rm -rf ./plugin/writer/._*
然后就成功了

 2275


 扫一扫


 被折叠的 条评论
为什么被折叠?
 到【灌水乐园】发言


