


 本文介绍如何使用腾讯音乐API获取歌手数据,并在前端通过Vue和Better-scroll组件展示歌手列表,实现热门歌手显示、字母导航及联动效果。
歌手数据的API接口地址是:
https://c.y.qq.com/v8/fcg-bin/v8.fcg
请求这个地址不需要带参数和配置请求头,所以发送请求的方式就简单的多了,可以用之前说的jsonp方式、配置proxyTable代理方式,还有devServer发起后台请求然后前端请求本地devServer的方式。
这里就沿用之前的devServer方式,
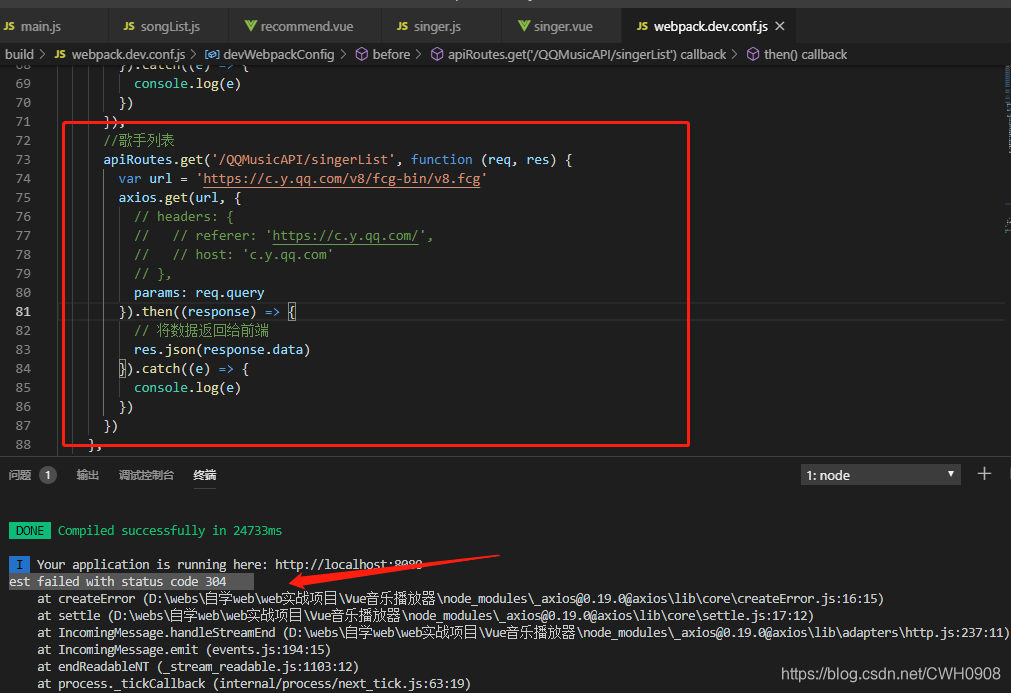
首先在,webpack.dev.conf.js文件的devServer属性中,添加请求API接口前的一条配置,用以devServer发起请求。
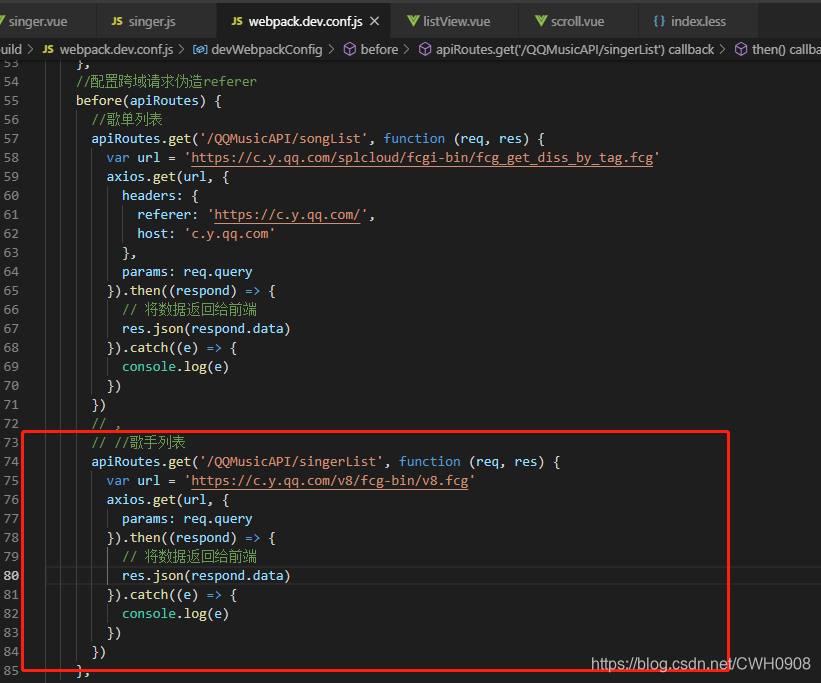
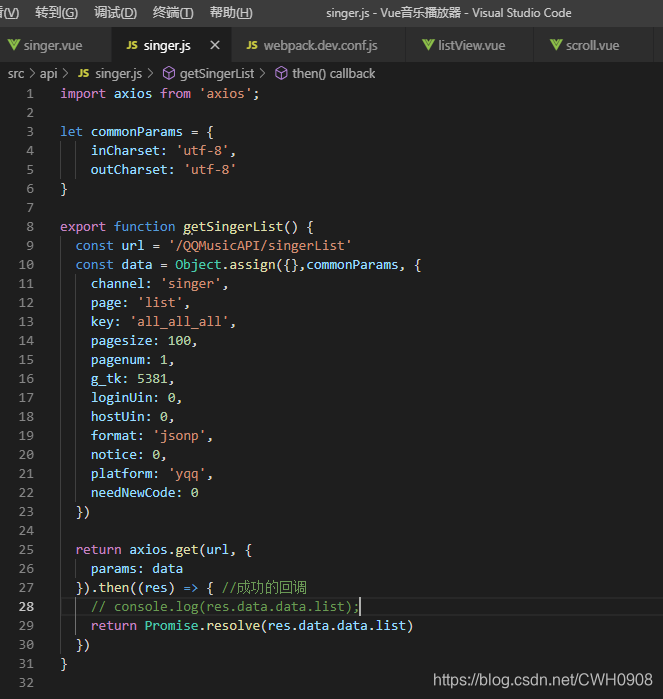
singer.js文件用于请求后台服务器请求回来的数据(根据url地址匹配)
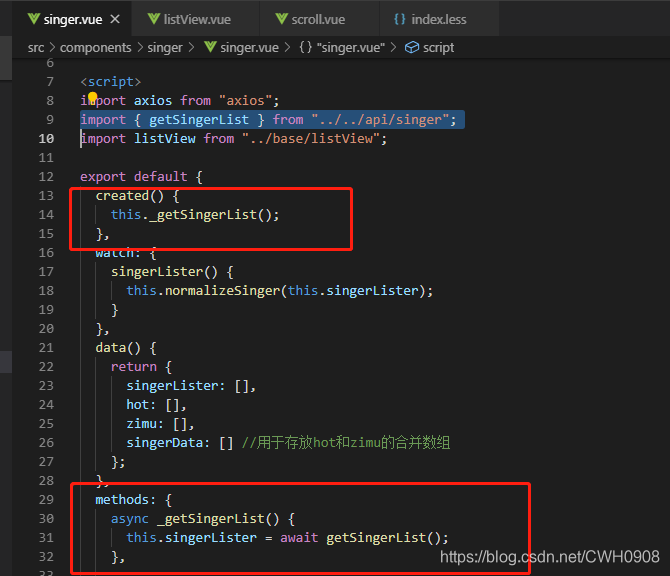
在前端singer.vue组件中,引入该请求函数,至于async和await,则是将异步请求变成同步请求,此时才能将this指向当前vue实例,方便数据转存在data中。
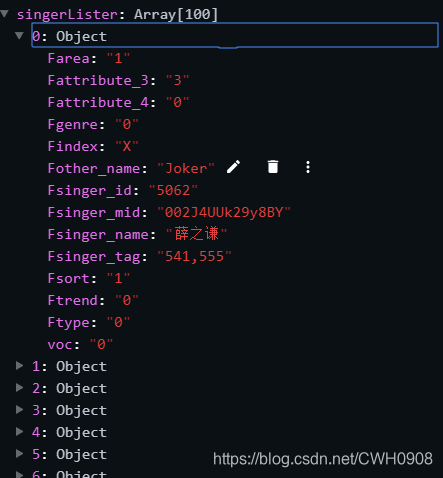
请求回来的数据,主要使用的数据,Findex:歌手名开头字母;Fsinger_name:歌手名;Fsinger_id:歌手id(标识);Fsinger_mid:拼接成歌手图像的url ( "http://y.gtimg.cn/music/photo_new/T001R150x150M000" + Fsinger_mid +".jpg?max_age=2592000" )
将请求回来的数据的前10条作为热门歌手的数据,然后将所有数据按开头字母封成数组
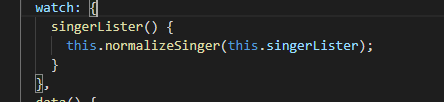
首先监听singerLister数据,当singerLister变化时(从devServer中请求到数据回来),调用normalizeSinger函数来格式化歌手信息,方便传递使用。
以下是normalizeSinger函数,接收请求回来的歌手信息数组,创建一个map对象来存储格式化后的数据,
其中hot属性存储热门歌手信息,使用forEach遍历list,得到前10条的数据,将对应数据push进items数组。
使用以 Findex 作为开头字母来创建对象保存对应的歌手信息(判断map中Findex字母是否存在,存在则继续存入,不存在则给map新添加一个属性)。
由此以得出热门数据的对象hot,和每个开头字母的数据对象,但是存储格式是对象,我们遍历的时候是乱序的,所以我们要继续格式化数据,以数据中的title(即开头字母)作为标准,使用sort函数进行排序,即可达到排序后地字母数组,然后使用concat函数将hot数组和字母数组合并成一个完整的歌手信息数组。
normalizeSinger(list) {
let map = {
hot: {
//热门数据
title: "热门",
items: []
}
};
list.forEach((item, index) => {
//遍历list,将数据填充到热门歌手的数组里
if (index < 10) {
//把前10条数据作为热门歌手的数据
map.hot.items.push({
id: item.Fsinger_id, //歌手id
name: item.Fsinger_name, //歌手名称
picUrl:
"http://y.gtimg.cn/music/photo_new/T001R150x150M000" +
item.Fsinger_mid +
".jpg?max_age=2592000" //歌手头像地址
});
}
//歌手开头字母
const key = item.Findex;
if (!map[key]) {
//用来存储歌手开头字母A、B、C......的歌手信息
map[key] = {
title: key,
items: []
};
}
map[key].items.push({
id: item.Fsinger_id, //歌手id
name: item.Fsinger_name, //歌手名称
picUrl:
"http://y.gtimg.cn/music/photo_new/T001R150x150M000" +
item.Fsinger_mid +
".jpg?max_age=2592000" //歌手头像地址
});
});
//由于这种直接在data中添加的map是一个对象,而对象的遍历是无序的,无法得到A~Z的排列,所以需要对其进行排序处理
// this.map = map;
let hot = [];
let zimu = [];
for (let item in map) {
if (map[item].title == "热门") {
hot.push(map[item]);
} else if (map[item].title.match(/[a-zA-Z]/)) {
//是字母的
zimu.push(map[item]);
}
}
//对字母数组数据进行排序,用title做比较
zimu.sort((a, b) => {
return a.title.charCodeAt(0) - b.title.charCodeAt(0);
});
this.hot = hot;
this.zimu = zimu;
this.singerData = this.hot.concat(this.zimu); //合并数据
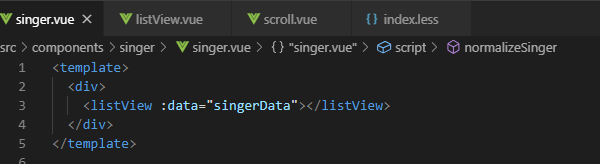
}然后使用listView.vue组件来显示歌手信息,创建listView组件并在singer组件中引入使用,并把格式化后的歌手数据传递给listView组件
listView组件,被scroll组件包裹(见上一篇better-scroll的使用)
<template>
  <!-- 此处的:data为scroll绑定的watch属性,监听到data的变化而调用scroll的refresh函数 -->
  <scroll class="listView" :data="data" ref="listView">
    <ul class="listViewUl">
      <li class="listViewLi" v-for="item in data" :key="item.title" ref="listGroup">
        <h3 class="itemTitle">{{item.title}}</h3>
        <ul>
          <li v-for="childItem in item.items" :key="childItem.id">
            <img v-lazy="childItem.picUrl" />
            <span>{{childItem.name}}</span>
          </li>
        </ul>
      </li>
    </ul>

    <!-- 右侧字母导航条 -->
    <nav class="rightBarNav">
      <ul class="rightBarUl" @touchstart="touchShortCut">
        <li v-for="(item,index) in shortCutList" :key="item.title" :data-index="index">
          <span :data-index="index" class="itemTitle">{{item.title.charAt(0)}}</span>
        </li>
      </ul>
    </nav>
  </scroll>
</template>

<script>
import scroll from "../../components/base/scroll";
import { getDomData } from "../../api/getDomData"; //引入获取dom节点自定义属性的函数
export default {
  props: {
    data: {
      //负责从父组件中接收歌手信息
      type: Array,
      default: []
    }
  },
  components: {
    scroll
  },
  methods: {
    touchShortCut(e) {
      console.log("touch事件");
      console.log(e.target);
      let liIndex = getDomData(e.target, "index");
      this.$refs.listView.scrollToElement(this.$refs.listGroup[liIndex], 0);
    }
  },
  computed: {
    shortCutList() {
      return this.data;
    }
  }
};
</script>

<style lang="less" scoped>
//略
</style>
其中getDomData.js文件是获取dom节点中的自定义属性,上面我们给右侧字母导航条的li和span都添加了一个 data-index 自定义属性,然后每次外面ul的touchstar事件触发时,调用touchShortCut函数并传入touch对象e,返回所点击的第几个li值给liIndex,然后使用$refs来操作dom节点,最外层scroll节点调用scrollToElement函数,传入点击的li节点,即可实现点击右侧导航条跳到指定的数据。
效果图:
此时由于vant组件的图片懒加载,当右侧字母导航条跳转时,图片懒加载不会主动加载出来,=-=,要咋整呢。
getDomData.js文件
 //从dom节点获取属性
 //el代表传入的节点,然后对name属性的值做拼接,拼接成的 data-name 形式的 ,我们在vue组件的don节点自定义的属性,第三个val参数可选
 export function getDomData(el, name, val) {
    const prefix ="data-";
    name = prefix +name;
    if(val){//有传入val值,则给自定义的属性赋值
        return el.setAttribute(name,val);
    }else{//没有传入val值,则取的自定义属性值
        return el.getAttribute(name)
    }
 }
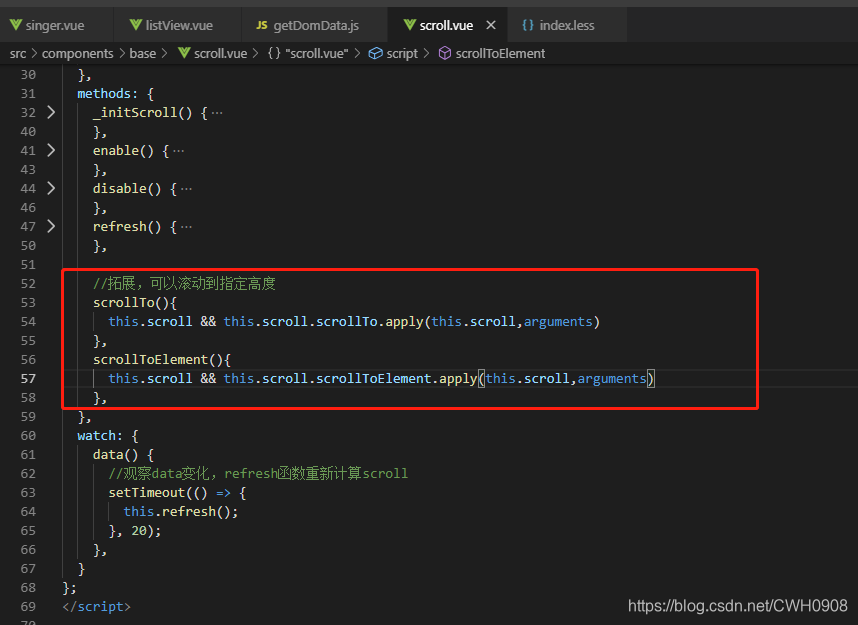
scroll组件新添加两个函数
更新,实现 右侧字母导航条可以滑动,实现左右联动效果,过于复杂==,上代码慢慢看。
listView.vue文件
<template>
  <!-- 此处的:data为scroll绑定的watch属性,监听到data的变化而调用scroll的refresh函数 -->
  <scroll
    class="listView"
    :data="data"
    ref="listView"
    :listenScroll="listenScroll"
    :probeType="probeType"
    @scroll="scroll"
  >
    <ul class="listViewUl">
      <li ref="listGroup" class="listViewLi" v-for="item in data" :key="item.title" >
        <h3 class="itemTitle">{{item.title}}</h3>
        <ul>
          <li @click="goTo(childItem)" v-for="childItem in item.items" :key="childItem.id" :data-id="item.Fsinger_id">
            <img v-lazy="childItem.picUrl" />
            <span>{{childItem.name}}</span>
          </li>
        </ul>
      </li>
    </ul>

    <!-- 右侧字母导航条 -->
    <nav class="rightBarNav">
      <ul
        class="rightBarUl"
        @touchstart="touchShortCut"
        @touchmove.stop.prevent="touchmoveShortCut"
      >
        <li
          v-for="(item,index) in shortCutList"
          :key="item.title"
          :data-index="index"
          :class="{'currentIndex':currentIndex===index}"
        >
          <span :data-index="index" class="itemTitle">{{item.title.charAt(0)}}</span>
        </li>
      </ul>
    </nav>
  </scroll>
</template>

<script>
import scroll from "../../components/base/scroll";
import { getDomData } from "../../api/getDomData"; //引入获取dom节点自定义属性的函数
export default {
  created() {
    //由于不需要观测touch初始值的变换,所以不用把touch放到data里,而是在created周期时获取一次即可
    this.touch = {}; //中间变量,让touchShortCut函数和touchShortCut函数之间 touch 数据 可以沟通

    this.listenScroll = true;

    this.listHeight = []; //每个li的高度

    this.probeType = 3; //不节流的滑动方式,包含swipper
  },
  data() {
    return {
      scrollY: -1,
      currentIndex: 0 //默认 li[0] 高亮
    };
  },
  props: {
    data: {
      //负责从父组件中接收歌手信息
      type: Array,
      default: []
    }
  },
  components: {
    scroll
  },
  methods: {
    //触摸导航条事件
    touchShortCut(e) {
      let liIndex = getDomData(e.target, "index");

      let firstToucch = e.touches[0]; //初始touch的位置
      this.touch.y1 = firstToucch.pageY; //保存在this.touch中
      this.touch.liIndex = liIndex; //初始锚点

      this._scrollTo(liIndex);
    },
    //滑动导航条事件
    touchmoveShortCut(e) {
      //根据滚动距离来确定滚动到的位置
      let firstToucch = e.touches[0]; //初始touch的位置
      this.touch.y2 = firstToucch.pageY; //保存在this.touch中
      let delta = ((this.touch.y2 - this.touch.y1) / 18).toFixed(0); //滑动导航条,y轴上偏移的距离
      //根据每个锚点的高度来确定偏移距离偏移了多少个li,这里导航条每个li的高度是18px,toFixed函数四舍五入
      //注意,转成Number类型
      let liIndex = parseInt(this.touch.liIndex) + parseInt(delta); //根据初始的锚点加上偏移的锚点数,得到偏移后的锚点
      //   this.$refs.listView.scrollToElement(this.$refs.listGroup[liIndex], 0); //滚动
      this._scrollTo(liIndex);
    },
    _scrollTo(index) {
      if (!index && index !== 0) {
        return;
      }
      if (index < 0) {
        index = 0;
      } else if (index > this.listHeight.length - 2) {
        index = this.listHeight.length - 2;
      }
      this.scrollY = -this.listHeight[index];
      this.$refs.listView.scrollToElement(this.$refs.listGroup[index], 0);
    },
    scroll(pos) {
      //触摸滚动事件
      this.scrollY = pos.y; //获取better-scroll 滚动的y轴的距离
    },
    //计算每个字母歌手组li的高度clientHeight
    _calculateHeight() {
      this.listHeight = []; //每次调用重新初始化每个li的高度(data数据变化)
      const list = this.$refs.listGroup;
      let height = 0;
      this.listHeight.push(height); //初始高度为0
      for (let i = 0; i < list.length; i++) {
        let item = list[i];
        //由于字母排序,li的高度应该是累加的,即之前li的高度要加上去,所以每次得到li的高度,都要存进listHeight数组
        height += item.clientHeight;
        this.listHeight.push(height);
      }
    },
    //编程式路由导航
    goTo(singer) {//点击的li传出,以供父组件调用
      this.$emit('goTo',singer)
    }
  },
  watch: {
    data() {
      setTimeout(() => {
        this._calculateHeight(); //data数据得到后,延迟调用计算高度的函数,确保数据能得到
      }, 20);
    },
    scrollY(newY) {
      //对比scrollY和listHeight就可以得到liIndex的值
      const listHeight = this.listHeight; //先保留数据
      for (let i = 0; i < listHeight.length; i++) {
        let height1 = listHeight[i]; //下限 0
        let height2 = listHeight[i + 1]; //上限 最后一个li(最大高度)
        //-newY才是正值
        if (!height2 || (-newY > height1 && -newY < height2)) {
          //?????
          //代表在区间范围内滚动(在height1和height2区间内)
          this.currentIndex = i;
          return;
        }
        this.currentIndex = 0;
      }
    }
  },
  computed: {
    shortCutList() {
      return this.data;
    }
  }
};
</script>

<style lang="less" scoped>
scroll.vue文件
<template>
  <div ref="wrapper" class="wrapper">
    <!-- 需要滚动的节点放置在此插槽中 -->
    <slot></slot>
  </div>
</template>

<script>
import BScroll from "better-scroll";
export default {
  props: {
    probeType: {
      type: Number,
      default: 1
    },
    click: {
      type: Boolean,
      default: true
    },
    data: {
      type: Array,
      default: null
    },
    listenScroll: {
      //监听滚动事件=》导航条联动,当前li高亮
      type: Boolean,
      default: false
    }
  },
  mounted() {
    //定时器确保页面节点已渲染完成
    setTimeout(() => {
      this._initScroll();
    }, 20);
  },
  methods: {
    _initScroll() {
      if (!this.$refs.wrapper) {
        return;
      }
      this.scroll = new BScroll(this.$refs.wrapper, {
        probeType: this.probeType,
        click: this.click
      });
      if (this.listenScroll) {
        //监听scroll的滚动事件
        let _this = this; //保存vue实例的this
        this.scroll.on("scroll", (pos) => {
          _this.$emit("scroll", pos);
        });
      }
    },
    enable() {
      this.scroll && this.scroll.enable();
    },
    disable() {
      this.scroll && this.scroll.disable();
    },
    refresh() {
      //刷新,重新计算高度
      this.scroll && this.scroll.refresh();
    },

    //拓展,可以滚动到指定高度
    scrollTo() {
      this.scroll && this.scroll.scrollTo.apply(this.scroll, arguments);
    },
    scrollToElement() {
      this.scroll && this.scroll.scrollToElement.apply(this.scroll, arguments);
    }
  },
  watch: {
    data() {
      //观察data变化,refresh函数重新计算scroll
      setTimeout(() => {
        this.refresh();
      }, 20);
    }
  }
};
</script>

<style scoped>
.wrapper {
  /* position: absolute;
  left: 0;
  top: 13vh; */
  overflow: hidden;
  width: 100%;
  height: 88vh;
}
</style>
懒加载事件也已跟随出现,完成效果图:
有点小瑕疵,没有继续完善了==
完善:坑,clientHeight只能获取整数,有小数部分自动向下取整,因此我使用的rem计量单位导致获取的歌手li高度不准确,将设置每个歌手的准确li值解决。
效果图:
注意:304状态码(莫名其妙就好了 =-=)
在网上查了有关304错误的解释(自从上次请求后,请求的网页未修改过。服务器返回此响应时,不会返回网页内容。


 2448
2448

 被折叠的 条评论
为什么被折叠?
被折叠的 条评论
为什么被折叠?
 到【灌水乐园】发言


