


 本文介绍了如何在SpringBoot环境下,结合Thymeleaf模板引擎创建登录表单,并进行了简单的用户鉴权模拟。通过添加依赖、编写HTML表单和控制器代码,展示了从用户输入到数据处理的基本流程。

一个系统,离不开用户的鉴权。本文,我们来讲讲怎么通过 Spring Boot 实现模拟登陆功能~
演示开发环境如下:
IntelliJ IDEA 2021.2.2 (Ultimate Edition)macOS Monterey-Apple M1Java version-17.0.7Spring Boot-3.1.0
为了方便管理代码,这里会使用到 Spring Boot 上的模版功能。我们新建了一个名为 jimmy-template 的项目:
安装依赖
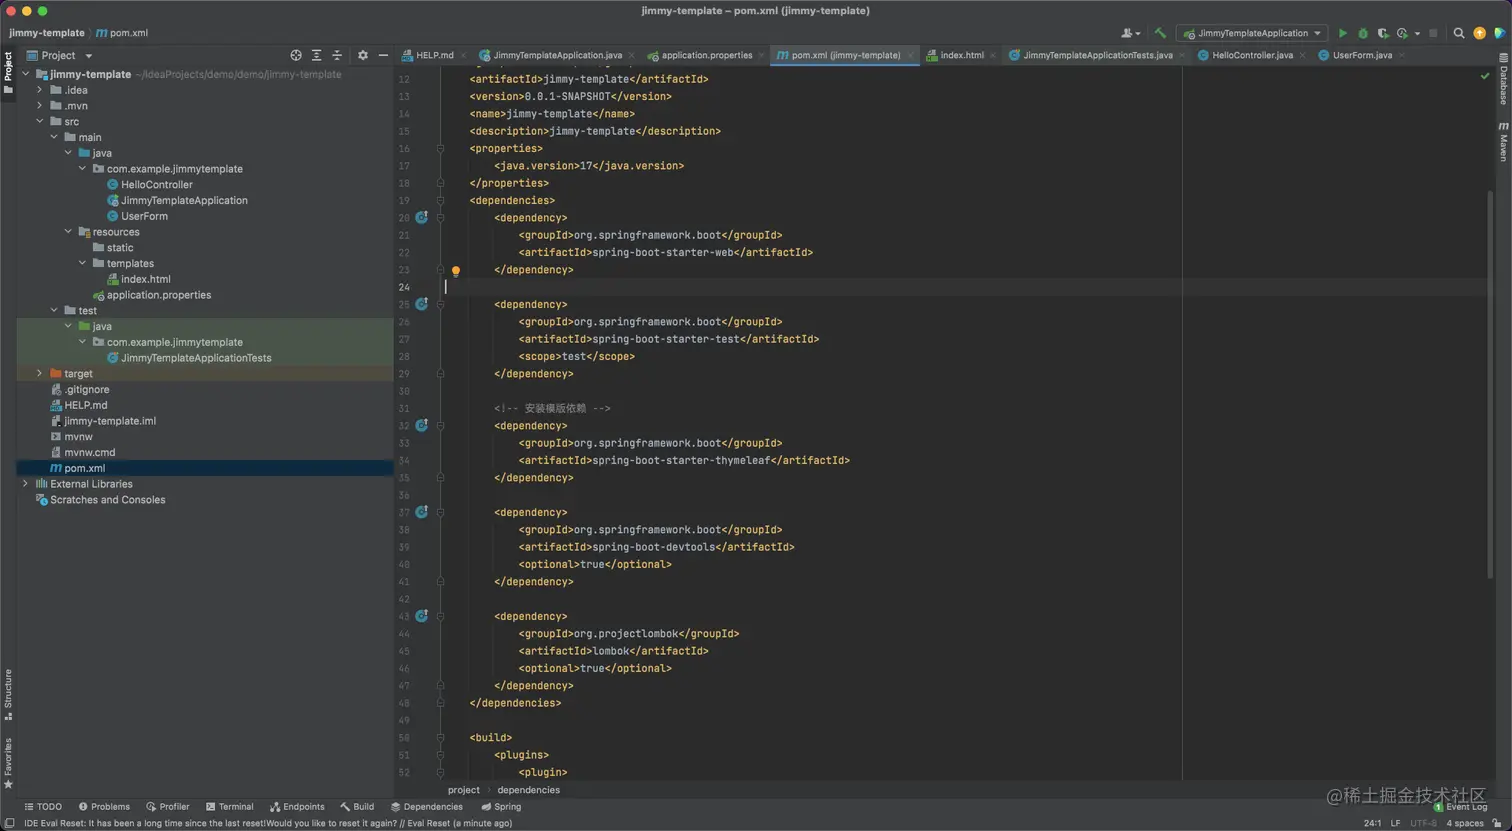
在 pom.xml 中添加模版依赖:
xml
复制代码
<!-- 安装模版依赖 --> <dependency> <groupId>org.springframework.boot</groupId> <artifactId>spring-boot-starter-thymeleaf</artifactId> </dependency>
案例也使用了 lombok,可以参考 Spring Boot JAVA 统一返回的信息一文。
编写登陆表单
我们在 src/main/java/resources/templates/ 文件夹下新建一个名为 index.html 文件:
html
复制代码
<!DOCTYPE html> <html lang="en"> <head> <meta charset="UTF-8"> <title>Thymeleaf</title> </head> <body> <!--/*@thymesVar id="msg" type="String"*/--> <h1 th:text="${msg}">Hello, Jimmy.</h1> <!--/*@thymesVar id="user" type="Object"*/--> <form action="#" th:action="@{/add}" th:object="${user}" method="post"> <input th:field="*{username}" type="text"/> <input th:field="*{password}" type="text" /> <input type="submit" /> </form> </body> </html>
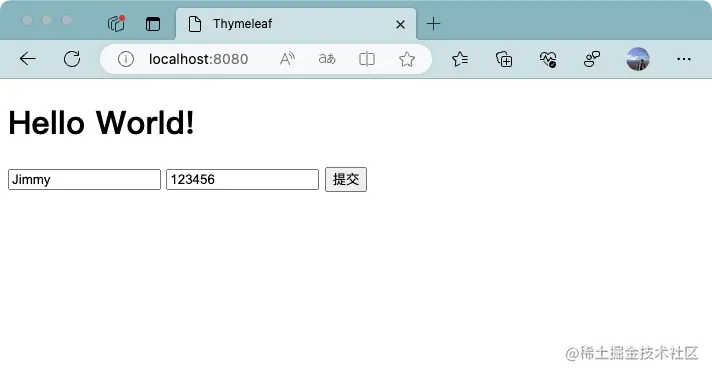
该页面读取了 msg 信息。表单关联数据 username 和 password。
鉴权
那么我们简单模拟下鉴权,在 src/main/java/com.example.jimmytemplate/ 下面新建 model 数据:
java
复制代码
// UserForm.java package com.example.jimmytemplate; import lombok.Data; @Data public class UserForm { private String username; private String password; }
然后在同目录下,新建 controller 文件:
java
复制代码
// HelloController.java package com.example.jimmytemplate; import org.springframework.stereotype.Controller; import org.springframework.ui.ModelMap; import org.springframework.web.bind.annotation.ModelAttribute; import org.springframework.web.bind.annotation.RequestMapping; import org.springframework.web.bind.annotation.RequestMethod; import org.springframework.web.bind.annotation.ResponseBody; @Controller public class HelloController { @RequestMapping("/") public String index(ModelMap map) { map.addAttribute("msg", "Hello World!"); UserForm user = new UserForm(); user.setUsername("Jimmy"); user.setPassword("123456"); map.put("user", user); // return 模板文件的名称-->对应 src/main/resources/templates/index.html return "index"; } @ResponseBody @RequestMapping(value="/add", method= RequestMethod.POST) public String add(@ModelAttribute UserForm user) { String username = user.getUsername(); String password = user.getPassword(); // TODO: 这里应该是相关的逻辑处理 // 我们简单返回信息 return "Hello, "+username+". Your password is: "+password; } }
这里我们设定了变量 msg 的值为 Hello World! 文本。并为 username 和 password 设定值分别为 Jimmy 和 123456,然后绑定模版 index.html。
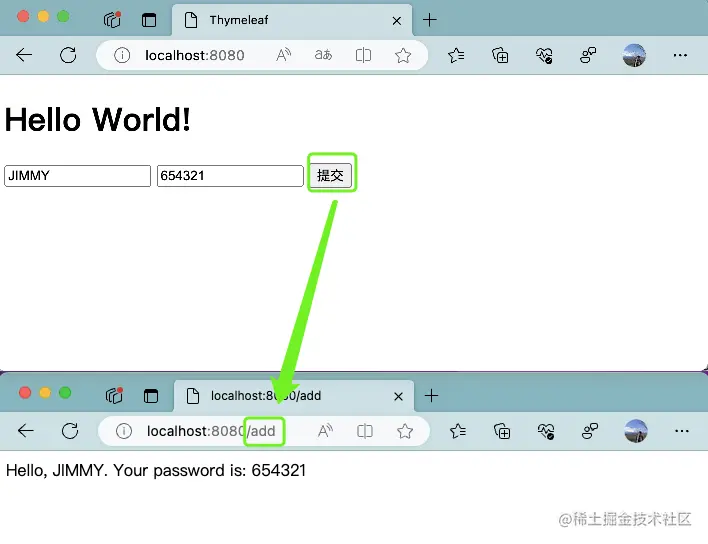
在触发按钮之后,页面路径会跳转到 /add,并且页面展示账号和密码信息,如下:
参考
- SpringBoot之整合Thymeleaf动态模板,附案例!
- Spring MVC and Thymeleaf: how to access data from templates
- Springboot之Thymeleaf 表单标签(表单提交)|第二章-yellowcong
- SpringBoot入门系列(五)Thymeleaf的常用标签和用法


 1821
1821

 被折叠的 条评论
为什么被折叠?
被折叠的 条评论
为什么被折叠?
 到【灌水乐园】发言


