


 本文详细介绍了在RuoYi前后端分离微服务架构中如何集成WebSocket,从新建子模块到后端配置、服务编写,再到前端Vue的实现与测试,提供了完整的步骤与测试方法。
RuoYi前后端分离微服务版集成WebSocket
新建模块
1.在common模块下新建子模块
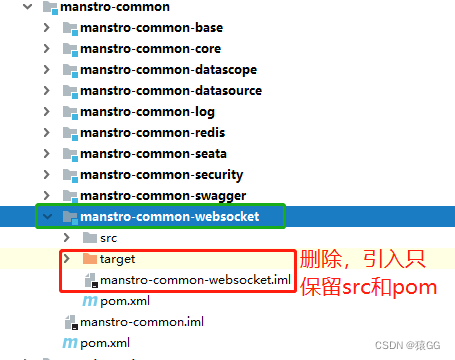
可以复制一份本模块其他的子模块,把除了src和pom之外的文件全删除
2.在common父模块中引入websocket子模块

后端
1. 引入依赖
<!--websocket-->
<dependency>
   <groupId>org.springframework.boot</groupId>
   <artifactId>spring-boot-starter-websocket</artifactId>
</dependency>
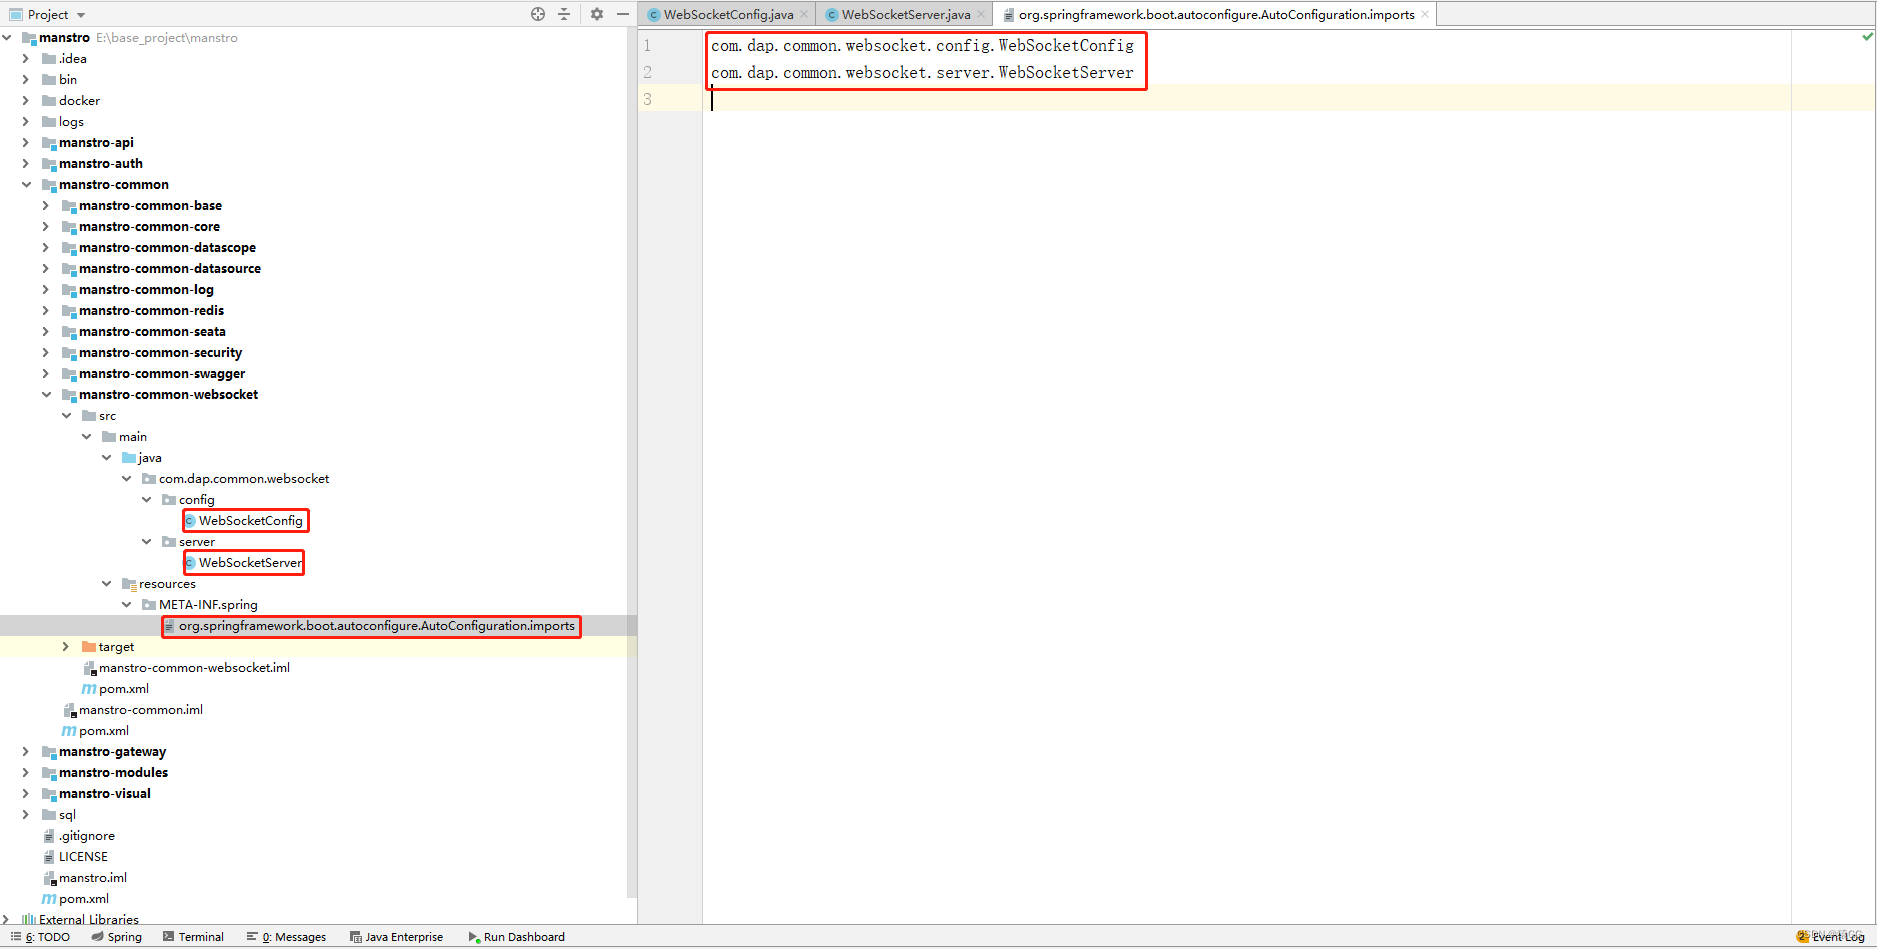
2.编写配置类
import org.springframework.context.annotation.Bean;
import org.springframework.context.annotation.Configuration;
import org.springframework.web.socket.server.standard.ServerEndpointExporter;

@Configuration
public class WebSocketConfig {
    @Bean
    public ServerEndpointExporter serverEndpointExporter() {
        return new ServerEndpointExporter();
    }
}
3.编写服务类
import org.slf4j.Logger;
import org.slf4j.LoggerFactory;
import org.springframework.stereotype.Component;
import javax.websocket.*;
import javax.websocket.server.PathParam;
import javax.websocket.server.ServerEndpoint;
import java.io.IOException;
import java.util.concurrent.CopyOnWriteArraySet;

/**
 * @ Description:
 * @ ServerEndpoint 注解是一个类层次的注解,它的功能主要是将目前的类定义成一个websocket服务器端,
 * 注解的值将被用于监听用户连接的终端访问URL地址,客户端可以通过这个URL来连接到WebSocket服务器端
 */
@Component
@ServerEndpoint("/api/websocket/{sid}")
public class WebSocketServer {

    private static final Logger log = LoggerFactory.getLogger(WebSocketServer.class);
    //静态变量,用来记录当前在线连接数。应该把它设计成线程安全的。
    private static int onlineCount = 0;
    //concurrent包的线程安全Set,用来存放每个客户端对应的MyWebSocket对象。
    private static CopyOnWriteArraySet<WebSocketServer> webSocketSet = new CopyOnWriteArraySet<WebSocketServer>();

    //与某个客户端的连接会话,需要通过它来给客户端发送数据
    private Session session;

    //接收sid
    private String sid = "";

    /**
     * 连接建立成功调用的方法
     */
    @OnOpen
    public void onOpen(Session session, @PathParam("sid") String sid) {
        this.session = session;
        webSocketSet.add(this);     //加入set中
        this.sid = sid;
        addOnlineCount();           //在线数加1
        try {
            sendMessage("conn_success");
            log.info("有新窗口开始监听:[ " + sid + " ],当前在线人数为:" + getOnlineCount());
        } catch (IOException e) {
            log.error("websocket IO Exception");
        }
    }

    /**
     * 连接关闭调用的方法
     */
    @OnClose
    public void onClose() {
        webSocketSet.remove(this);  //从set中删除
        subOnlineCount();              //在线数减1
        //断开连接情况下,更新主板占用情况为释放
        log.info("释放的sid为:"+sid);
        //这里写你 释放的时候,要处理的业务
        log.info("有一连接关闭!当前在线人数为" + getOnlineCount());

    }

    /**
     * 收到客户端消息后调用的方法
     * @ Param message 客户端发送过来的消息
     */
    @OnMessage
    public void onMessage(String message, Session session) {
        log.info("收到来自窗口[ " + sid + " ]的信息:" + message);
        //群发消息测试,处理收到消息的业务逻辑
        try {
            sendInfo(Math.random()+"ml",sid);
        } catch (Exception e) {
            e.printStackTrace();
        }

    }

    /**
     * @ Param session
     * @ Param error
     */
    @OnError
    public void onError(Session session, Throwable error) {
        log.error("websocket 发生错误");
        error.printStackTrace();
    }

    /**
     * 群发消息
     */
    public void sendMessage(String message) throws IOException {
        this.session.getBasicRemote().sendText(message);
    }

    /**
     * 判断sid发送消息
     */
    public static void sendInfo(String message,  String sid) throws IOException {
        log.info("推送消息到窗口[ " + sid + " ],推送内容:" + message);
        for (WebSocketServer item : webSocketSet) {
            try {
                //这里可以设定只推送给这个sid的,为null则全部推送
                if (sid == null) {
                // item.sendMessage(message);
                } else if (item.sid.equals(sid)) {
                    item.sendMessage(message);
                }
            } catch (IOException e) {
                continue;
            }
        }
    }

    public static synchronized int getOnlineCount() {
        return onlineCount;
    }

    public static synchronized void addOnlineCount() {
        WebSocketServer.onlineCount++;
    }

    public static synchronized void subOnlineCount() {
        WebSocketServer.onlineCount--;
    }

    public static CopyOnWriteArraySet<WebSocketServer> getWebSocketSet() {
        return webSocketSet;
    }
}
4.自动化配置
在resources\META-INF\spring文件夹下的org.springframework.boot.autoconfigure.AutoConfiguration.imports文件中配置以上两个类
5.后端测试
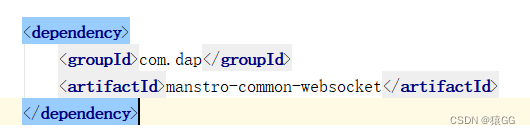
1.在modules-system模块下引入pom,
2.在gateway网关配置文件中配置路径白名单
3.到此就可以直接在websocket在线测试网站中自行测试了,
测试地址为:网关IP:端口/网关中配置的system模块路由/api/websocket/{sid}
或者直接访问system模块:system模块IP:端口/api/websocket/{sid}

vue前端测试代码
1.template中添加
<!-- websocket测试  start -->
  <div>
    <el-row :gutter="10" >
      <el-col :span="4" :xs="24">
         <el-button
            type="primary"
            size="mini"
            @click="send"
            >测试WebSocket
        </el-button>
      </el-col>
      <el-col :span="4" :xs="24">
        <div class="head-container">
            <el-input
              v-model="message"
              clearable
              size="small"
              style="margin-bottom: 20px"
            />
        </div>
      </el-col>
    </el-row>
  </div>
  <!-- websocket测试   end -->
2.data中添加
//======websocket测试=======start
url: "ws://127.0.0.1:8080/system/api/websocket/message",
message: "",
ws: null,
//======websocket测试========end
3.methods中添加
//======websocket测试=======start
    join() {
      this.ws = new WebSocket(this.url);
      //非Vue所管理的函数,需要保存this
      const v_this = this;
      this.ws.onopen = function (event) {
        v_this.message = v_this.message + "已经打开连接!" + "\n";
      };
      this.ws.onmessage = function (event) {
        v_this.message = event.data + "\n";
      };
      this.ws.onclose = function (event) {
        v_this.message = v_this.message + "已经关闭连接!" + "\n";
      };
    },
    exit() {
      if (this.ws) {
        this.ws.close();
        this.ws = null;
      }
    },
    send() {
      if (this.ws) {
        this.ws.send(this.message);
      } else {
        alert("未连接到服务器");
      }
    },
//======websocket测试========end


 1万+
1万+


 到【灌水乐园】发言


