


 本文探讨了为何推荐使用ViewBinding而非findViewById或ButterKnife。ViewBinding提供了更简洁的代码,减少了手动查找视图的步骤,同时具备类型安全和null安全特性。在Activity和Fragment中集成ViewBinding的方法也被详细说明,其优点包括简化代码、提高编译速度和增强安全性。然而,它不支持布局变量和双向数据绑定。此外,文章还分享了Android程序员的进阶资源和大厂内部调优方案。
为什么推荐你使用ViewBinding 替换findViewById 和 ButterKnife ? 因为太爽了,太上头了。 用过一次就爱上了,再也不想回去。真心的。不信你看下文!
定义
ViewBinding 是google推出Jetpack库的一个组件,主要用于视图绑定,替代 findViewById操作.Viewbinding会根据xml文件生成一个对应的绑定类, 比如我们xml文件是: activity_login_layout.xml 生成的绑定类就是ActivityLoginLayoutBinding 这么一个类.在使用的时候直接通过生成的绑定类调用我们xml中的视图组件, 不用findViewById,也不用声明组件. 接下来看下我们集成和项目就能很快的理解.
集成
首先在我们工程build.gradld中引入viewBind
    //引入ViewBinding
    viewBinding {
        viewBinding = true
    }
然后我们就可以在代码中使用ViewBinding了
代码
创建了一个登录页面, activity_login_layout.xml
<?xml version="1.0" encoding="utf-8"?>
<LinearLayout xmlns:android="http://schemas.android.com/apk/res/android"
    android:layout_width="match_parent"
    android:layout_height="match_parent"
    xmlns:tools="http://schemas.android.com/tools"
    android:orientation="vertical"
    tools:viewBindingIgnore="false"
    android:padding="16dp">

    <androidx.appcompat.widget.AppCompatTextView
        android:id="@+id/tv_login_title"
        android:layout_width="match_parent"
        android:layout_height="wrap_content"
        android:gravity="center"
        android:text="登录"
        android:textColor="@color/design_default_color_primary_variant"
        android:textSize="19sp" />

    <androidx.appcompat.widget.AppCompatEditText
        android:id="@+id/et_login_account"
        android:layout_width="match_parent"
        android:layout_height="50dp"
        android:layout_marginTop="10dp"
        android:hint="用户名"
        android:paddingStart="10dp"
        android:paddingEnd="10dp" />

    <androidx.appcompat.widget.AppCompatEditText
        android:id="@+id/et_login_pwd"
        android:layout_width="match_parent"
        android:layout_height="50dp"
        android:layout_marginTop="10dp"
        android:hint="密码"
        android:paddingStart="10dp"
        android:paddingEnd="10dp" />

    <Button
        android:id="@+id/btn_login"
        android:layout_width="match_parent"
        android:layout_height="50dp"
        android:layout_marginTop="20dp"
        android:background="@color/design_default_color_secondary"
        android:text="登录"
        android:textSize="20dp" />

    <TextView
        android:id="@+id/tv_find_pwd"
        android:layout_width="wrap_content"
        android:layout_height="wrap_content"
        android:layout_gravity="end"
        android:layout_marginTop="10dp"
        android:layout_marginEnd="10dp"
        android:text="找回密码"
        android:textColor="@android:color/holo_red_dark"
        android:textSize="16sp" />
</LinearLayout>
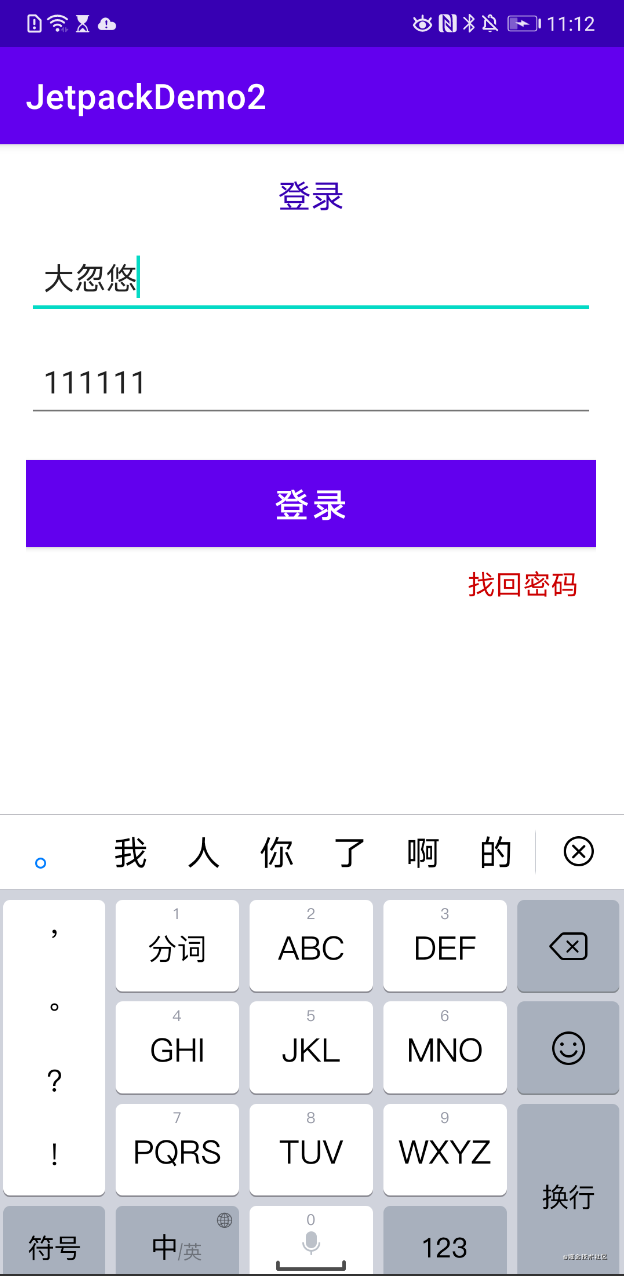
大忽悠登录账号.png
接下来我们看下用findViewById方式获取id并且设置点击事件等
class LoginActivity2 : AppCompatActivity(R.layout.activity_login_layout) {
   //先声明控件
    lateinit var etAccount: EditText
    lateinit var etPwd: EditText
    lateinit var btnLogin: Button

    override fun onCreate(savedInstanceState: Bundle?) {
        super.onCreate(savedInstanceState)
        initView()
    }

    private fun initView() {
    //挨个findViewById 初始化控件
        etAccount = findViewById(R.id.et_login_account)
        etPwd = findViewById(R.id.et_login_pwd)
        btnLogin = findViewById(R.id.btn_login)
        btnLogin.setOnClickListener {
            var accountInfo = etAccount.text
            var accountPwd = etPwd.text
            if (!TextUtils.isEmpty(accountInfo)) {
                if (!TextUtils.isEmpty(accountPwd)) {
                    Log.e("ping", "执行登录操作:用户名:$accountInfo 密码: $accountPwd")
                } else {
                    Log.e("ping", "请输入密码")
                }
            } else {
                Log.e("ping", "请输入用户名")
            }
        }
    }
}
在看下用ViewBinding的代码
class LoginActivity : AppCompatActivity() {
    private lateinit var binding: ActivityLoginLayoutBinding
    override fun onCreate(savedInstanceState: Bundle?) {
        super.onCreate(savedInstanceState)
        binding = ActivityLoginLayoutBinding.inflate(layoutInflater)
        val view = binding.root;
        setContentView(view)
        initView()
    }

    private fun initView() {
        binding.btnLogin.setOnClickListener {
            var accountInfo = binding.etLoginAccount.text
            var accountPwd = binding.etLoginPwd.text
            if (!TextUtils.isEmpty(accountInfo)) {
                if (!TextUtils.isEmpty(accountPwd)) {
                    Log.e("ping", "执行登录操作:用户名:$accountInfo 密码: $accountPwd")
                } else {
                    Log.e("ping", "请输入密码")
                }
            } else {
                Log.e("ping", "请输入用户名")
            }
        }
    }
}
是不是很直观, 不需要声明控件,也不需要findViewById 直接用 ActivityLoginLayoutBinding绑定类 . 操作就可以, 是不是很Nice. 这个时候你又说了,这样我不知道那个是那个控件怎么办? 我们来看下ActivityLoginLayoutBinding类的代码:
public final class ActivityLoginLayoutBinding implements ViewBinding {
    @NonNull
    private final LinearLayout rootView;
    @NonNull   //android:id="@+id/btn_login"
    public final Button btnLogin;  //根据我们在xml中定义的id 驼峰命名发声明控件
    @NonNull  //android:id="@+id/et_login_account"
    public final AppCompatEditText etLoginAccount;
    @NonNull  //android:id="@+id/et_login_pwd"
    public final AppCompatEditText etLoginPwd;
    @NonNull  // android:id="@+id/tv_find_pwd"
    public final TextView tvFindPwd;
    @NonNull
    public final AppCompatTextView tvLoginTitle;

    private ActivityLoginLayoutBinding(@NonNull LinearLayout rootView, @NonNull Button btnLogin, @NonNull AppCompatEditText etLoginAccount, @NonNull AppCompatEditText etLoginPwd, @NonNull TextView tvFindPwd, @NonNull AppCompatTextView tvLoginTitle) {
        this.rootView = rootView;
        this.btnLogin = btnLogin;
        this.etLoginAccount = etLoginAccount;
        this.etLoginPwd = etLoginPwd;
        this.tvFindPwd = tvFindPwd;
        this.tvLoginTitle = tvLoginTitle;
    }

    @NonNull
    public LinearLayout getRoot() {
        return this.rootView;
    }

    @NonNull
    public static ActivityLoginLayoutBinding inflate(@NonNull LayoutInflater inflater) {
        return inflate(inflater, (ViewGroup)null, false);
    }

    @NonNull
    public static ActivityLoginLayoutBinding inflate(@NonNull LayoutInflater inflater, @Nullable ViewGroup parent, boolean attachToParent) {
        View root = inflater.inflate(2131427356, parent, false);
        if (attachToParent) {
            parent.addView(root);
        }

        return bind(root);
    }

    @NonNull
    public static ActivityLoginLayoutBinding bind(@NonNull View rootView) {
        int id = 2131230807;
        Button btnLogin = (Button)ViewBindings.findChildViewById(rootView, id);
        if (btnLogin != null) {
            id = 2131230876;
            AppCompatEditText etLoginAccount = (AppCompatEditText)ViewBindings.findChildViewById(rootView, id);
            if (etLoginAccount != null) {
                id = 2131230877;
                AppCompatEditText etLoginPwd = (AppCompatEditText)ViewBindings.findChildViewById(rootView, id);
                if (etLoginPwd != null) {
                    id = 2131231121;
                    TextView tvFindPwd = (TextView)ViewBindings.findChildViewById(rootView, id);
                    if (tvFindPwd != null) {
                        id = 2131231122;
                        AppCompatTextView tvLoginTitle = (AppCompatTextView)ViewBindings.findChildViewById(rootView, id);
                        if (tvLoginTitle != null) {
                            return new ActivityLoginLayoutBinding((LinearLayout)rootView, btnLogin, etLoginAccount, etLoginPwd, tvFindPwd, tvLoginTitle);
                        }
                    }
                }
            }
        }

        String missingId = rootView.getResources().getResourceName(id);
        throw new NullPointerException("Missing required view with ID: ".concat(missingId));
    }
}
其实ViewBinding自动为我们声明控件,并且执行fingViewById,我们只需要在用的时候直接用 binding.btnLogin 等等
在Activity中如何视图绑定
Activity中使用视图绑定的话需要在 的 onCreate() 方法中执行以下步骤:
- 调用生成的绑定类中包含的静态 inflate() 方法。此操作会创建该绑定类的实例以供 Activity 使用。
- 通过调用 getRoot() 方法或使用 Kotlin 属性语法获取对根视图的引用。
- 将根视图传递到 setContentView(),使其成为屏幕上的活动视图。
    private lateinit var binding: ActivityLoginLayoutBinding

    override fun onCreate(savedInstanceState: Bundle?) {
        super.onCreate(savedInstanceState)
        binding = ActivityLoginLayoutBinding.inflate(layoutInflater)
        val view = binding.root;
        setContentView(view)
    }
然后就可以使用视图上任何定义的View了,例如:
binding.btnLogin.setOnClickListener {
            var accountInfo = binding.etLoginAccount.text
            var accountPwd = binding.etLoginPwd.text
            if (!TextUtils.isEmpty(accountInfo)) {
                if (!TextUtils.isEmpty(accountPwd)) {
                    Log.e("ping", "执行登录操作:用户名:$accountInfo 密码: $accountPwd")
                } else {
                    Log.e("ping", "请输入密码")
                }
            } else {
                Log.e("ping", "请输入用户名")
            }
        }
    }
在 Fragment 中使用视图绑定
在Fragment使用视图绑定,首先需要在 onCreateView() 方法中执行以下步骤:
- 调用生成的绑定类中包含的静态 inflate() 方法。此操作会创建该绑定类的实例以供 Fragment 使用。
- 通过调用 getRoot() 方法或使用 Kotlin 属性语法获取对根视图的引用。
- 从 onCreateView() 方法返回根视图,使其成为屏幕上的活动视图。
class LoginFragment : Fragment() {
    private lateinit var binding: ActivityLoginLayoutBinding
    override fun onCreateView(
        inflater: LayoutInflater,
        container: ViewGroup?,
        savedInstanceState: Bundle?
    ): View? {
        binding = ActivityLoginLayoutBinding.inflate(inflater, container, false)
        return binding.root
    }

    override fun onDestroyView() {
        super.onDestroyView()
        null.also { it -> binding = it }
    }
}
然后就能愉快的使用了我们视图上定义的view啦
 binding.btnLogin.setOnClickListener {
            //执行登录操作
        }
总结
与findViewById相比,很明显的优点是,代码量减少,使用更加简单,减少了很多无用的操作. 还有就是
- Null 安全:由于视图绑定会创建对视图的直接引用,因此不存在因视图 ID 无效而引发 Null 指针异常的风险。此外,如果视图仅出现在布局的某些配置中,则绑定类中包含其引用的字段会使用 @Nullable 标记。
- 类型安全:每个绑定类中的字段均具有与它们在 XML 文件中引用的视图相匹配的类型。这意味着不存在发生类转换异常的风险。
优点
- 更快的编译速度:视图绑定不需要处理注释,因此编译时间更短
- 易于使用:视图绑定不需要特别标记的 XML 布局文件,因此在应用中采用速度更快。在模块中启用视图绑定后,它会自动应用于该模块的所有布局。
缺点
- 视图绑定不支持布局变量或布局表达式,因此不能用于直接在 XML 布局文件中声明动态界面内容。
- 视图绑定不支持双向数据绑定。
在这里给大家分享一波Android程序员进阶宝典和面试秘籍
完整学习笔记PDF,点击这里免费下载获取!点击这里免费自取!!
架构师筑基必备技能
目前Android APP开发主流语言就是Java语言,Java语言最大的特性就是提高了软件的交互可能性,可以说安卓手机几乎所有应用程序都是利用Java语言来进行编写的。
知识要点:
1、 Java序列化、泛型与反射
2、虚拟机底层原理
3、Android内存原理
4、 Java高级并发原理详解
5、 编译时技术掌握与实战
6、JDK高级动态代理
7、高级数据结构与算法
8、 Java IO操作
。。。。

Android R FrameWork源码与UI
在Android中,Framework泛指系统架构层。Framework的中文意思是“框架”,在软件开发中通常指开发框架,在一个系统中处于内核层之上,为顶层应用提供接口,被设计用来帮助开发者快速开发顶层应用,而不必关心系统内核运行机制,通常Framework都会隐藏main函数等应用程序必须的组件,开发人员只需把精力放在功能代码的实现上。说简单点,Framework具体的工作也就是为android应用开发的开发人员提供了一系列的服务和API的接口。
UI其实并不是单纯指用户看到的效果。因为在Android开发中,每个控件背后都有一套深层次的体系在支撑,自然而然,会UI不单纯指的是会自定义控件,我们还应该知道自定义控件背后的执行流程,包括从Activity的创建,XML的解析,到每个控件的测量、布局、绘制。当然在中间还夹杂着比如动画、事件分发机制、嵌套滑动机制等知识点。还有谷歌提供的一些UI框架也使我们要掌握的对象,比如Jetpack组件库、Material Design等。
知识要点:
1、 FrameWork源码解析(SDK 30)
2、Android常用组件深入解析
3、JetPack全家桶
4、Android R新特性解析
。。。。。

大厂内部APP调优方案
性能优化是一个项目必须要经历的过程,你的应用好与坏都是在用户使用的过程中反映出来的,如果性能优化没有做好,对于你的应用来说影响是非常大的。尤其是现在的Android市场竞争非常激烈,如果你的应用体验没有竞品的好,那么用户流失是必然的。
性能优化不是一件简单的事情,每个应用的性能好与坏无法由一个人来决定,因为性能优化的维度有太多了,从我们项目的整体架构,到我们代码的每一个细节,再到应用使用环境的测试,只有步步为营,才能做好一个项目的优化。大部分开发者把性能优化指向与不闪退就行,但是实际上性能优化包含了很多方面,比如从简单的启动优化、 UI优化、 卡顿优化、 崩溃优化、 安全性优化,到深层次的弱网优化、 大图加载优化、 储存优化、 高效传输优化、 极限瘦身优化,再到实际开发过程中的OOM问题原理解析、 ANR问题解析、 Crash监控方案。要想把这些优化流程做好,我们不仅从项目架构、代码规范等方面入手,还用学会利用第三方的检测工具来检测项目性能,最主要是,我们需要一套完整的性能优化方案,这正是我们所缺少的,所以我们必须要把缺少的补上, 打造一套真正的完整的性能优化体系,把性能优化流程化,常态化。
知识要点
1、 APP基础优化
2、APP深度优化
3、开发焦点问题优化
4、编程效率优化
5、项目实战
- 抖音在APK包大小资源优化的实践
- 优酷响应式布局技术全解析
6、网络优化
- 手机淘宝双十一性能优化项目揭秘
- 高德APP全链路源码依赖分析
- 彻底干掉OOM的实战经验分享
- 微信Android终端内存优化实践

对标腾讯T3.3架构师
Android框架体系架构(高级UI+FrameWork源码) 这块知识是现今使用者最多的,我们称之Android2013~2016年的技术。
Android开发者也往往因为网上Copy代码习惯了而导致对这块经常“使用”的代码熟悉而又陌生:熟悉的是几乎天天在和它们打交道, 天天在复制这些代码 ;陌生的是虽然天天和这些代码打交道,但是并没有深入研究过这些代码的原理,代码深处的内涵。
知识要点:
1、架构师设计思想篇
2、 手淘全套架构设计与实现
3、 开源框架
4、OKHttp网络框架
5、一线大厂核心框架剖析与实现

NDK模块开发(音视频系列)
NDK(Native Development Kit缩写)一种基于原生程序接口的软件开发工具包,可以让您在 Android 应用中利用 C 和 C++ 代码的工具。通过此工具开发的程序直接在本地运行,而不是虚拟机。
在Android中,NDK是一系列工具的集合,主要用于扩展Android SDK。NDK提供了一系列的工具可以帮助开发者快速的开发C或C++的动态库,并能自动将so和Java应用一起打包成apk。
知识要点:
1、NDK开发之C/C++入门
2、JNI模块开发
3、Linux编程
4、底层图片处理
5、音视频开发
6、机器学习

Flutter学习进阶
2021 年无疑是 Flutter 技术如火如荼发展的一年。
每一个移动开发者都在为 Flutter 带来的“快速开发、富有表现力和灵活的 UI、原生性能”的特色和理念而痴狂,从超级 App 到独立应用,从纯 Flutter 到混合栈,开发者们在不同的场景下乐此不疲的探索和应用着 Flutter 技术,也在面临着各种各样不同的挑战。
知识要点:
1、Flutter跨平台开发概述
2、Windows中Flutter开发环境搭建
3、编写你的第一个Flutter APP
4、Flutter Dart语言系统入门
…

微信小程序开发
微信小程序作为现在比较火的编程开发应用场景之一,深受市场的青睐,这让不少开发者眼馋不已。但是对于初学者来说,就完全摸不着头脑了,不知道微信小程序开发制作需要学习那些知识,有需要的朋友可以参考本篇。
知识要点:
1、小程序概述及入门
2、小程序UI开发
3、API操作
4、购物商场项目实战

面试宝典


 2010
2010

 被折叠的 条评论
为什么被折叠?
被折叠的 条评论
为什么被折叠?
 到【灌水乐园】发言


