随着Typescript的发展,在Vue3 + Volar中,如果组件库存在global.d.ts,那么在使用组件的时候就会提示组件的属性。

输入的时候也会有相应的提示

但如果没有global.d.ts则会不存在代码提示,组件类型也是any

0x0 事情起因
事情起因是这样的,在github上和一位师傅在讨论Panel的beforeToggleAPI,应该返回布尔值还是调用done函数
我在尝试两种方案的时候发现,非常的不方便,因为我经常会忘记API名称。本来想着把Panel的API搞好之后就去修复,结果就忘了这茬。
0x1 方案拟定
在rc-1版本的时候就已经发现问题并提交了issues,但到了1.0.0还是没有人关闭这个issues,可能是各位老师都忙着修改自己的组件。正好我的组件也没有正在开放的issues,便着手开始修复这个问题。
看着build.js我其实没有什么头绪,于是我跑去问了万能的刀酱1。得到的答复是这样的

啊这…刀酱说他不道啊,那看来我们只好靠自己了,于是我找遍了掘金硬是没找到一份有关于这方面的资料也可能是我没仔细看
于是我又跑去看Ant design的scripts脚本,结果发现人家是直接硬写死的 73ebf4c。

(当时我的表情)
我坐在凳子上如坐针毡,看着代码硬是一点思路没有,于是根据我看的为数不多的医疗文献2,我很轻松的就能明白,一定是我认知疲劳了,绝对不是我想摆烂。解决认知疲劳的最好办法就是直接开摆!

正大光明的解决认知疲(bai)劳(lan)
但是当我连输了两把五子棋之后,我就啪的一下很快啊,马上就把手机扔了,并表示“我怎么是这种人呢”。但是看着VSCODE里没有思路的代码,我还立刻捡起被扔出去的手机在群里问了问各位师傅。
各位师傅也非常的给力,啪的一下很快啊,马上甩出了一个解决方案。

好!既然各位师傅们都这么的热心给了我帮助,那么我必然要解决这个恶魔

我!巴别塔的恶灵!整合运动的毁灭者!3 誓要将没有类型提示这个恶魔永远的封印进CHANGLOG里,再不允许它踏入项目半步

(小虎鲸出击!)
本文将会以vue-devui项目为例,带领读者从零改造改造构建流程,使得构建产物可以支持volar插件。话不多说我们直接开始。
0x2 分析问题
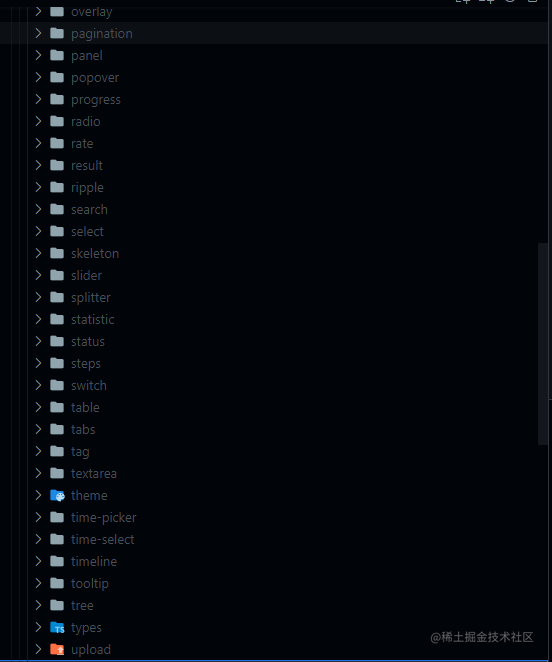
运行build:components命令之后,所有的产物都会放在packages\devui-vue\build下。我们发现,build文件夹下不存在任何的声明文件。代码中也没有和声明文件有关的代码
// build.js
const createPackageJson = (name) => {const fileStr = `{"name": "${name}","version": "0.0.0","main": "index.umd.js","module": "index.es.js","style": "style.css","types": "../types/${name}/index.d.ts"
}`;fsExtra.outputFile(path.resolve(outputDir, `${name}/package.json`), fileStr, 'utf-8');
};
exports.build = async () => {// 打包umd与es模块await buildAll();// 获取所有componentsconst components = fs.readdirSync(entryDir).filter((name) => {const componentDir = path.resolve(entryDir, name);const isDir = fs.lstatSync(componentDir).isDirectory();return isDir && fs.readdirSync(componentDir).includes('index.ts');});// 构建所有准备好发布的组件.for (const name of components) {if (!isReadyToRelease(name)) {continue;}// 打包单个组件await buildSingle(name);// 创建单个组件的package,支持按需导入createPackageJson(name);}
};
我们只需要使用vue-tsc在打包时声明类型文件,最后根据组件完成度来决定哪些组件要写进global.d.ts即可。

看来整体的难度并不是很高。(谁给你的勇气,梁静茹吗)
0x3 global.d.ts大致结构
现在逻辑大致通顺了,只需要用vue-tsc生成各组件的声明文件,然后稍做处理就可以写入global.d.ts了,不过目前我们还不知道global.d.ts文件大致是什么样子,文件结构也不复杂,我们来熟悉一下
// global.d.ts
export {}
// vue3 support
declare module '@vue/runtime-core'{interface GlobalComponents {// 组件声明}interface ComponentCustomProps{// 指令声明}interface ComponentCustomProperties{// service声明}
}
了解了global文件的大致结构,我们就可以直接开始改造了
0x4 目录结构
先让我们大致看一眼改造前的目录结构是什么样的.下图只列出了重要的目录.
packages...buildvue-devui.umd.jsvue-devui.es.jsdevui-vue__mocks__ devui // 组件源码componentindex.ts // 组件入口...vue-devui.ts // 库入口devui-cli // cli工具commandsbuild.js // 打包逻辑docs // 组件文档
0x5 依赖安装
本次使用了vue-tsc来生成声明文件
pnpm install vue-tsc ---save
在文章发布时vue-tsc已经迭代到1.0.0
0x6 改造packages.json
因为vue-tsc不是全局安装,直接使用命令会报错。所以我们需要在packages.json中添加一条命令.
"scripts":{
+ "build:components:dts": "vue-tsc --declaration --emitDeclarationOnly"
}
读者可以根据自己需求来添加参数,这里只需要生成类型文件,故只添加了--declaration --emitDeclarationOnly
0x7 改造tsconfig.json
我在这里将declarationDir设置为build/types做统一管理。
因为vue-tsc会自动读取最近的tsconfig,如果不对 declarationDir 选项做设置,最终的声明文件将会生成在原目录下,而不是 build 目录下
0x8 改造build.js
for (const name of components) {if (!isReadyToRelease(name)) {continue;}readyToReleaseComponentName.push(name);await buildSingle(name);createPackageJson(name);nuxtBuild.createAutoImportedComponent(name);
}
- nuxtBuild.createNuxtPlugin();
+ try {
+ execSync(`pnpm run build:components:dts`);
+ } catch {}
+ nuxtBuild.createNuxtPlugin();
注意,这里要使用try...catch包裹。除非组件库非常的标准,没有一点类型错误,否则遇到类型错误之后会报错,后续代码便不会运行。
再次运行build:components命令,等待任务结束后我们可以发现build目录下就已经多出了types文件夹。内部包含了所有组件及库入口的声明文件。

0x9 生成global.d.ts
既然每个组件都有了声明文件,我们就可以开始生成global.d.ts。每一个组件的入口文件格式都是固定的,我们随便选择一个组件看一下。
// devui/alert/src/alert.tsx
export default defineComponent({name: 'DAlert',props: alertProps,/** setup 略 */
})

// devui/alert/index.ts
import type { App } from 'vue';
import Alert from './src/alert';

export * from './src/alert-types';

export { Alert };

export default {title: 'Alert 警告', // 声明组件名称(用于文档)category: '反馈', // 组件类型(用于文档)status: '100%', // 组件完成状态(status≠100%时为未完成)install(app: App): void {// 注册组件app.component(Alert.name, Alert); // Alert.name 返回 DAlert},
};
0x9.1 遍历install函数
组件的默认导出中又有一段install函数。当开发者全局使用库时,库入口会use各个组件入口文件的install函数。
install函数通常只做注册处理,但部分组件会做一些简单的锚点处理。例如overlay组件会在body中插入一个元素。
我们可以根据这个特性,使用ts-compiler对install函数进行处理。大致的处理流程如下图示
graph LR
ts-compiler获取默认导出 --> ts-compiler获取install函数 --> 提取类型;
subgraph 正则表达式
提取类型 --component--> 获取组件名;
提取类型 --directive--> 获取指令名;
提取类型 --service--> 获取service名;
end;
获取组件名 --> 构建关系树;
获取指令名 --> 构建关系树;
获取service名 --> 构建关系树;
项目中还使用了一颗关系树,目的是为了存储组件之间的关系,大致的抽象结构如下
graph TD
root --> name1[name=root]
root --> is1[isComponent=false]
root --> children

children --> component-a
children --> component-b
children --> component-c

component-a --> name2[name=component-a]
component-a --> children2[children]
component-a --> is2[isComponent=false]

children2 --> component-a-1
children2 --> component-a-2
children2 --> component-a-3

component-a-1 --> name3[name=component-a-1]
component-a-1 --> type1[type=component/service/directive/undefined]
component-a-1 --> is3[isComponent]
多叉树的实现代码如下
// use-relation-tree.js
class componentNode {/** * * @param {String} name componentName */constructor(name){this.name = name;/** @type {componentNode} */this.children = [];this.type = '';this.isComponet = false;}/** * * @param {(node: componentNode) => void} callback */forEachChild(callback){for (const child of this.children){callback(child);}}
}

class componentRelationTree{constructor(){/** * @type {componentNode} */this.root = new componentNode('root');}/** * * @param {componentNode} node component relation Node. Used to describe the relationship between components */insert(node){// 避免进行误操作if (!this.#_hasSameNode(node)){this.root.children.push(node);}}/** * * @param {componentNode} node * @return {Boolean} */#_hasSameNode(node){let idx=0;let hasSame = false;while (this.root.children.length !== idx){/** @type {componentNode} */const child = this.root.children[idx++];hasSame = child.name === node.name;}return hasSame;}
}
ts-compiler处理流程如下, 为了逻辑清晰,我们封装到use-relation-tree.js里
// use-relation-tree.js
exports.useRelationTree = function (componentPaths){const tsPrograms = [];const tree = new componentRelationTree();tree.root.type = 'root';for (const path of componentPaths){tsPrograms.push(ts.createSourceFile('', readIndexFile(path)));}for (const program of tsPrograms){/** * @type {ts.ExportDeclaration[]} */const sourceFile = program.getSourceFile();program.forEachChild((node) => {if (ts.isExportAssignment(node)){/** * @type {ts.ObjectLiteralElement} */const exportObject = node.getChildAt(0, sourceFile);/** @type {ts.Node[]} */const properties = exportObject.parent.expression.properties;/** @type {componentNode} */let componentTreeNode;properties.forEach((property) => {if (ts.isPropertyAssignment(property)){const Identifier = property.getChildAt(0, sourceFile).getText(sourceFile);const value = property.getChildAt(2, sourceFile).getText(sourceFile);if (Identifier === 'title'){// title: 'Card 卡片'componentTreeNode = new componentNode(value.split(' ')[0]);}} else {/** @type {ts.MethodDeclaration} */const method = property;/** @type {ts.Block} */const block = method.body.getChildAt(1, sourceFile);const blockChildren = block.getChildren(sourceFile);for (const child of blockChildren){const childCode = child.getFullText(sourceFile);const nodeName = extra(childCode);const nodeType = extraType(childCode);const childNode = new componentNode(nodeName);childNode.type = nodeType;childNode.isComponet = nodeType === 'component';if (nodeName){componentTreeNode.children.push(childNode);}}}});tree.insert(componentTreeNode);}});}
}
我们将提取类型放入另一个文件use-extra.js中
// use-extra.js
/**
 *
 * @param {string} code node full text.
 * @returns {RegExpMatchArray| undefined}
 */
function extraComponentName(code){const regexp = /app\.component\(((?<components>.*)\.name), (?<fileName>.*)\)/;const groups = regexp.exec(code)?.groups;if (groups?.components){return groups.components;}
}
/**
 *
 * app.directive('file-drop', fileDropDirective);
 * @param {string} code
 * @returns {RegExpMatchArray| undefined}
 */
function extraDirective(code){const regexp = /app\.directive\('(?<directiveName>.*), ?(?<fileName>.*)\);/;const groups = regexp.exec(code)?.groups;if (groups?.fileName){return groups.fileName;}
}
/**
 *
 * app.config.globalProperties.$loading = loading;
 * app.provide(ModalService.token, new ModalService(anchorsContainer));
 * @param {string} code
 * @returns {RegExpMatchArray| undefined}
 */
function extraGlobalProperties(code) {const globalPropertiesReg = /app\.config\.globalProperties\.(?<serviceName>\$.*) = (?<serviceFileName>.*);/;const provideReg = /app\.provide\((?<serviceName>.*)\..*, ?new? ?(?<instanceName>.*)\((?<param>.*)\);/gm;const groups = globalPropertiesReg.exec(code)?.groups || provideReg.exec(code);if (groups?.serviceName){return groups.serviceName;}
}
/**
 *
 * @param {string} code
 * @returns {String| undefined}
 */
function extraValue(code){return extraComponentName(code) ?? extraDirective(code) ?? extraGlobalProperties(code);
}
/**
 * @param {string} code
 * @returns {String | undefined}
 */
function extraType(code){const isDirective = /app\.directive/.test(code);const isComponent = /app\.component/.test(code);const isGlobalProperties = /app\.config\.globalProperties/.test(code);const isProvide = /app\.provide/.test(code);if (isDirective) {return 'directive';}if (isComponent) {return 'component';}if (isGlobalProperties || isProvide) {return 'service';}
}
exports.extra = extraValue;
exports.extraType = extraType;
之后我们只需要两层的forEachChild拼接字符串即可。
const tree = useRelationTree(componentPath);
tree.forEachChild((foldNode) => {foldNode.forEachChild((node) => {let nodeName = node.name.replace(/\$/gim, '').replace(/directive/gim, '');let reference = nodeName;// Modal中的Body与Layout中的Body重复,在这里做读取replaceIdentifer.json做一次转换const needToTransform = replaceIdentifier?.[foldNode.name]?.[node.name] !== undefined;if (!node.isComponet){const hasType = new RegExp(node.type, 'gim');if (!hasType.test(reference)){reference += `-${node.type}`;}reference = bigCamelCase(reference);}if (needToTransform){reference = replaceIdentifier[foldNode.name][node.name]?.['reference'];nodeName = replaceIdentifier[foldNode.name][node.name]?.['exportKey'];}if (node.type === 'component'){componentDTSItem.push(buildComponentItem(bigCamelCase(nodeName), reference));}if (node.type === 'directive'){directiveDTSItem.push(buildDirectiveItem(nodeName, reference));}if (node.type === 'service'){serviceDTSItem.push(buildServiceItem(nodeName, reference));}});
});
我们将上述代码打包成一个函数,这里取名为了volarSupport
// build.js
exports.build = async () => { nuxtBuild.createNuxtPlugin();
+logger.success('准备生成global.d.ts');
+const volarSupportbuildState = volarSupport(replaceIdentifier, readyToReleaseComponentName);
+fs.writeFileSync('./build/index.d.ts', `
+export * from './types/vue-devui';
+import _default from './types/vue-devui';
+export default _default;
+`);
+if (volarSupportbuildState){
+logger.success('global.d.ts生成成功');
+} else {
+logger.error('global.d.ts生成失败, 因为发生错误');
+}
此时我们还需要修改一下build.js中的createPackageJson函数。目的是为了解决局部导入时的报错
const createPackageJson = (name) => {const fileStr = `{"name": "${name}","version": "0.0.0","main": "index.umd.js","module": "index.es.js","style": "style.css",
+ "types": "../types/${name}/index.d.ts"
}`;fsExtra.outputFile(path.resolve(outputDir, `${name}/package.json`), fileStr, 'utf-8');
};
同理我们需要在build函数中写入一个index.d.ts,为了解决全局引入的报错
exports.build = async () => {const volarSupportbuildState = volarSupport(replaceIdentifier, readyToReleaseComponentName);
+ fs.writeFileSync('./build/index.d.ts', `
+ export * from './types/vue-devui';
+ import _default from './types/vue-devui';
+ export default _default;
+ `);
if (volarSupportbuildState){logger.success('global.d.ts生成成功');
} else {logger.error('global.d.ts生成失败, 因为发生错误');
}
}
之后我们运行pnpm build:release就可以成功的生成好带有volar支持的项目啦~
0x10 总结
整体流程图如下
graph TB执行build命令 --> umd打包umd打包 --> 打包单个组件打包单个组件 --> vue-tsc生成类型文件vue-tsc生成类型文件 --> ts-compiler遍历vue-devui.ts文件subgraph volar支持ts-compiler遍历vue-devui.ts文件 --> ts-compiler获取默认导出 --> 获取install函数获取install函数 --> 提取类型subgraph 类型提取提取类型 --component--> 获取组件名提取类型 --directive--> 获取指令名提取类型 --service--> 获取service名endend获取组件名 --> 构建关系树;获取指令名 --> 构建关系树;获取service名 --> 构建关系树;构建关系树 --> 遍历关系树 --> 遍历关系树生成文件--> 任务结束;
最后
整理了一套《前端大厂面试宝典》,包含了HTML、CSS、JavaScript、HTTP、TCP协议、浏览器、VUE、React、数据结构和算法,一共201道面试题,并对每个问题作出了回答和解析。

有需要的小伙伴,可以点击文末卡片领取这份文档,无偿分享
部分文档展示:


文章篇幅有限,后面的内容就不一一展示了
有需要的小伙伴,可以点下方卡片免费领取


 本文通过vue-devui项目详细介绍了如何从零开始改造构建流程,利用vue-tsc生成类型声明文件并整合到global.d.ts,确保在使用组件时有代码提示。内容涵盖分析问题、改造package.json、tsconfig.json、build.js等步骤,旨在帮助开发者理解并实现TypeScript泛型的高级推理应用。


 76
76

 被折叠的 条评论
为什么被折叠?


