


安装
npm i vite-plugin-svg-icons -D
引入
在vite.config.ts中引入
import { createSvgIconsPlugin } from "vite-plugin-svg-icons";
import path from "path";

plugins: [

  createSvgIconsPlugin({
    iconDirs: [path.resolve(process.cwd(), "src/icons/svg")],
    // svgoOptions: isBuild,
    // default
    symbolId: "icon-[dir]-[name]",
  }),
    ],
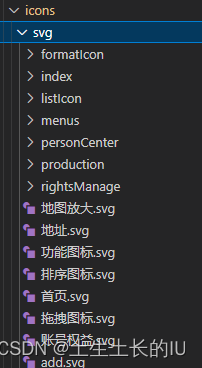
创建存放svg代码的文件夹(src/icons/svg),如下图
创建一个全局组件svg-icon(src/icons/index.vue)
<template>
  <svg :class="svgClass" v-bind="$attrs" :style="{ color: color }">
    <use :xlink:href="iconName"></use>
  </svg>
</template>

<script setup lang="ts">
import { computed, defineProps } from 'vue'
const props = defineProps({
  name: {
    type: String,
    required: true
  },
  color: {
    type: String,
    default: ''
  }
})
const iconName = computed(() => `#icon-${props.name}`)
const svgClass = computed(() => {
  if (props.name) return `svg-icon icon-${props.name}`
  return 'svg-icon'
})
</script>

<style scoped>
.svg-icon {
  width: 1em;
  height: 1em;
  fill: currentColor;
  vertical-align: middle;
}
</style>
或者
<template>
  <svg aria-hidden="true" :opacity="opacity" :class="['svg-icon', $attrs.class]" :style="getStyle">
    <use :xlink:href="symbolId" :fill="color" />
  </svg>
</template>

<script lang="ts" setup>
import { computed, CSSProperties } from 'vue'

const props = defineProps({
  prefix: {
    type: String,
    default: 'icon'
  },
  name: {
    type: String,
    required: true
  },
  size: {
    type: [Number, String],
    default: 16
  },
  color: {
    type: String,
    default: '#333'
  },
  opacity: {
    type: [Number, String],
    default: 1
  }
})

const symbolId = computed(() => `#${props.prefix}-${props.name}`)

const getStyle = computed((): CSSProperties => {
  const { size } = props
  let s = `${size}`
  s = `${s.replace('px', '')}px`
  return {
    width: s,
    height: s,
    color: props.color
  }
})
</script>

<style lang="stylus" scoped>
.svg-icon
  display: inline-block
  overflow: hidden
  vertical-align: -0.2em
  // margin-right 0.1em
</style>
在main.js注入svg相关配置
import SvgIcon from './icons/index.vue'
import 'virtual:svg-icons-register'

app.component('svg-icon', SvgIcon)
使用
在svg代码文件夹中添加一个name为billSort的文件,然后使用的时候填入就行了
<svg-icon class="move align-[-11px] cursor-move" name="billSort" size="32" />
保姆级教程了,还不会就说不过去了哦


 1064
1064

 被折叠的 条评论
为什么被折叠?
被折叠的 条评论
为什么被折叠?
 到【灌水乐园】发言


